This post may contain affiliate links/ads and I may earn a small commission when you click on the links/ads at no additional cost to you. As an Amazon Affiliate, I earn from qualifying purchases. Techsphinx also participates in the StationX Affiliate program. You can read my full disclaimer here.

Red Hat Enterprise Linux 8 released on May 7, 2019. RHEL 8 is based on Fedora 28 and is packed with Linux kernel version 4.8.
Red Hat introduced “Application Streams”, which allows developer tools, frameworks and languages to be updated frequently without impacting the core resources of the operating system.
RHEL yum package manager is now based on DNF technology and it also has OpenSSL 1.1.1 & TLS 1.3 support.
You can read more about RHEL 8 on Red Hat’s official website.
Minimum System Requirements for RHEL 8
- 4 GB RAM
- 20 GB Disk space
- AMD/INTEL 64bit or 64bit ARM.
Pre-requisites:
- An Active RedHat Subscription.
- RHEL 8 Bootable ISO file.
- Bootable media creation tool. (Rufus or “dd” command)
- An empty Pen-drive.
- A compatible system for RHEL 8. (Check the minimum system requirements mentioned above.)
RHEL 8 Installation
Download
Download RHEL 8 ISO File from official link.
https://access.redhat.com/downloads/
Please Note: You need an Active RedHat subscription to download or login to RedHat and download the evaluation copy.
Create a bootable installation media.
Using Rufus (Windows):
1.) Download and install Rufus (If you don’t want to install you can also download the portable Version of Rufus)
2.) Start Rufus and Select the pen-drive and rhel8.iso file.
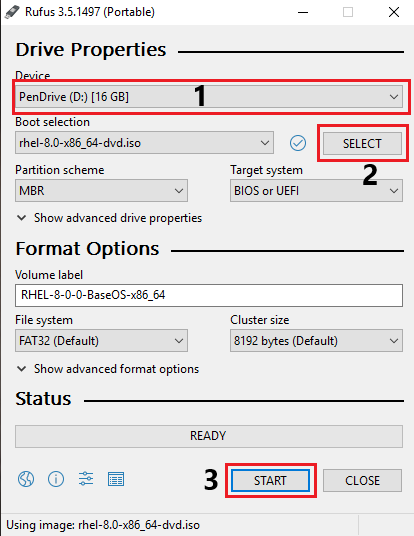
3.) Click on Start.
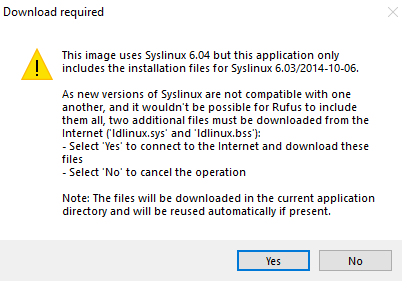
4.) Click Yes for the download pop-up.
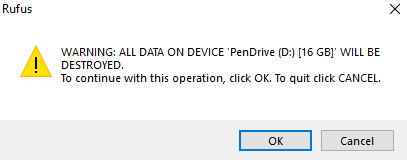
5.) As recommended by Rufus, write iso in image mode. If you encounter issues during boot, then write iso in dd mode.
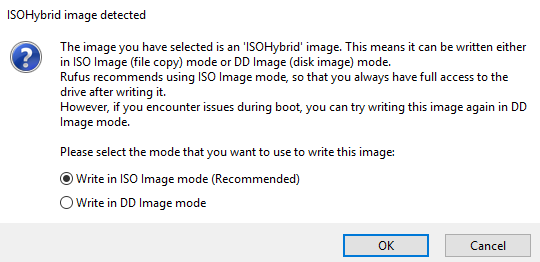
6.) Read the warning and click Ok.

7.) Now, wait for the bootable process to complete.
Using dd (Linux):
1.) Insert your pen-drive and find the drive using the command
sudo fdisk -l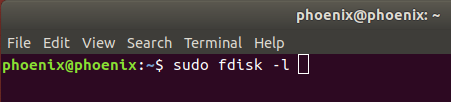
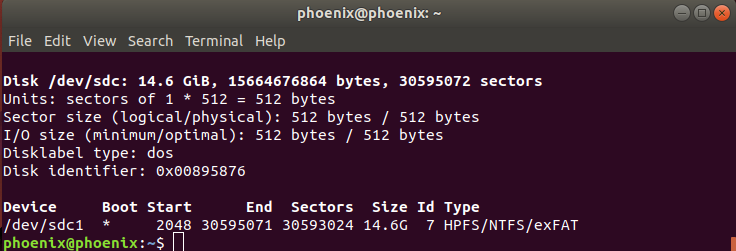
In my case its “/dev/sdc”
2.) Unmount the drive
sudo umount /dev/sdc*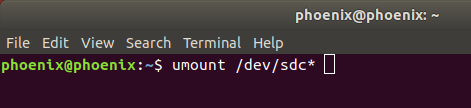
3.) Format the Drive
sudo mkfs.vfat -I /dev/sdc
4.) Now, time to write the .iso file to the pen-drive.
sudo dd if=/home/phoenix/Desktop/rhel-8.0-x86_64-dvd.iso of=/dev/sdcif = input file.
/home/phoenix/Desktop/rhel-8.0-x86_64-dvd.iso = location and name of the .iso file to write. (Change this according to your name and location)
of = output file.
/dev/sdc = name of my pen-drive given by Linux. (Change it according to your device name)

5.) Now, dd command by default doesn’t show the progress, but there is a trick.
First, find the process id of dd command using
sudo pgrep -l '^dd$'
Now, whenever you need to see the progress of dd command use
sudo kill -USR1 20683Replace 20683 with the output of your pgrep command.
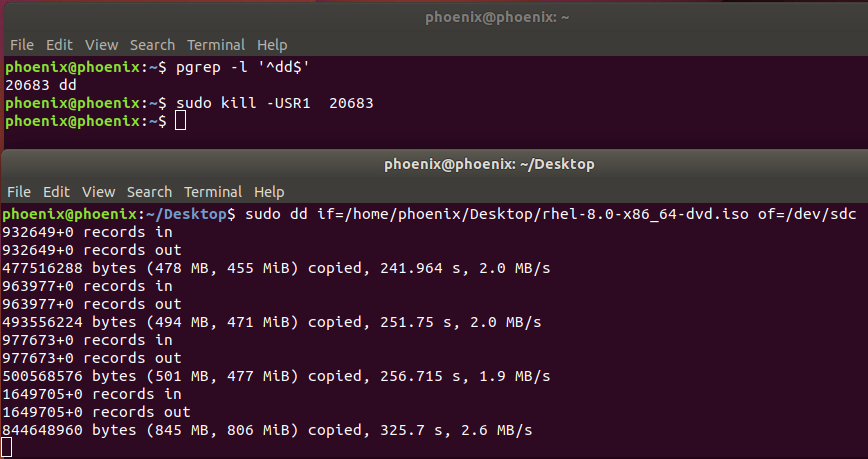
Please Note: DD command create partitions while writing .iso file. So use sudo mkfs.vfat -I /dev/sdc after you’ve installed rhel8 and you want to use your pen-drive for storing data.
Install RHEL 8
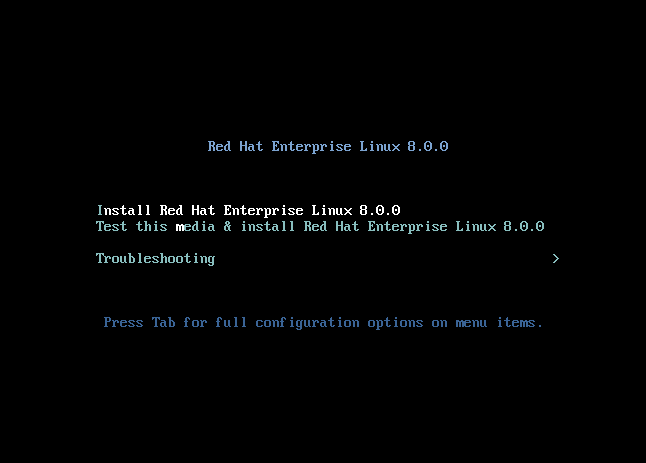
Now, boot the RHEL 8 using bootable media we created.

Choose “Install Red Hat Enterprise Linux 8.0.0” and hit Enter key.
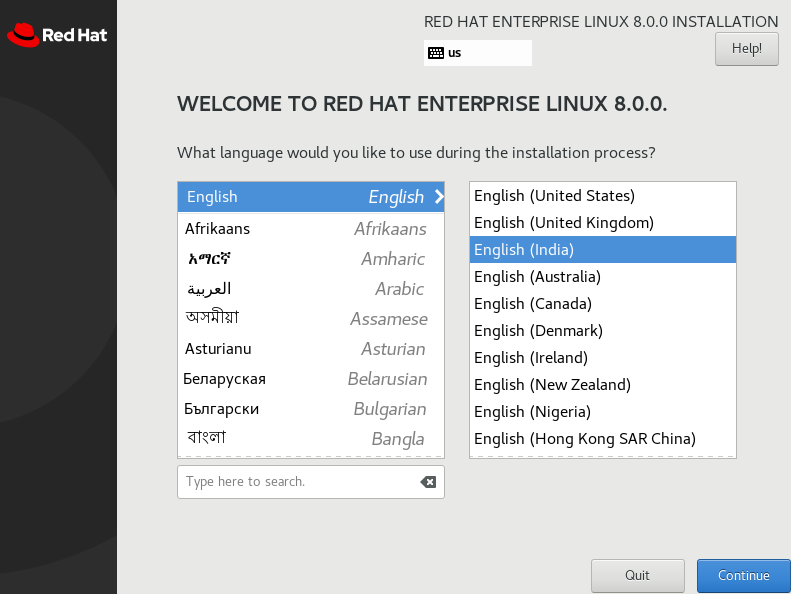
Choose your preferred language and click continue.
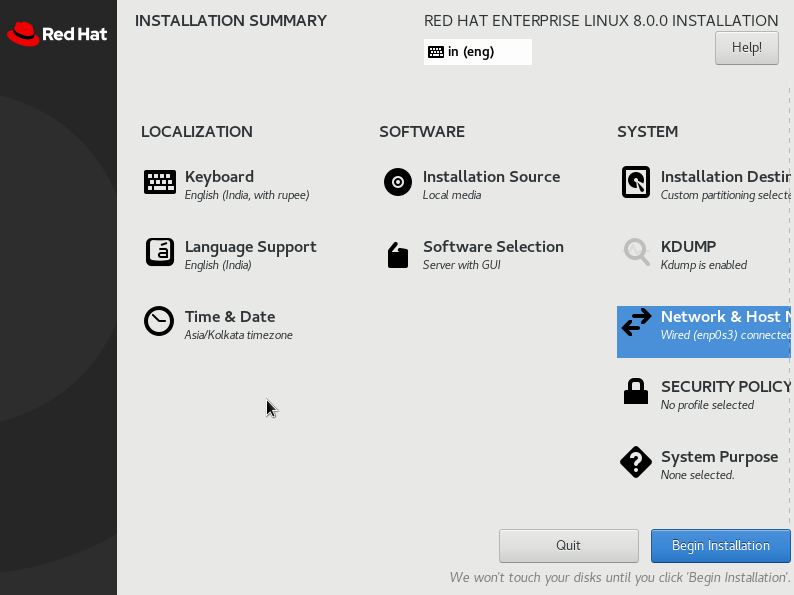
Now, let’s customize the important options.
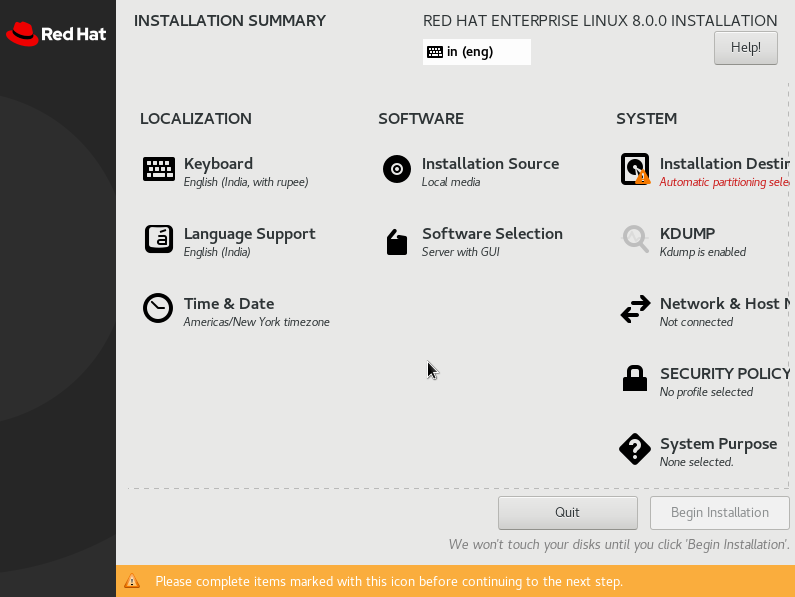
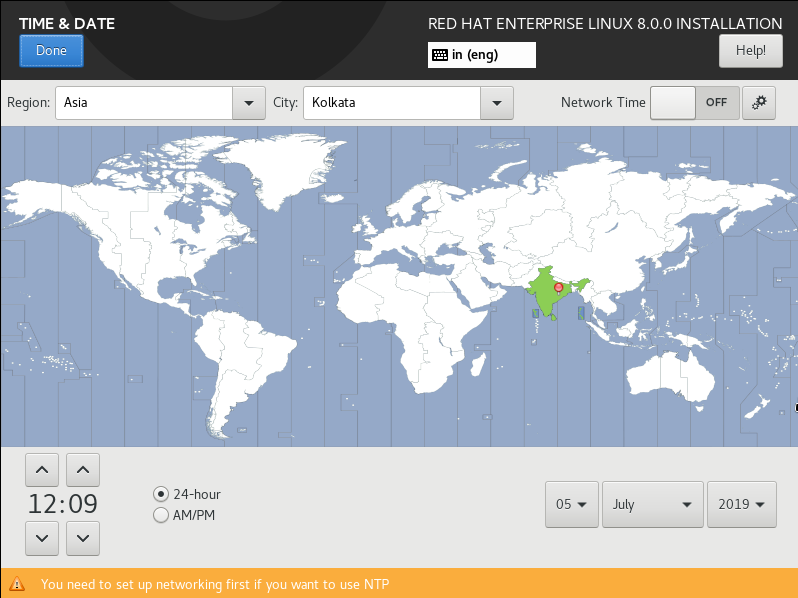
Click on “Time and Date” and select your preferred time zone then click on Done.
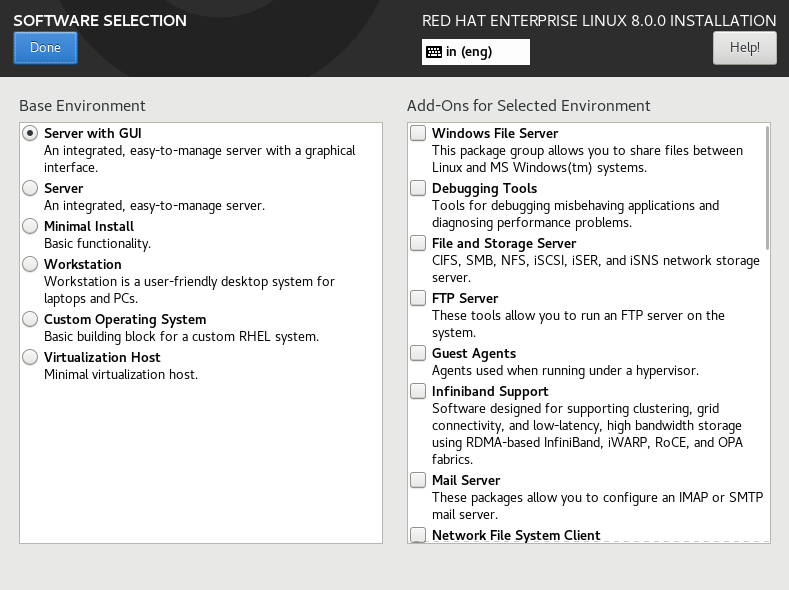
Click on Software selection tab and choose the packages which you want to install (I am leaving it as default)
Head on to the “Network and Hostname” tab and turn on the Ethernet. If it’s connected to the DHCP server, it will automatically get the IP.
Enter the Hostname and click apply.
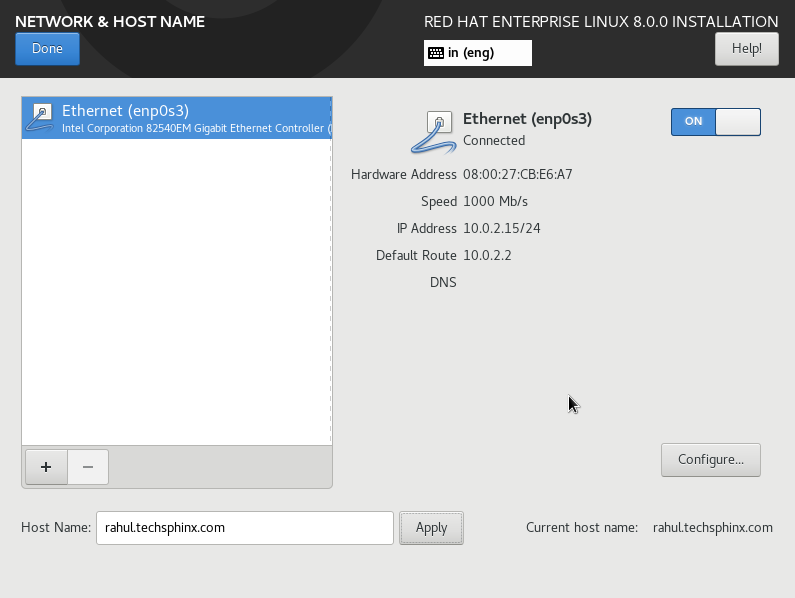
Click on Done.
Click on “Installation Destination” tab.
Select custom under storage configuration and click Done.
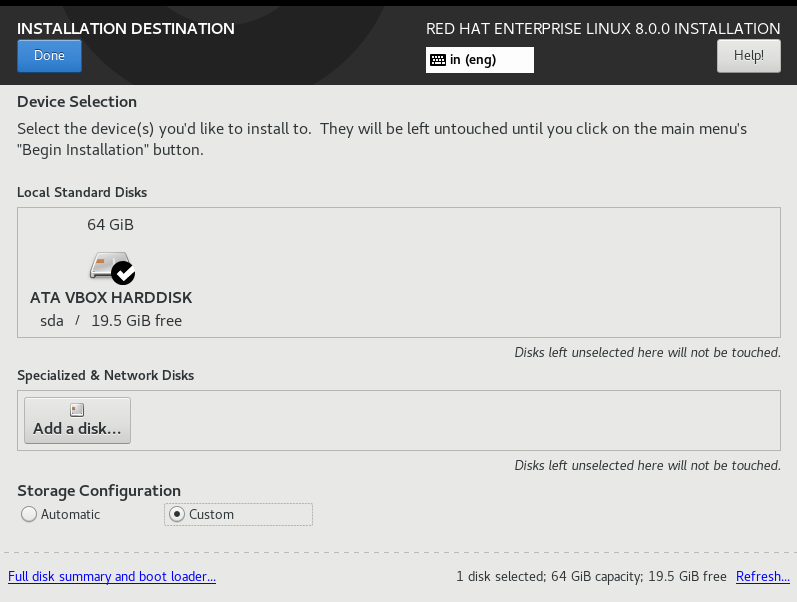
Now, let’s create some partitions. (I have 64 GB space available)
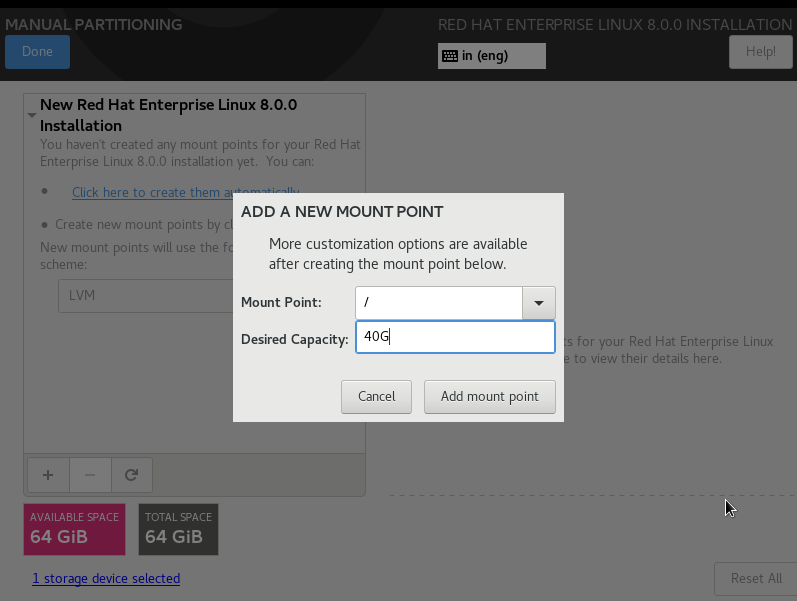
“/” Partition
Create / partition, and give it at least 70% of your available space, this is where everything will be stored including OS files and personal files. (I am giving it 40 GB)
Click on the “+” icon and Add a new mount point.
Mount point : /
desired capacity : 40G
Click on Add mount Point.
“/boot” Partition
Now, Create a boot partition. (500 Mb is enough, if you have more space available then give it 1 GB)
Click on the “+” icon and Add a new mount point.
Mount point : /boot
desired capacity : 500M
Click on Add mount Point.


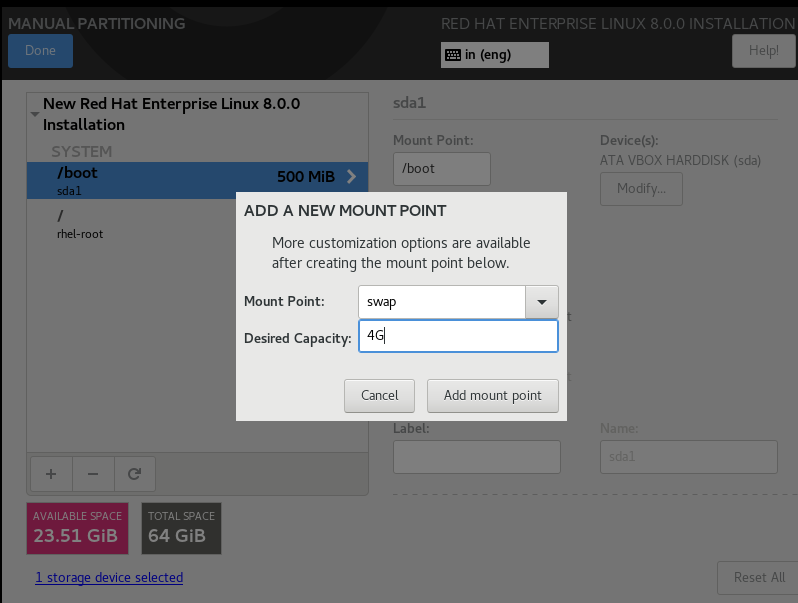
“Swap” Partition
Swap partition: Some part of your hard disk will work as RAM whenever your RAM is used up completely. So let’s create the swap partition.
Minimum recommended swap = Half of your actual RAM.
Maximum recommended swap = Double of your actual RAM.
(I have 8 GB RAM so I am using 4 GB for swap partition.)
Click on the “+” icon and Add a new mount point.
Mount point : swap
desired capacity : 4G
Click on Add mount Point.
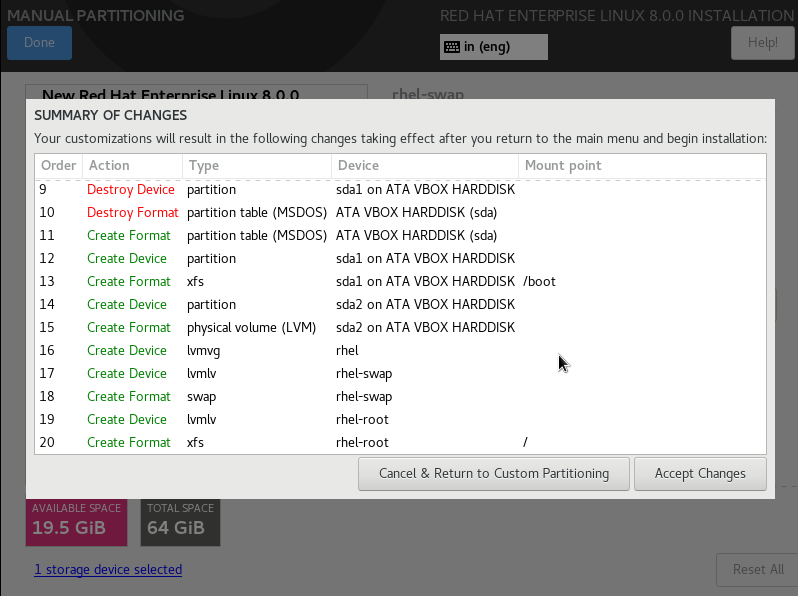
Click on Done and Click on Accept Changes.
Now, click on Begin Installation.
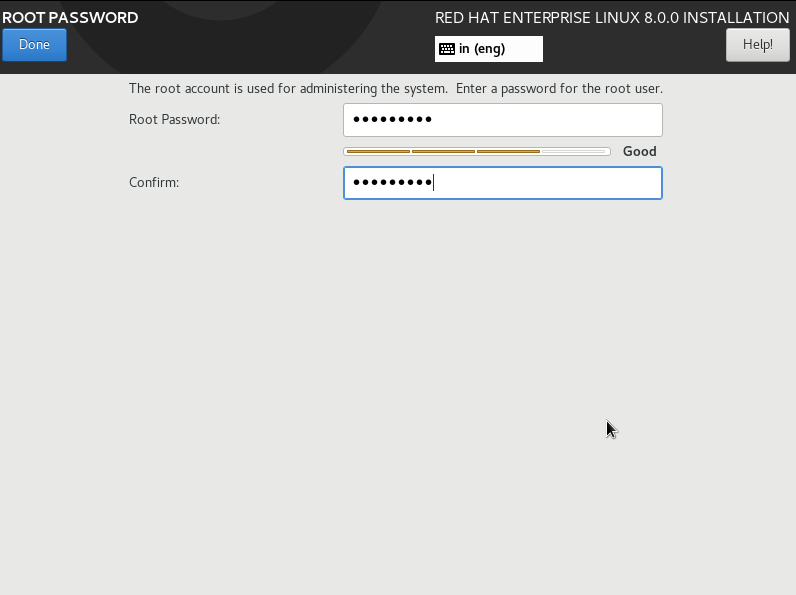
Set the root password.
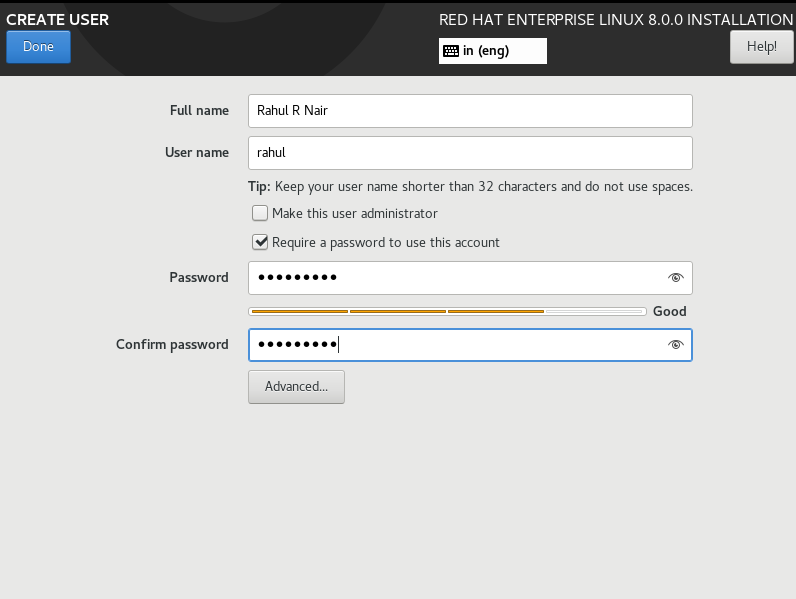
Create a user.
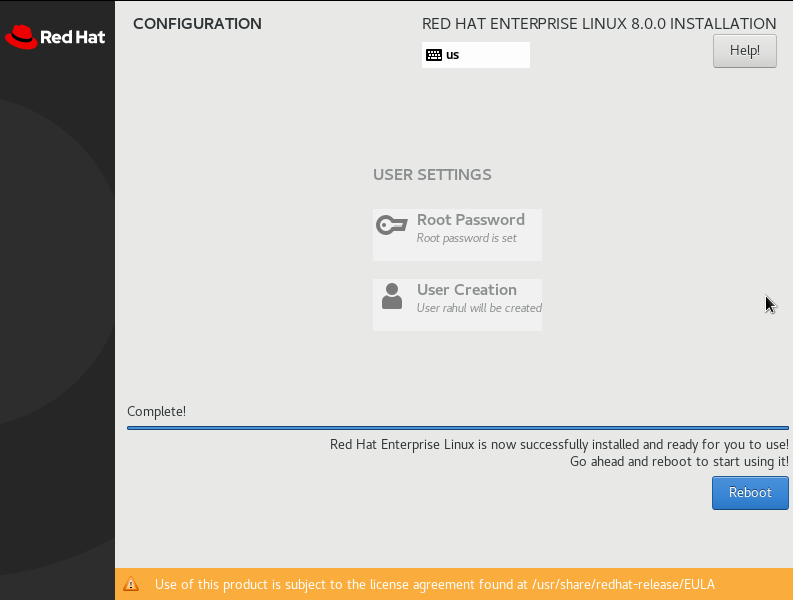
Wait for the installation to complete then click on reboot.
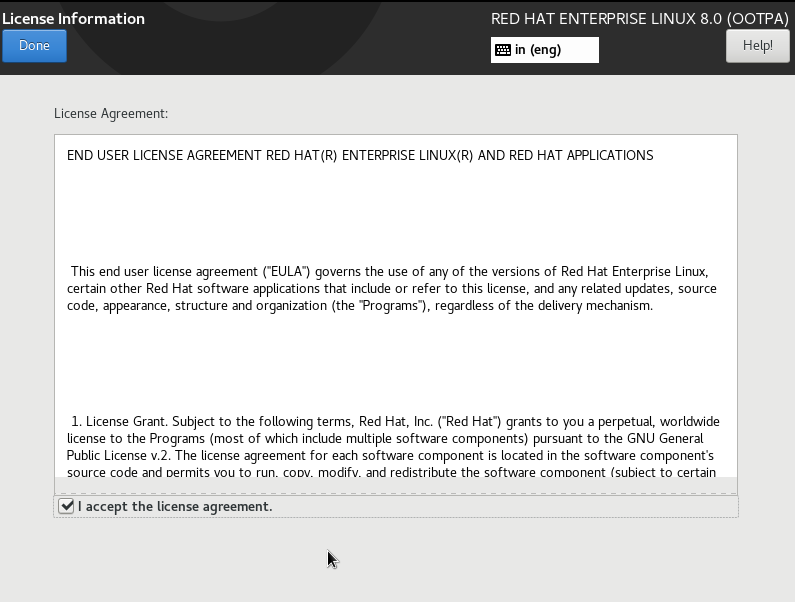
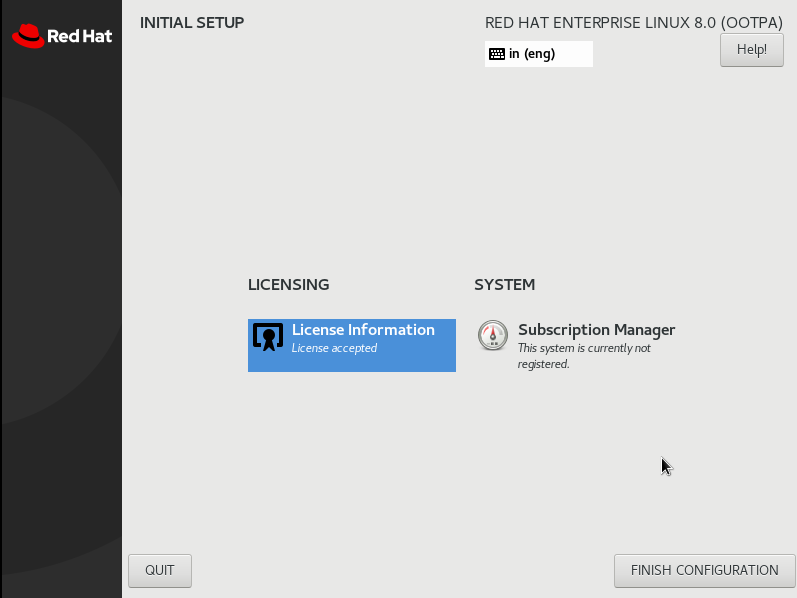
Once rebooted, agree to the licence.
Click on finish configuration.
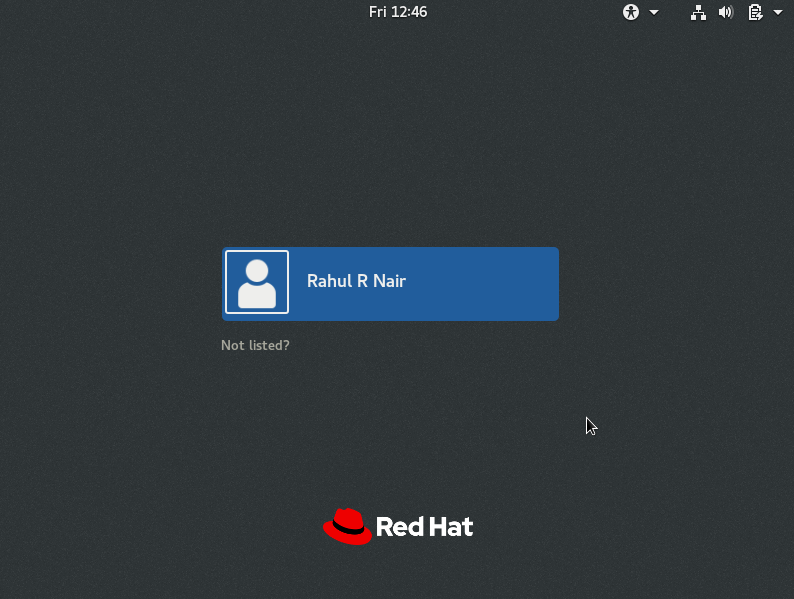
Login to the account and complete the on-screen instructions.
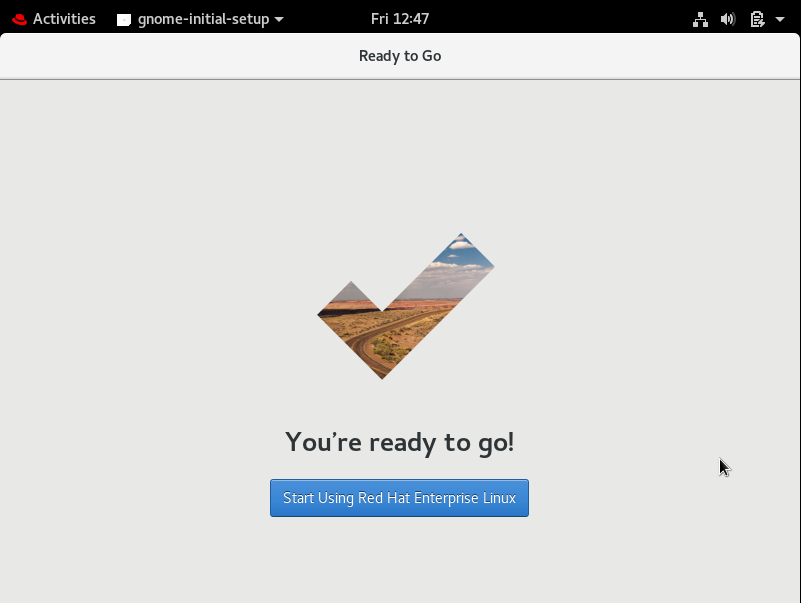
We’ve successfully installed RHEL 8. Please share your valuable feedback and comments on this post.

If you like this post, then follow Techsphinx on Facebook and Twitter for more reviews, tricks, tips and tutorials.
This article needs update or correction? Report the issue here so I can update it.