This post may contain affiliate links/ads and I may earn a small commission when you click on the links/ads at no additional cost to you. As an Amazon Affiliate, I earn from qualifying purchases. Techsphinx also participates in the StationX Affiliate program. You can read my full disclaimer here.

Do you want to install Linux distribution on your hardware?
If Yes! then you will need to create a bootable medium to install the OS. This tutorial will teach you how to create a bootable Linux USB.
Following this tutorial, you can create a bootable medium for any Linux distribution. (Ubuntu, Fedora, Kali, CentOS etc.) I am creating bootable USB of Ubuntu 20.04 in this post.
Pre-Requisites
– ISO file of the OS you want to install (Download from its Official Website)
– An empty USB Drive (Recommended 8 GB)
– Knowledge of Disk Partitions.
Create Bootable Linux USB on Windows
There are many softwares available to create a bootable USB on Windows OS, I use an open-source utility called Rufus.
Rufus is available for download on its official website for free of charge. There is also a portable version available if you don’t want to install Rufus on your system.
Follow the steps to create bootable linux USB using Rufus.
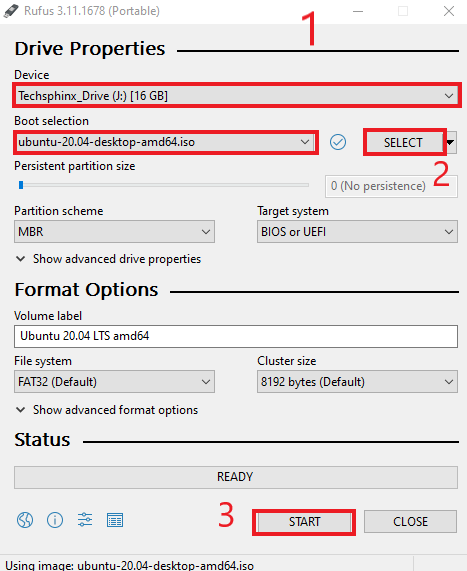
1. Start Rufus.
2. Select the correct Pen-drive and ISO file of the OS.
3. Select Partition Scheme (MBR or GPT) of the machine you want to install OS on.
4. Click on Start.
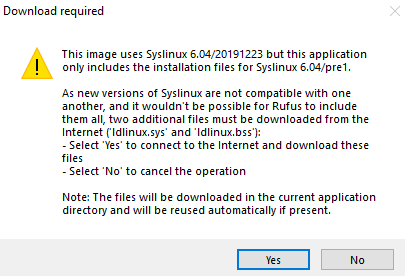
5. If it asks to download syslinux related files, then press yes to download.
6. Use the first option, write in ISO mode which is recommended by Rufus. If you encounter any issues during boot, you can use the dd mode.
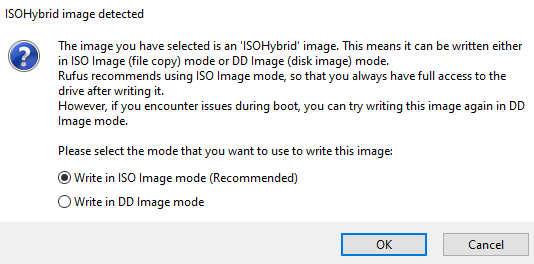
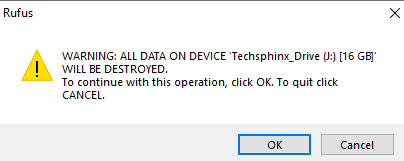
7. Read the warning carefully and press OK.

Wait for the process to finish, after that close Rufus and your bootable USB is ready to go.
Create Bootable Linux USB on Linux
To create a bootable Linux USB using Linux Distro, I use dd command.
The dd command is part of Coreutils package which is available in Linux by default, also if you have a CLI (Command Line Interface) system, you cannot run any graphical boot disk creation software. Therefore, dd will be the best of both worlds.
To create a bootable Linux USB using dd command:
1. Find the name of your USB drive using df command.
df -hT
df: Disk Free
-h: Human readable format.
T: Type
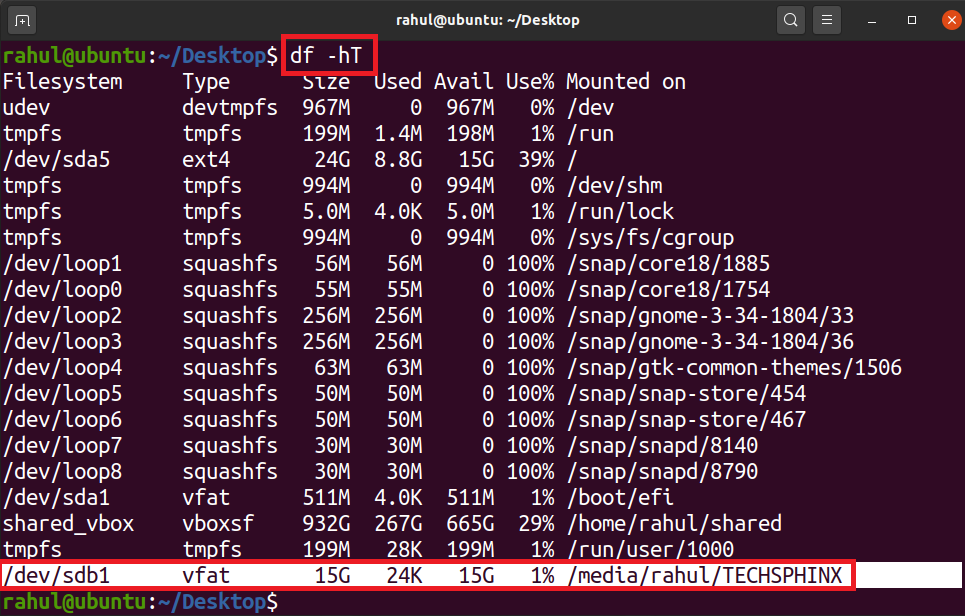
/dev/sdb is the name of my usb drive.
2. Unmount the USB drive (Replace /dev/sdb1 with the name of your USB drive)
umount /dev/sdb1
3. Now, to create a bootable USB using dd command:
sudo dd if=/path/to/ubuntu.iso of=/dev/sdb bs=1M status=progress
Replace /path/to/Ubuntu.iso with the location and name of your .iso file.
Replace /dev/sdb with the name of your USB drive (the one which you found out using the df command, don’t include any number like /dev/sdb1)
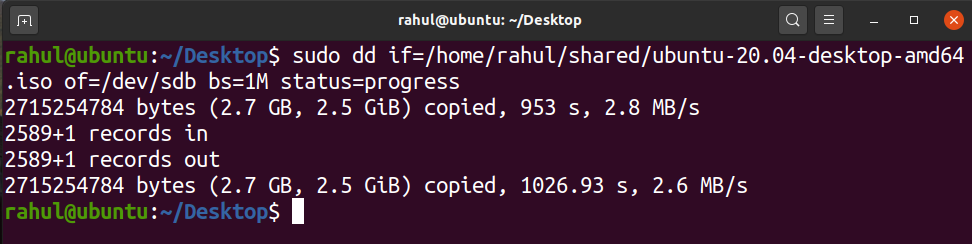
4. Wait for the command to finish.
Once finished, your bootable Linux USB is ready for action.
Create Bootable Linux USB on MAC
There are many tools available on macOS for creating bootable USB but none can beat Etcher – An Open-source project by Balena.

Etcher is available for download on its official website free of charge.
To Create a bootable Linux USB on macOS:
1. Download and Install Etcher.
On newer versions of macOS, you will not be able to run apps from unknown sources due to security reasons. So, click “open” when it blocks from running the app.
2. Launch Etcher, then select flash from file option. Now, browse and select the .iso file of the OS
3. Select the USB drive.
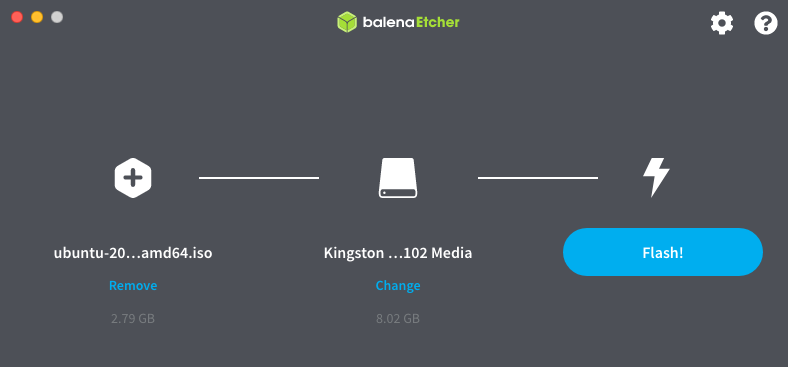
4. After selecting both the image and USB drive, the “Flash!” button becomes active. Click on Flash!
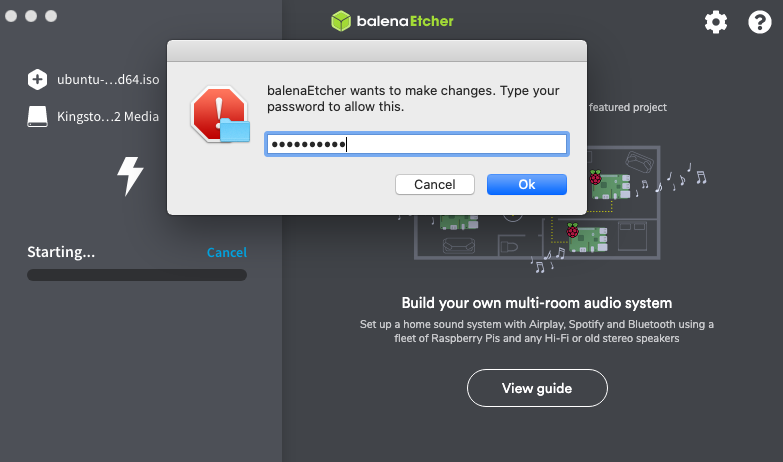
5. Type your password for Etcher to make changes.
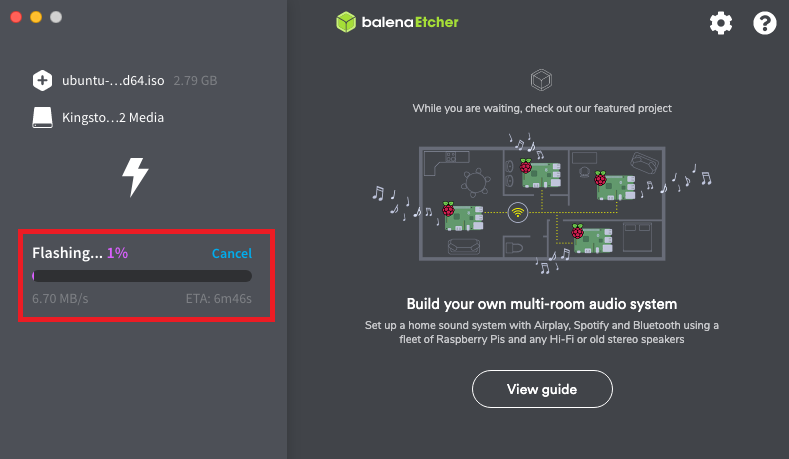
6. The flashing process will begin.
Note: After the flashing is completed, macOS may inform you that “The disk you inserted was not readable by this computer”.
Just select Eject and remove the USB drive, don’t select Initialise.
You’ve successfully created a bootable Linux USB using macOS.
How to boot Linux Distro using bootable USB?
You’ve successfully created a bootable Linux USB, now it’s time to boot it.
1. Power Off your Computer.
2. Insert your USB drive and power on the system.

3. Go to boot options pressing the appropriate key. It may differ depending on the manufacturer of your system.
Common keys for accessing the Boot Menu – Esc, F2, F10 or F12
4. Select your USB drive from the boot menu.
After that, the boot process will initiate.
Some Important things
Are these the only way to create a bootable Linux USB? – Absolutely No!
There are other tools and commands to create a bootable disk, however, I just covered some of the methods I’ve been using for years (and these never failed me!).
You can also use different tools like UNetbootin or BalenaEtcher which are available for Windows, Linux and macOS.
If your USB drive is not booting, then make sure:
1. You have used the correct partition table when creating the bootable medium for your system (MBR or GPT)
2. The .iso file you downloaded is not corrupt.
3. The OS you are booting is compatible with your system. (32 bit or 64 bit)
4. If you are dual booting with Windows pc, secure boot is disabled and the legacy boot is enabled to avoid any problems.
5. Check the USB drive by booting it on a different machine to make sure that bootable USB works.
6. Check the USB drive for bad sectors or errors.
I hope that the above-mentioned troubleshooting steps will help you solve your booting issues, if you have solved booting issues any other way then tell me in the comments. I would love to improve my knowledge.

If you like this post, then follow Techsphinx on Facebook and Twitter for more reviews, tricks, tips and tutorials.
This article needs update or correction? Report the issue here so I can update it.