This post may contain affiliate links/ads and I may earn a small commission when you click on the links/ads at no additional cost to you. As an Amazon Affiliate, I earn from qualifying purchases. Techsphinx also participates in the StationX Affiliate program. You can read my full disclaimer here.

Do you want to unlock full potential of your android device?
Yes, by unlocking full potential I mean unlocking bootloader, installing custom recovery, installing custom ROM and of course rooting and customizing your android phone.
So, if you want to do any of above, then you have to start your journey by enabling OEM unlocking of your android device.
Don’t know what is OEM unlocking? Why do you need to unlock OEM? Or How to enable OEM unlocking?
Don’t worry this post got all those questions covered.
So, without wasting precious time let’s start by getting familiar with the word “OEM Unlock”.
What is OEM Unlocking?
Android device has a lot of potential, but this potential is limited by the manufacturer of the device. They limit the functionality of the device using a software switch.
This is done in order to prevent users from accidentally messing up their device.
But what about people like you and me?
What if a user deliberately wants to push beyond these limitations?
This is where OEM Unlocking comes into play.
When you flip that “OEM Unlock” switch on, it sets the “unlock_ability” flag to: “1”. This flag remains persistent even if you reboot your device or perform a factory reset. This option will stay enabled unless you turn it off manually.
OEM Unlock option is usually hidden in android devices to prevent any accidental access.
Why would you need to enable OEM Unlocking?
Now, you know what Unlocking OEM means, let see why do we need to enable “OEM Unlock” and what are its drawbacks.
With enabling OEM unlock, the world of endless-possibilities opens –
- Unlocking bootloader
- Installing Custom Recovery
- Installing Custom Roms
- Rooting Device
- Installing Custom kernel
- Removing bloatware
- Installing famous mods like Viper4Android
- Modifying system files and Partitions
- And many other cool things. (I just barely scratched the surface here)
But there is a small price to pay, enabling “OEM unlock” is just turning on a switch, but you cannot do any serious customizations to your android device unless you unlock the bootloader (which is the next step after unlocking OEM).
Unlocking bootloader voids the warranty of your device.

Now, here’s an official disclaimer: If you follow this post and you unlock OEM and then unlock the bootloader (or try to unlock bootloader) and you mess up your device due to any reason. I or TechSphinx shall not be held responsible for your actions.
You’ll learn more about the difference between Unlocking OEM vs Unlocking Bootloader next in this post.
Enabling OEM Unlock vs Unlocking Bootloader
Often these words (Enabling OEM unlock and Unlocking Bootloader) are used interchangeably, but they are not the same thing.
Before diving deep into this, let’s first understand the meaning of bootloader.
What is a bootloader in Android?
The operating system resides in storage and must be loaded into memory in order for you to use it.
When a device starts (boots up), it doesn’t have any programs in its memory which makes it incapable of accessing components like storage or I/O devices.
Here’s where bootloader comes into play.
Bootloader initializes the hardware and brings up the kernel (the core part of the operating system which communicates with the hardware).
Kernel then proceeds to initialize the operating system.
Since bootloader sits between software and hardware, it provides users with booting options such as entering into fastboot mode or recovery mode of the device.
If you want to know more about recovery and best custom recovery available for your android device, then head over to my best custom recovery post.
The Manufacturer of the device locked the bootloader to prevent any accidental damage to the device.
So, in order to make any changes to bootloader (for example: install a “custom recovery”), you have to unlock it and by enabling “OEM Unlock”, you are allowing the bootloader to be unlocked.
Now you know the meaning of OEM unlock and unlocking Bootloader, let’s put all pieces together.
Let’s see the entire process of rooting android device in order.
1. Unlocking OEM – Turning on a switch that allows us to run “fastboot” commands to unlock the bootloader. (Without enabling OEM unlock, you cannot use fastboot commands to unlock bootloader)
2. Unlocking Bootloader – That allows us to install custom recovery on android device.
3. Installing Custom Recovery (like TWRP) – Custom Recovery allows us to flash third-party images, which the default recovery doesn’t allow (for example Magisk, Viper4android etc.).

4. Flashing Magisk – Magisk is a suite of open source tools for customizing fundamental parts of Android which includes “root”.
Now you know, enabling OEM unlock isn’t same as unlocking the bootloader. They are two different steps which you have to perform sequentially.
If you want to see the entire process in action, then head over to my Root Moto G5s Plus and install custom recovery post where I have unlocked bootloader, installed TWRP and Rooted my moto G5s Plus device.
How to Enable OEM Unlock in Android Device?
Finally, it’s time for some practical stuff.
Let’s see how to enable OEM unlock on your android device.
Backup Important Stuff
Now, it’s a good idea to take a backup of your important files before proceeding. Enabling OEM unlock doesn’t erase any data, but if you proceed further to unlocking the bootloader (which you will), then everything on your device will be erased.
Enable Developer Options on Android
The option to enable OEM unlock is hidden under developer options of the device. To unhide it, follow the below steps:
1. Navigate to Settings.
2. Go to About Phone.
3. Click on Build Number 7 times.
After that, you will see an onscreen message stating that you are now a developer.
4. Go back to Settings.
5. Go to System.
6. There you will find the Developer Options which previously was not there.
Important Note: Different phones have different menus in Settings. Just remember to look for the build number options somewhere in your device and click on it 7 times. The same goes for the developer options too, you may find developer options in Settings but in android Nougat and newer versions, it’s under Settings > System.
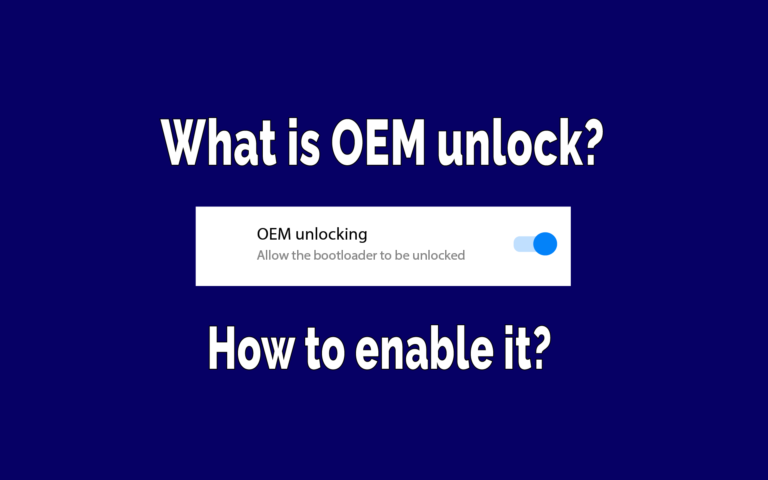
Enable OEM Unlocking on Android
To enable OEM unlock
1. Navigate to Settings.

2. Tap on System.
3. Go to Developer Options.
4. Scroll down and find OEM unlock option.
5. Toggle on the switch next to it.
If you have a pin/password/pattern set, you will be asked to enter it.
6. Press enable, when it asks for confirmation.
Done! Now you can unlock the bootloader of the device.
FAQ on OEM Unlock
Now, let’s cover some of the most common questions asked related to OEM unlock.
Does Enabling OEM unlock voids warranty of device?
Toggling “OEM unlock” switch under developer options is a feature that is introduced in Android 5.0 and later. This is to prevent unauthorized access to unlock the bootloader. Enabling this option will not void the warranty of the device, but if you proceed further and unlock the bootloader of the device, then your device warranty may be void.
Please note: Different Manufacturers have a different policy for bootloader unlock. You can unlock the bootloader of the Oneplus device and your warranty will not be void, but if you unlock the bootloader of Motorola device, then your warranty will be void. Always check their policy for bootloader unlock. For most manufacturers, unlocking bootloader will void the warranty.
Is OEM unlocking same as rooting?
No, it’s not. Rooting is a process that grants you superuser access (aka root-access). With root access, you have complete control over your device, you can modify system files and configurations. It also allows hardware acceleration like CPU overclocking or custom RAM optimizations.
Enabling “OEM unlock” only allows you to unlock the bootloader. By unlocking bootloader you can install custom recovery and with a custom recovery, you can flash Magisk, which will grant you superuser access. You can say “Unlocking OEM” is the first step of rooting an android device.
Can you root an android device without unlocking bootloader?
The right answer to that question is YES. Unlocking bootloader and rooting a device are completely different things. However, the easiest way to root a device is by unlocking the bootloader. Rooting without unlocking bootloader is quite complicated, and in some devices, it may lead to unnecessary problems like crashing or corrupting the system.
Final Words on OEM Unlock
In some devices, you may not find the OEM unlock option. In that case, just proceed with unlocking bootloader.
Also in some devices, you may have to get unlock data from the manufacturer itself (like with Motorola devices).
I hope now you understand the entire concept of OEM unlocking. If you have any questions, then tell me in the comments.

If you like this post, then follow Techsphinx on Facebook and Twitter for more reviews, tricks, tips and tutorials.
This article needs update or correction? Report the issue here so I can update it.