This post may contain affiliate links/ads and I may earn a small commission when you click on the links/ads at no additional cost to you. As an Amazon Affiliate, I earn from qualifying purchases. Techsphinx also participates in the StationX Affiliate program. You can read my full disclaimer here.

In this post, I am going to show you how to install LAMP Stack in CentOS 8 / RHEL 8.
LAMP is a software stack that is mainly used for creating dynamic web-pages. Most hosting companies use LAMP Stack to provide a hosting environment for their user’s website.
LAMP stands for:
Linux based OS (CentOS or RHEL in our case)
Apache – A Web server.
MySQL – A Relational Database Management System.
PHP – A server side scripting language mainly responsible for creating dynamic websites.
You can replace PHP with Perl or Python and MySQL with MariaDB.
We are going to install MariaDB in place of MySQL.
Pre-Requisites
– CentOS 8 / RHEL 8 installed and running on a local computer or remote server.
Related: How to install RHEL 8? (Explained with Pictures)
– Active Internet Connection to download and install packages.
– Basic Linux Knowledge
Steps to install LAMP in CentOS 8 / RHEL 8
You need to be logged in as root or have root access via sudo to follow this tutorial.
1. Update Software Packages
Before proceeding, it’s recommended to update software packages.
sudo dnf update
2. Install Apache
Let’s install apache web server and its necessary utilities.

sudo dnf install httpd httpd-tools
After installing, start the service using the command:
sudo systemctl start httpd
Also, it’s a good idea to enable the service, so it will automatically start at boot time.
sudo systemctl enable httpd
Check the status of apache by using the following command:
sudo systemctl status httpd
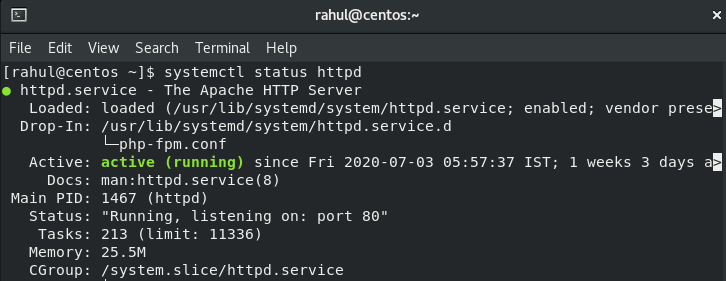
As you can see, apache web server is up and running.
Now, let’s configure firewall to avoid any unnecessary interruptions.
To create firewall rules, run the following commands:
sudo firewall-cmd --permanent --zone=public --add-service=http
sudo firewall-cmd --permanent --zone=public --add-service=https
sudo firewall-cmd --reload
Open your web browser and enter your system’s IP address as the URL.
http://server-ip
(Replace “server-ip” with your server’s IP address.)
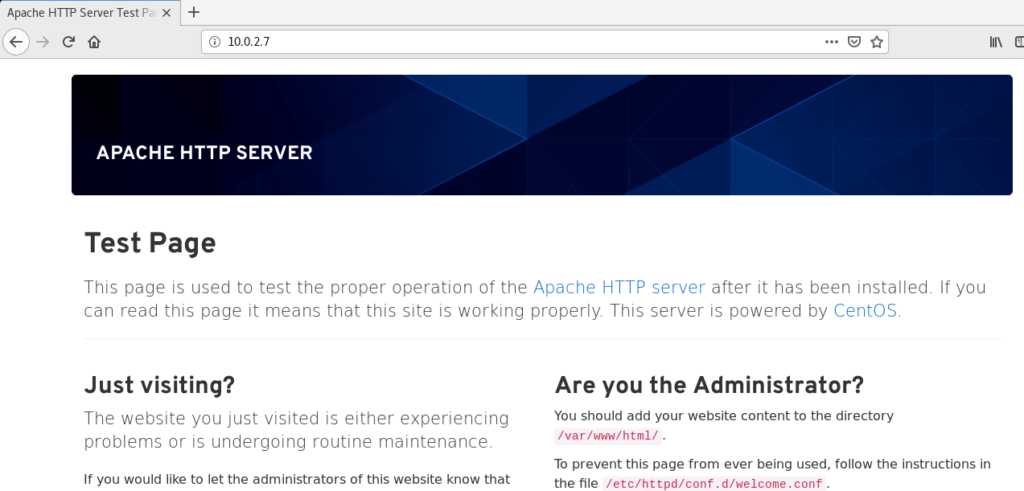
You should see the apache testing page. This means your apache installation is working properly.
3. Install MariaDB
It is time to install the database for our LAMP stack.
To install MariaDB database server use the following command:
sudo dnf install mariadb-server mariadb -y
Once installed, start the service using:
sudo systemctl start mariadb
Also, enable the service:
sudo systemctl enable mariadb
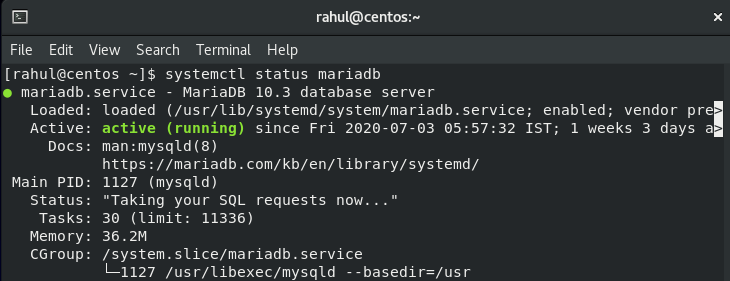
Check the status of mariadb:
sudo systemctl status mariadb
Run the mariadb post installation script to secure database:

mysql_secure_installation
Press enter when it asks for current root password.
Now, press Y to change root password and setup new root password for your database.
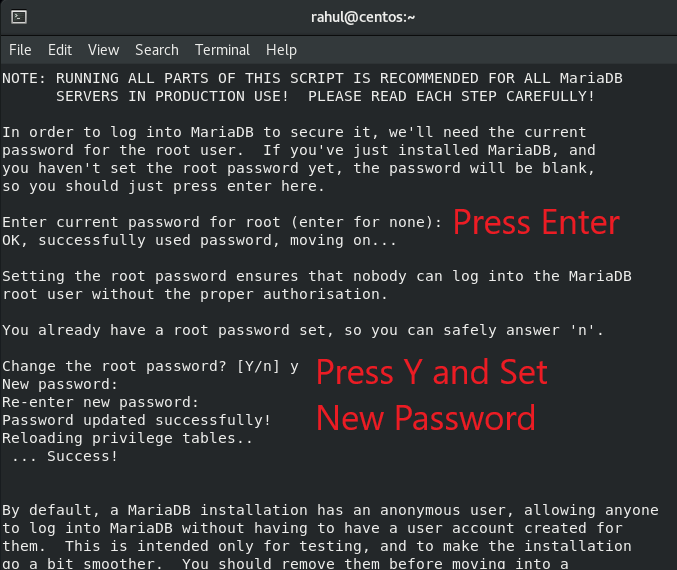
After setting up the new root password, press “Y” or hit enter for every other question. (Y is capitalized here, this indicates the default answer is yes.)
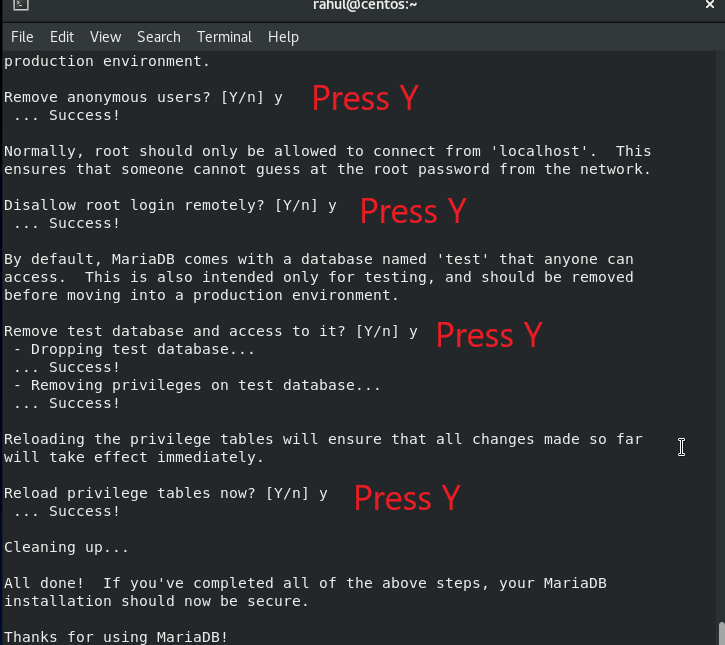
Done! You have installed and secured your MariaDB database.
You can also login to MariaDB console via terminal using command:
mysql -u root -p
and enter MariaDB password that you had set up before.
To exit MariaDB use:
exit;
4. Install PHP
Finally Let’s install the last piece of stack – PHP
PHP 7.4 is the latest version and is not available in the base repository as of writing this post.
So, we will use the remi repository to install PHP 7.4
First we have to install EPEL repo using the command:
sudo dnf install https://dl.fedoraproject.org/pub/epel/epel-release-latest-8.noarch.rpm
Now, install dnf-utils and remi-repository using the command:
sudo dnf install dnf-utils http://rpms.remirepo.net/enterprise/remi-release-8.rpm
Let’s list the php module available for download.
sudo dnf module list php
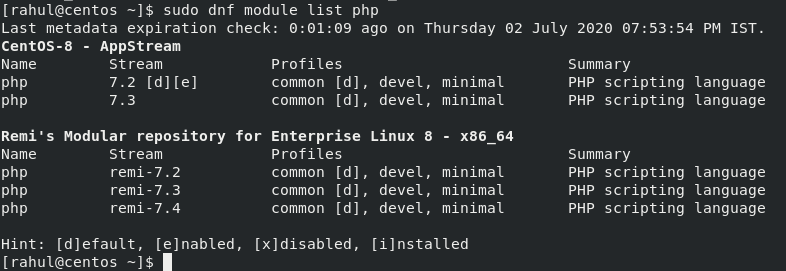
As you can see PHP 7.2 is marked as default and enabled.
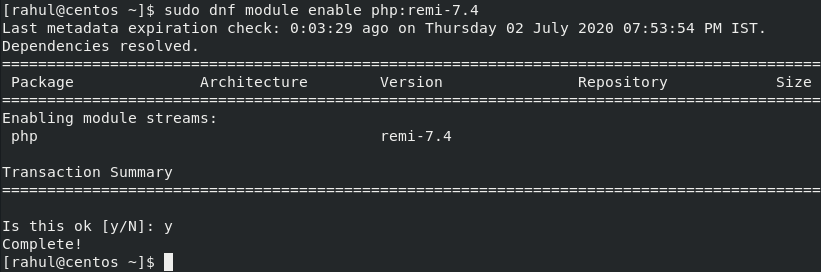
So, let’s reset the default PHP:
sudo dnf module reset php
Now, enable the PHP 7.4 from remi-repository:

sudo dnf module enable php:remi-7.4
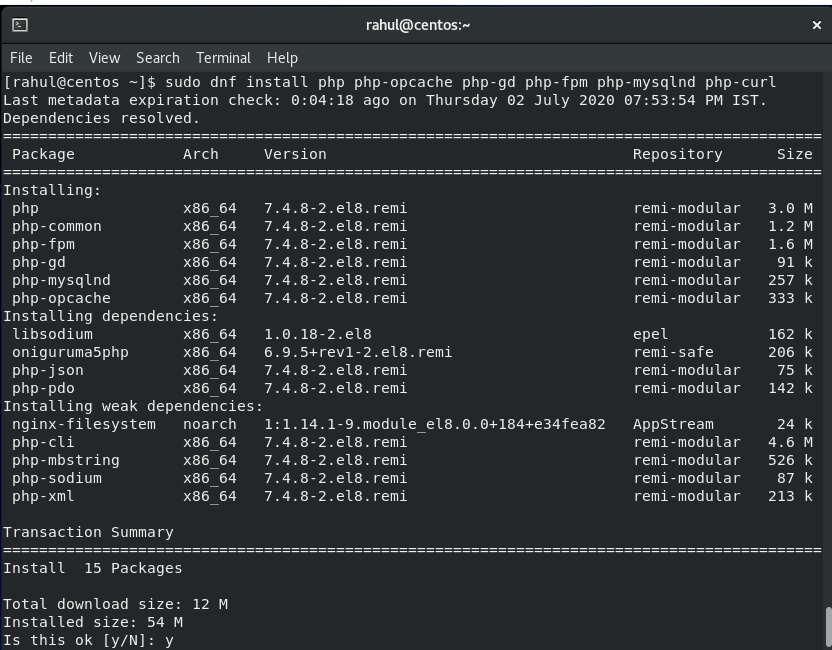
Finally, let’s install PHP and PHP-FPM and other necessary utilities using the command:
sudo dnf install php php-opcache php-gd php-fpm php-mysqlnd php-curl
After installation, you can check the PHP version using:
php -v

Now, start the PHP-FPM (FastCGI Process Manager) using the command:
sudo systemctl start php-fpm
Also, enable PHP-FPM to start at boot time:
sudo systemctl enable php-fpm
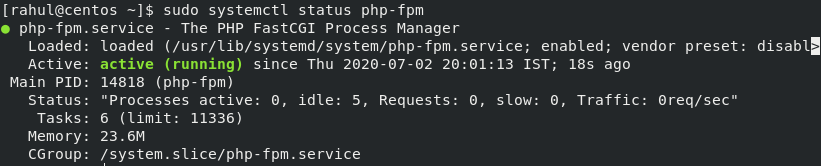
Check the status of PHP-FPM
systemctl status php-fpm
Configure SELinux to allow Apache to execute the PHP code via PHP-FPM using the command:
sudo setsebool -P httpd_execmem 1
Restart httpd service.
sudo systemctl restart httpd
Check if PHP is working properly
Create a new file to display PHP info:
sudo nano /var/www/html/info.php
Type the following PHP code to display PHP info:
<?php phpinfo (); ?>
Save and exit the file (In Nano editor use Ctrl + x to exit and press y when it asks to save the file)
Open web-browser and navigate to:
http://server-ip/info.php
Replace “server-ip” with IP address of the server.
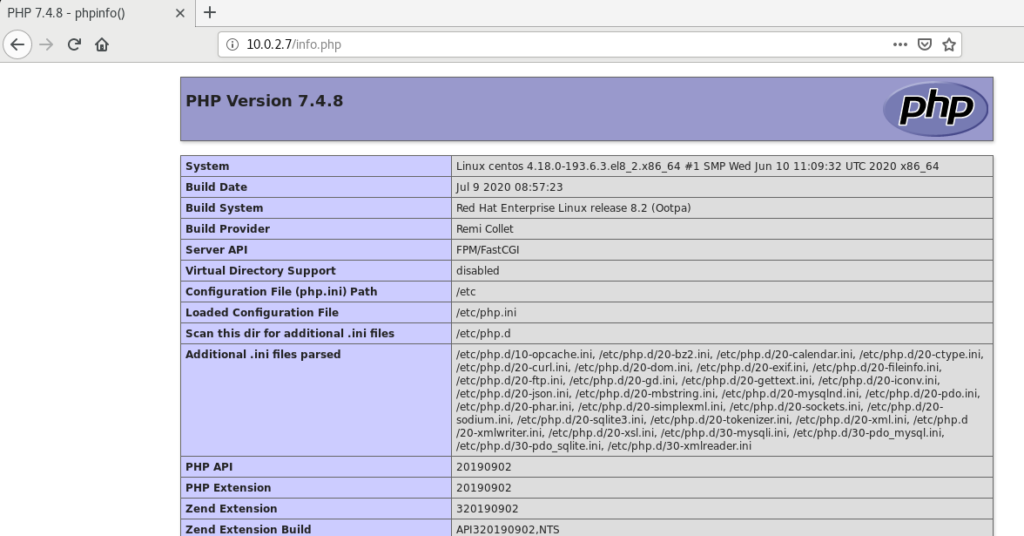
You will see information about PHP.
Now don’t forget to remove info.php file as it poses a security risk by giving out details about your PHP.
sudo rm /var/www/html/info.php
Conclusion
Congrats! You have successfully installed and configured LAMP Stack (Apache, MariaDB, PHP) on your CentOS 8 / RHEL 8 system.

If you like this post, then follow Techsphinx on Facebook and Twitter for more reviews, tricks, tips and tutorials.
This article needs update or correction? Report the issue here so I can update it.