This post may contain affiliate links/ads and I may earn a small commission when you click on the links/ads at no additional cost to you. As an Amazon Affiliate, I earn from qualifying purchases. Techsphinx also participates in the StationX Affiliate program. You can read my full disclaimer here.

Brief: After following this guide to the end, you’ll be able to install, understand and even uninstall Gnome System Monitor on your Linux Distro.
Linux has many graphical and command-line task managers. One of such is GNOME System Monitor.
It is a simple and elegant task manager that comes pre-installed on systems that have GNOME installed. Although it comes pre-installed on many popular Linux distros like Ubuntu, CentOS etc., your particular OS version may lack it.
In this post, I will also show you how to install an extension to System Monitor, so that you don’t have to open task manager to monitor your resources every now and then.
Let’s start by looking at some features that Gnome System Monitor offers.
Features of GNOME System Monitor
- It has a graphical User Interface.
- Monitor Processes.
- Control process behaviours (Stopping, Killing, Changing Priority etc.)
- Search for open files.
- Monitor CPU, Network history, Memory and swap usage.
- Monitor File Systems (available space, used space, Type, mount point etc.)
Pre-Requisites
- Linux Based OS with Graphical User Interface
- GNOME Desktop Environment (Only if you want to install and use system monitor extension)
- Active internet connection
- Sudo privileges
Install GNOME System Monitor
You can install system monitor graphically or through command-line. First, let’s have a look at the graphical method.
Install Graphically
You can install Gnome System Monitor graphically via software installer in Linux.
(I am installing it via Ubuntu’s Software Installer.)
1. Open software installer and search for GNOME System Monitor.

2. Click on Install.

(You’ll be asked to authenticate before installing)
3. Once Installed, you’ll see the option to remove.
Install via Terminal
To install Gnome System Monitor via terminal use one of the following command according to your Linux distro.
For Ubuntu/Debian/Mint/Elementary OS etc. use:
sudo apt install gnome-system-monitor
For CentOS/Fedora/RHEL etc. use:

sudo dnf install gnome-system-monitor
Launch GNOME System Monitor
After installing the gnome system monitor, you can navigate to the applications menu and click on system monitor icon to launch it.
You can also launch it via terminal using the command:
gnome-system-monitor
Using GNOME System Monitor
Now, let’s understand what the gnome system monitor has to offer in terms of monitoring and managing a Linux system.
Process Tab
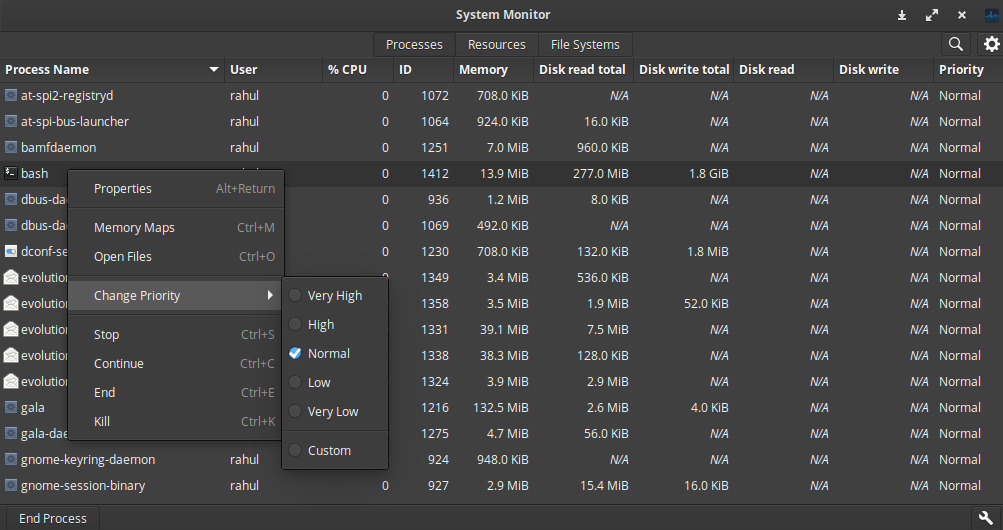
When you open GNOME system Monitor, this is the tab you’ll see, by default. Process tab displays all the processes running on your Linux system. Here you can see the following information of each process:
- Process name
- Owner of the process
- CPU usage
- Process ID
- Memory
- Disk read and write info
- Priority
You can decide what you want to do with the process based on the above information. You can right-click on any process and you’ll be provided with the options to:
- View its detailed properties
- View its memory maps
- List open used files
- Change priority
- Stop the Process
- Continue the stopped process
- End the process
- Kill the Process
Resources Tab
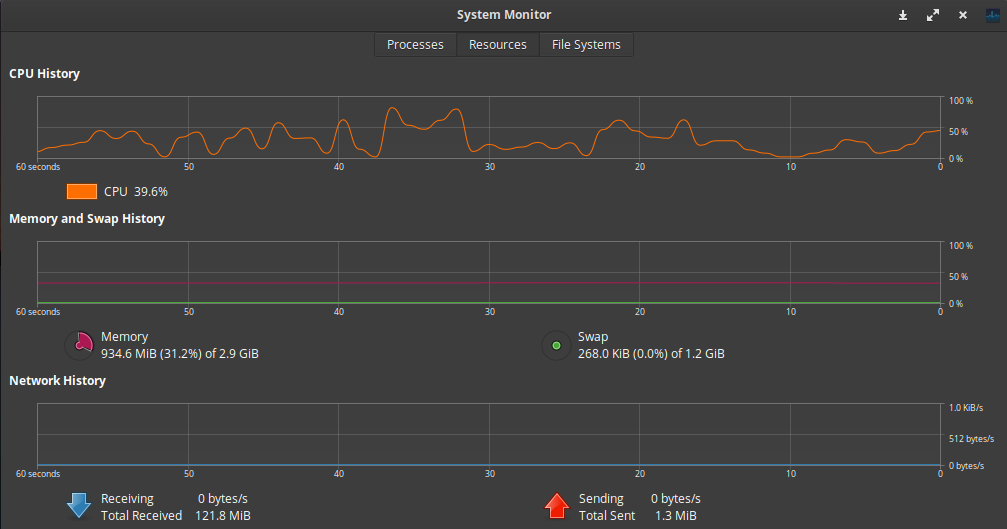
This tab is very helpful in monitoring the performance of your system. Through the resources tab, you can view the history of usage for the following resources in a graphical format.
- CPU History
- Memory and Swap History
- Network History
File System Tab
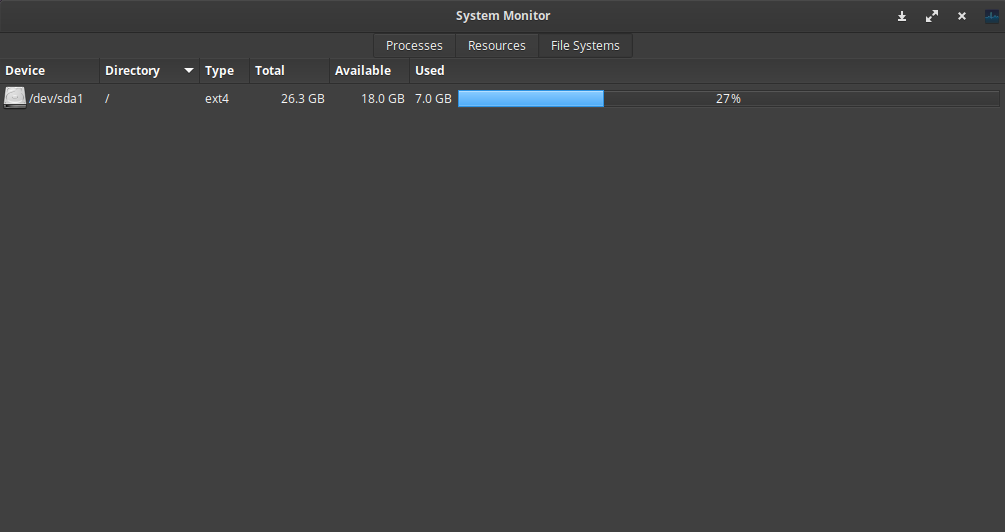
File system tab provides information about the hard drive(s) on your system. It provides you with the following info about the devices:
- Device Name
- Directory where the device is mounted
- Type of file system
- Total size
- Available space
- Used space
You can also sort the listing based on the above info.
Other Options
If you click on the system monitor icon (or the burger menu icon in some OS) at the top-right corner of the Gnome system monitor window, then you will get to see some more options:
- Search for Open Files
The Search for Open Files dialog lists all the files that processes have open.
- Preferences
You can customize settings of the GNOME system monitor from the preferences tab.
- Help
You can go to this option, if you need any help related to system monitor.
Install System Monitor Extension
Note: The extension I am using in this post requires GNOME Desktop Environment and GNOME Shell v3.26 or later.
There are many System Monitor extensions available, but I am going to install “gnome-shell-system-monitor-applet” by Mounier Florian (GitHub username – paradoxxxzero).
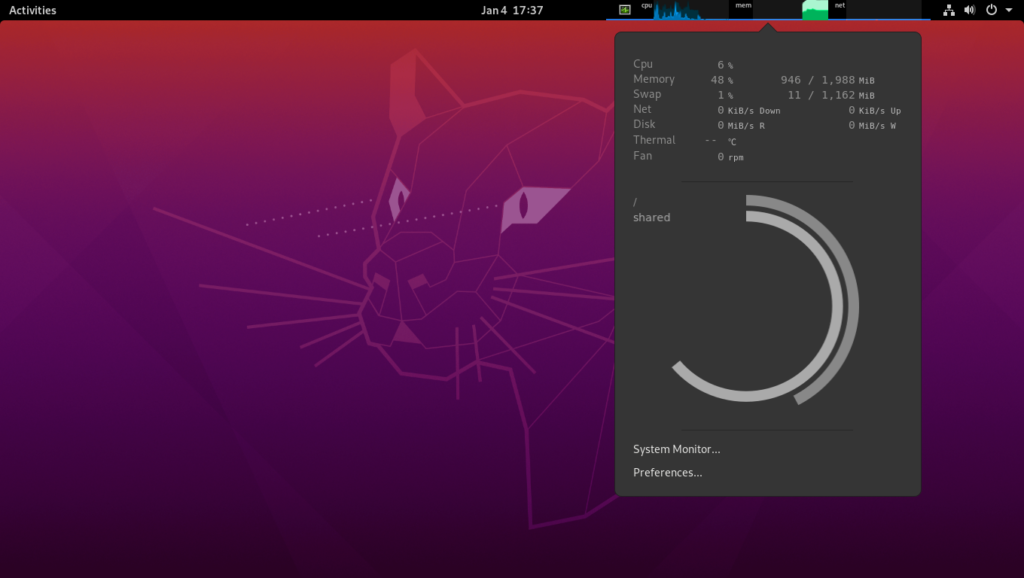
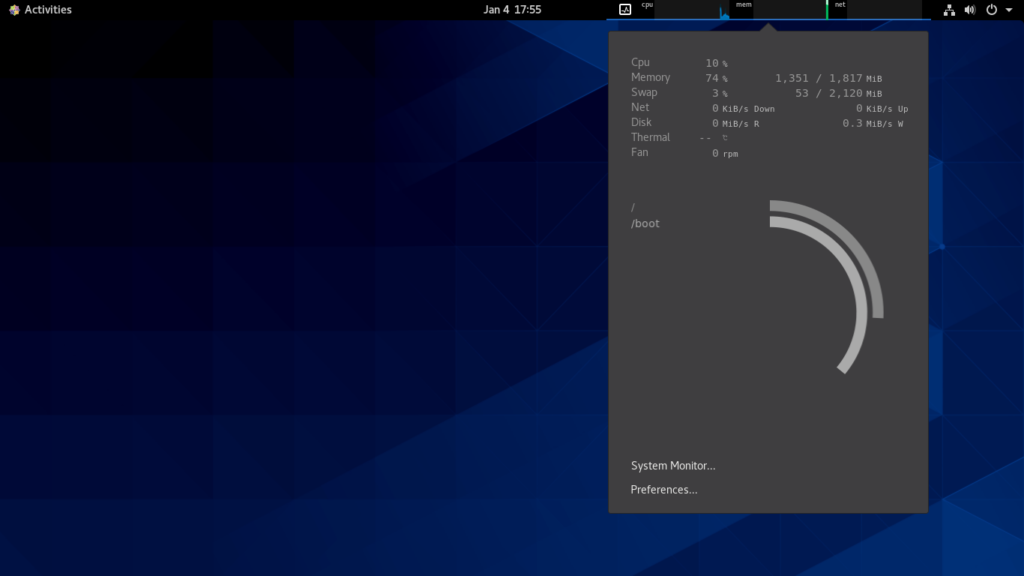
After installing this extension, you don’t have to open system monitor to find out what program is using up your resources, you can get all that info in gnome-shell status bar.

Install this System Monitor Extension on Ubuntu
You can also install this extension via browser by going to the gnome-system-extensions page and following the steps provided there. Here, I am going to install it using the source file.
1. Download the extension source code from GitHub using “wget” command.
wget https://github.com/paradoxxxzero/gnome-shell-system-monitor-applet/archive/v38.tar.gz
2. Extract the downloaded tar file.
tar -xzvf v38.tar.gz
3. Navigate to the extracted directory.
cd gnome-shell-system-monitor-applet-38/
4. Run the make install command, to install the extension.
make install
5. Restart your system for the changes to take effect.
reboot
6. After restarting, you can install gnome-tweaks and enable the extension from there.
sudo apt install gnome-tweaks
gnome-tweaks
7. Go to extensions tab of gnome-tweaks and enable the “System-Monitor” extension.
8. Alternatively, you can also enable extension without gnome-tweaks using the following command:
gnome-extensions enable [email protected]
Install System Monitor Extension on CentOS/Fedora/RHEL
The System monitor applet extension is available in the EPEL repo.
1. Install EPEL release.
sudo dnf install epel-release
2. Install the extension using “dnf” utility.
sudo dnf install gnome-shell-extension-system-monitor-applet
3. Install GNOME tweaks.
sudo dnf install gnome-tweaks
4. Restart the system.
reboot
5. Start GNOME tweaks.
gnome-tweaks
6. Enable the “System-Monitor” extension from the extensions tab in gnome tweaks.
Uninstall GNOME System Monitor
Just as with the installation process, you can also uninstall system monitor graphically or via terminal.

Uninstall Graphically
To uninstall graphically:
1. Open Software Installer. (I am using Ubuntu Software Installer here.)
2. Go to the Installed tab.
3. Scroll down or search for Gnome system monitor.

4. Click on the “Remove” button and confirm to remove.
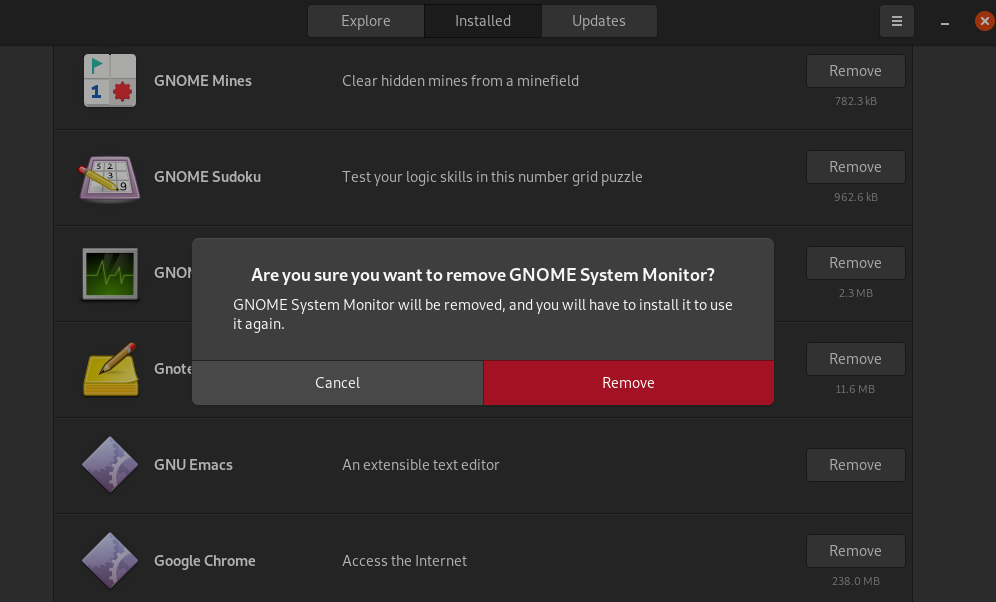
Gnome System Monitor will be removed from your system.
Uninstall via Terminal
To uninstall Gnome system monitor via terminal, use the “apt” or “dnf” utility.
For Ubuntu/Debian/Mint/Elementary OS etc. use:
sudo apt remove gnome-system-monitor
For CentOS/Fedora/RHEL use:
sudo dnf remove gnome-system-monitor
Conclusion
Gnome System Monitor is a basic system monitor that is ideal for any beginner.
However, if you are going to stick to Linux for a long time, then I recommend using a command-line system monitor like HTOP.
Using HTOP is not as easy as using Gnome System Monitor but you can perform many advanced monitoring and management tasks on your system. I have written a complete guide on understanding and using HTOP to monitor and manage processes on Linux systems.
I hope you enjoyed reading this post. Don’t forget to share this post with your friends and colleagues (especially to those who are new to Linux).

If you like this post, then follow Techsphinx on Facebook and Twitter for more reviews, tricks, tips and tutorials.
This article needs update or correction? Report the issue here so I can update it.