
This post may contain affiliate links/ads and I may earn a small commission when you click on the links/ads at no additional cost to you. As an Amazon Affiliate, I earn from qualifying purchases. Techsphinx also participates in the StationX Affiliate program. You can read my full disclaimer here.

Burp Suite is a Java-based graphical tool designed for web security testing. It helps you to identify vulnerabilities and verify attack vectors that are affecting your web applications. Burp suite can do a lot of things, but in this burp suite tutorial, we are going to cover how to set up Burp proxy. If you want to know more about Burp Suite, then go to https://portswigger.net
You can configure Burp suite proxy to intercept and modify the data sent between the client and server.
Pre-requisites:
- Kali Linux up and running (Check this post, if you don’t know how to install Kali Linux.)
- Burp Suite (Already installed in Kali)
- Firefox Browser (Already installed in Kali)
Note: You use any operating system you want; you can also install Burp suite in Windows. But in this burp suite tutorial, I use Kali Linux as it’s specifically designed for pen-testing and has a lot of tools pre-installed for the same.
HTTP Get and Post Requests
Before Get and Post requests, let’s understand how a client and webserver transfer data using a simple scenario.
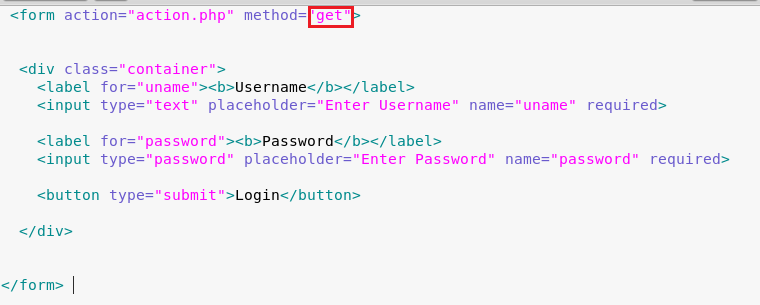
Here’s a simple HTML login form that sends data to the webserver (using PHP) for validation.
The client fills the required fields and clicks on the login button.
HTTP protocol generates a request and sends the data to the webserver, the webserver then runs the code and returns the response to the client.
In this case, if the username and password are correct the webserver returns the response as “login successful” else it will return “wrong username or password”
Now, there are two methods to generate HTTP requests and send the data:
GET and POST
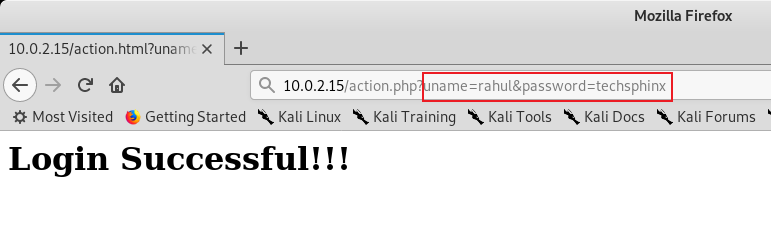
The “GET” method carries the request parameter appended in the URL string.

You can see the Username and Password clearly in the URL, you probably don’t want anyone sitting beside you to see the password. Right?
This is where the POST method come in handy.
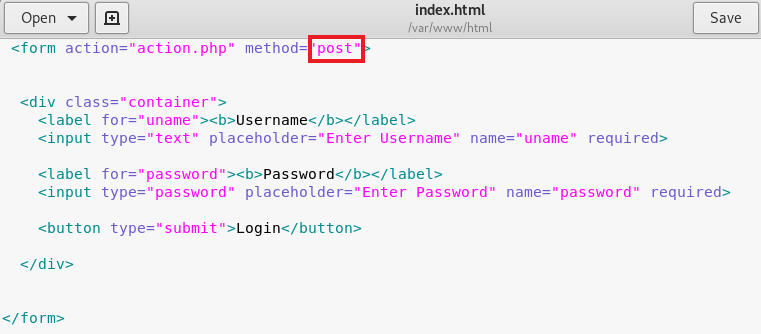
The “POST” method carries request parameter in the message body which makes it more secure to transfer data between client and server.
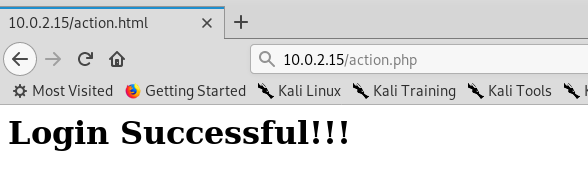
Now, no one sitting beside you can see your password.
In the GET method, we can easily tamper the URL parameters to modify the request sent to the web server, but this is not possible with the POST method. In this case, we have to use a proxy to modify the request before sending it to the web server.
Not only that, but the proxy also helps us to bypass any client-side filters or validations.
How to Setup Proxy for Burp Suite?
Start Burp Suite, go to the proxy tab and turn off the intercept, then follow along with this post.
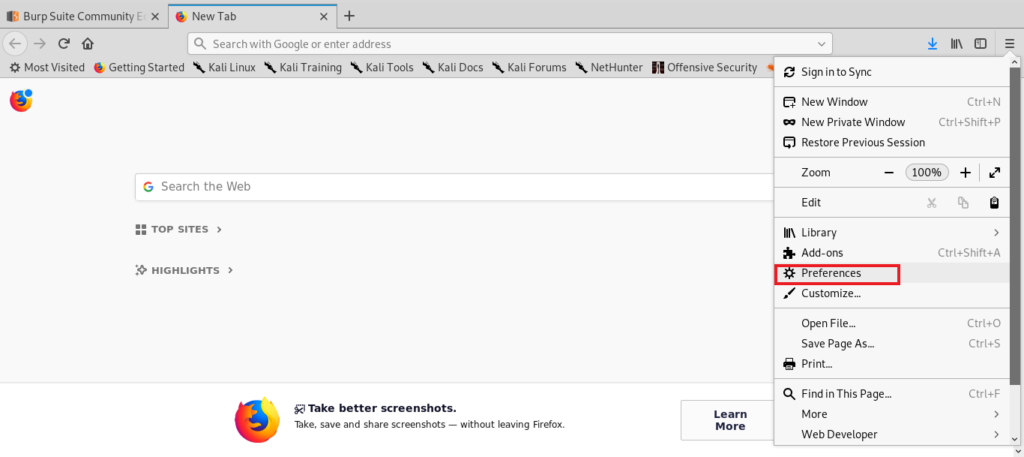
1.) Start Firefox and go to Preferences.
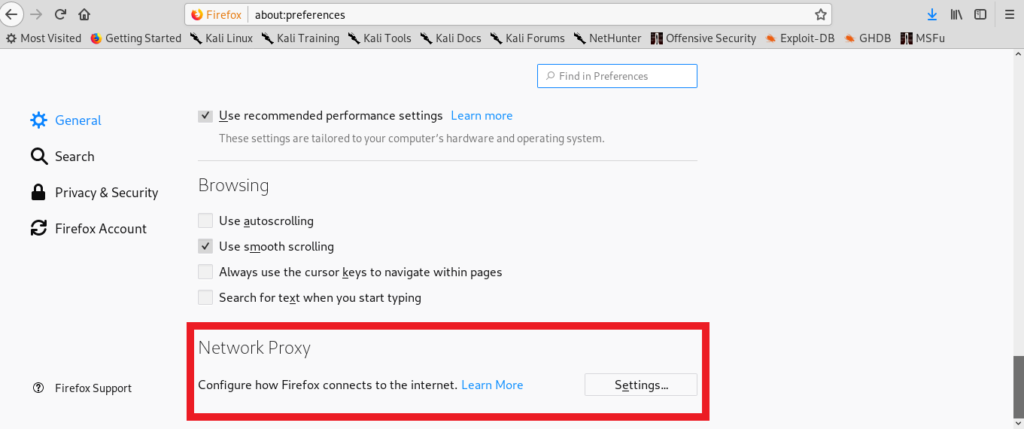
2.) Under Network Proxy, Click on Settings.

3.) Select Manual Proxy and enter IP = 127.0.0.1 and port = 8080. Also, check “use this proxy for all protocols.”
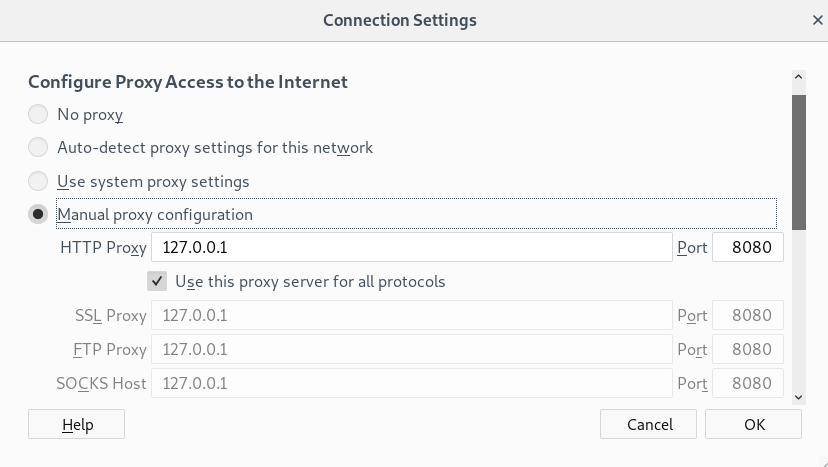
4.) Click on OK.
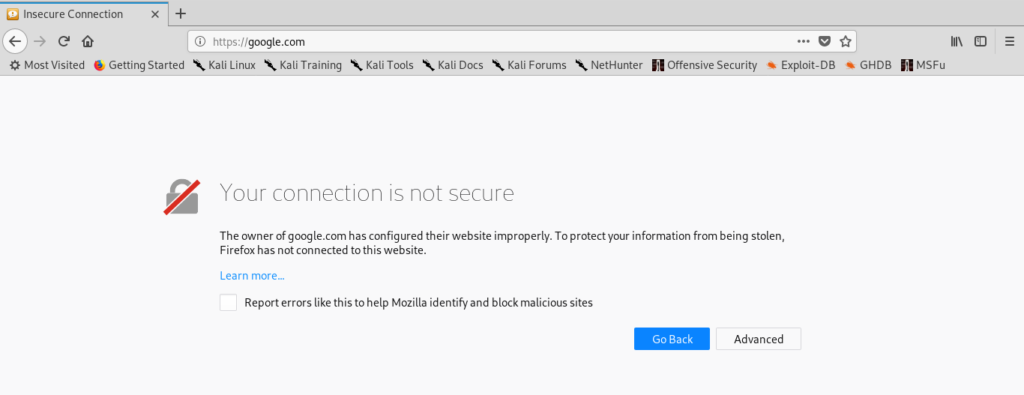
5.) Now, if you try to open any page that requires HTTPS. It will show you a certificate error. So, we need to install the Burp certificate.
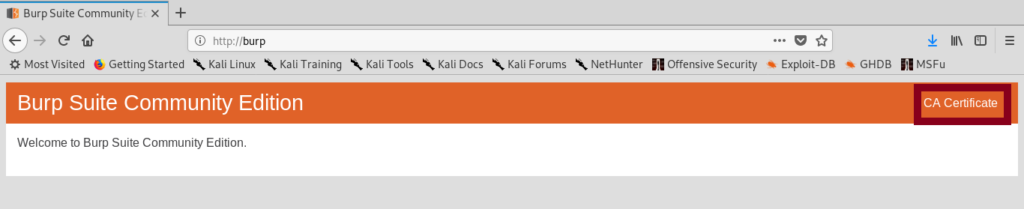
6.) Go to http://burp and click on the CA certificate. The CA certificate will be downloaded to your device.
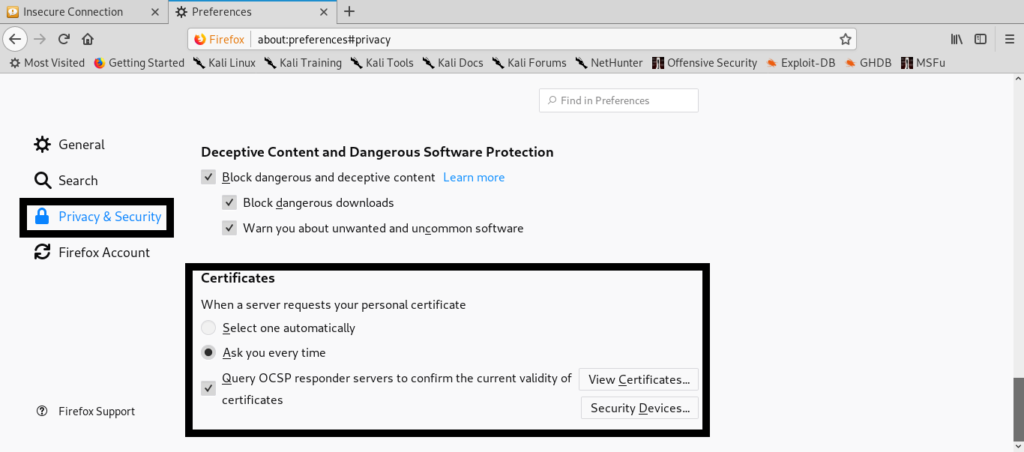
7.) Go to preferences in Firefox browser and under “privacy and security” click view certificates.
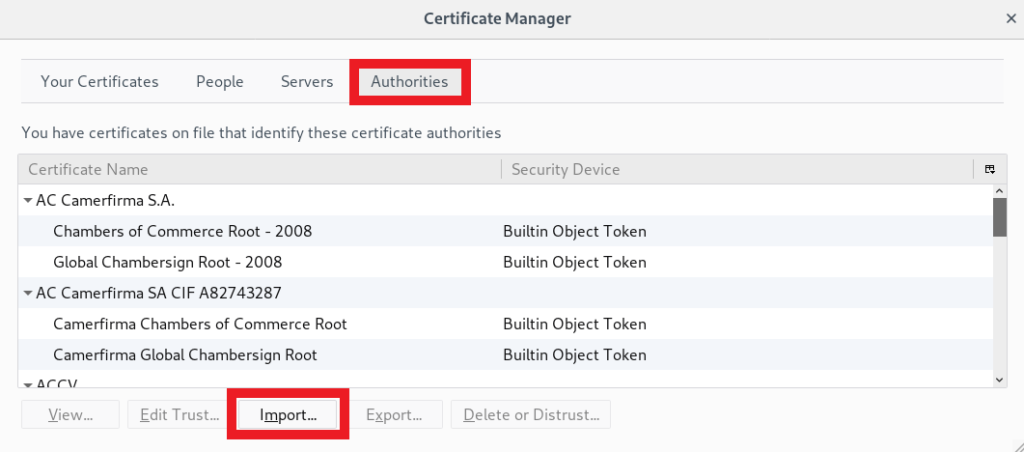
8.) Select the “Authorities” Tab and click on “Import” and select the CA certificate you’ve downloaded before.
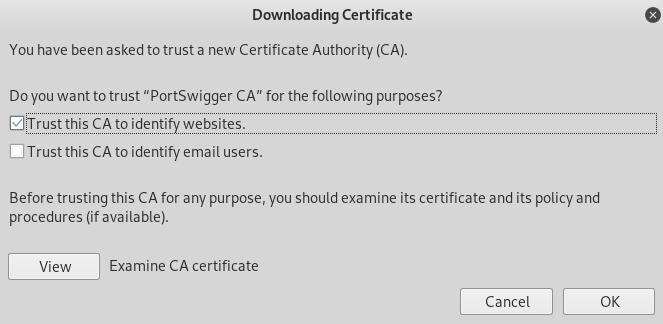
9.) Check “Trust this CA to identify websites” in the pop-up and click OK.
10.) Then, restart the Firefox browser. Now, you can easily browse “https” sites without any certificate errors.
Now, after closing the burp suite, you will notice that you can’t browse any websites because the proxy server is refusing connections.
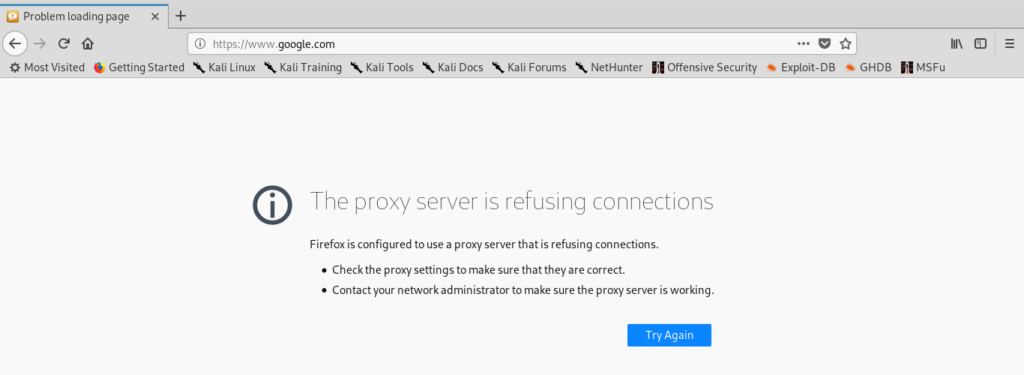
If you want to use Firefox browser to browse the website normally then go to preferences and under network and proxy, select “no proxy”. Whenever you want to use Burp, change it again to the manual proxy.

How to Intercept and Forward Requests?
Now, our proxy is set, so it’s time to intercept and forward the requests.
1.) Go to your browser and open a page for which you want to intercept the data. In my case, I am intercepting the data sent by google search engine.
2.) Start the Burp suite and click on the proxy and turn on intercept.
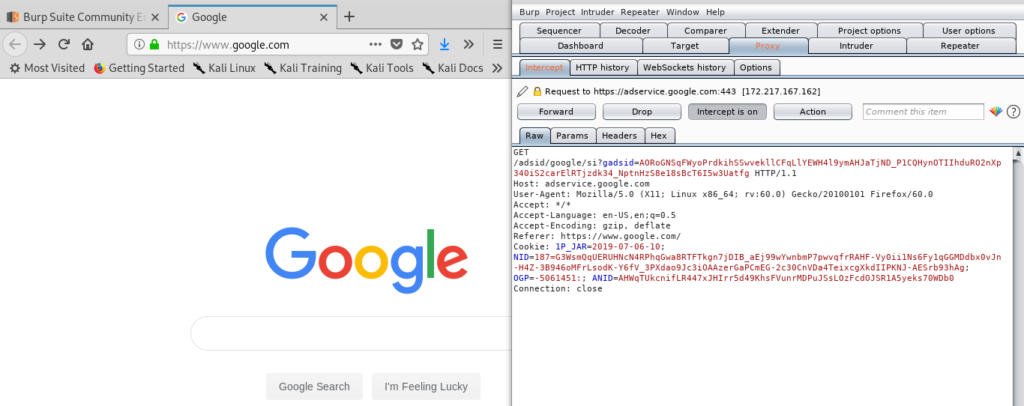
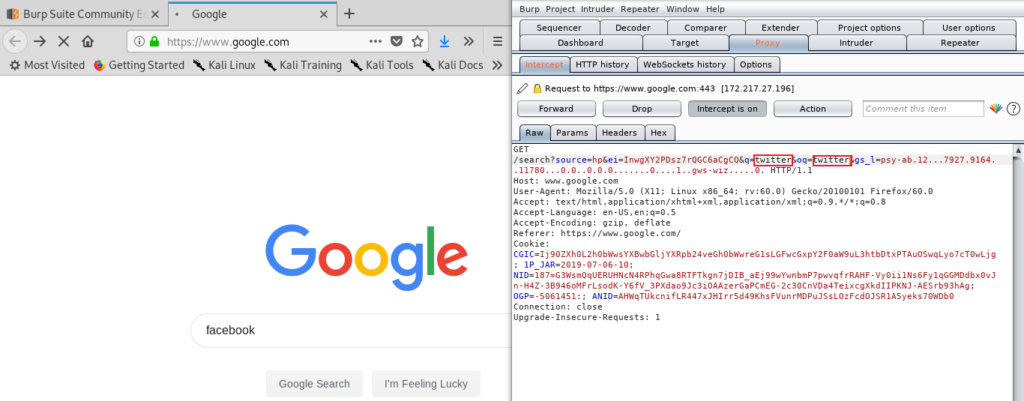
3.) Now, type anything in the search box and click on search. I am typing “Facebook”.
4.) Go to burp suite, you will see that burp has intercepted a connection.
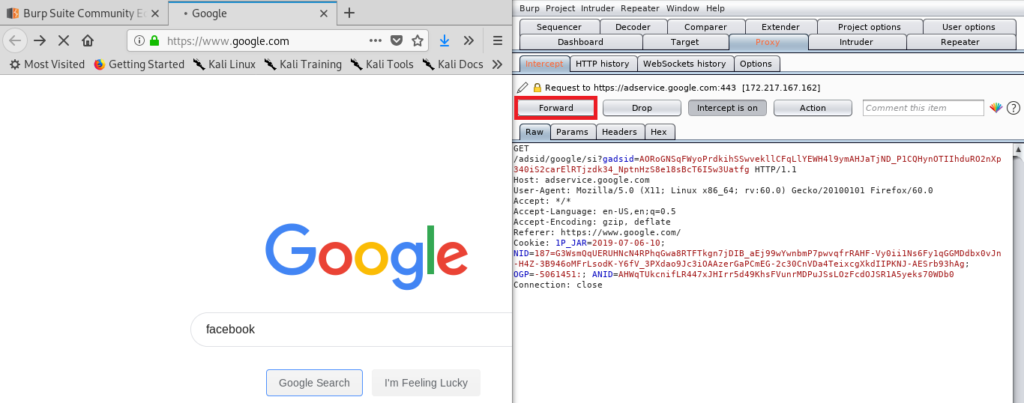
5.) Now, click on forward until you get google search engine sending “Facebook” query.
6.) Replace “Facebook” query by something else. I am replacing it with twitter.
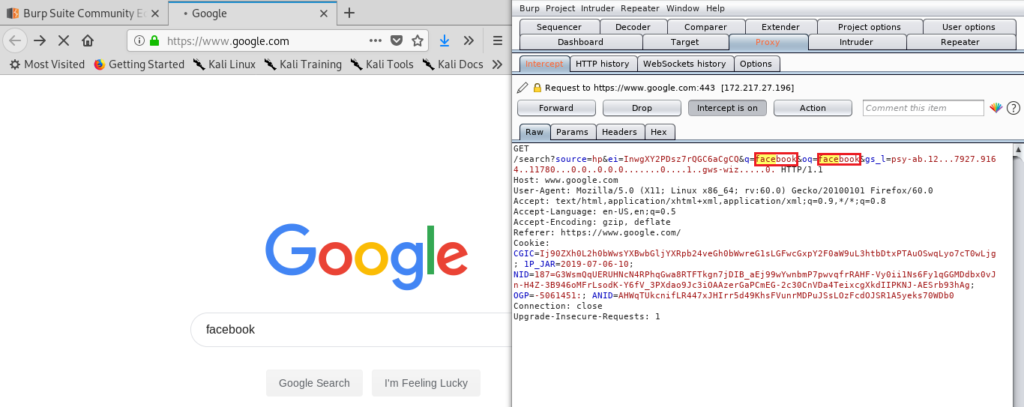
7.) Forward the request and you will see search results for “Twitter”.
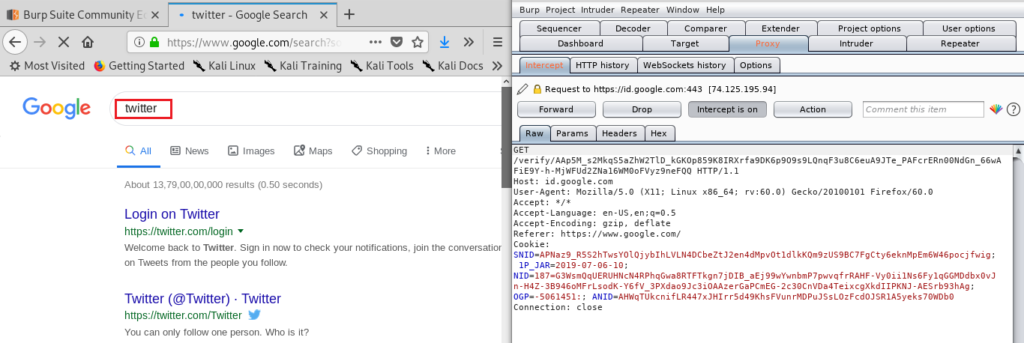
This is how you can modify the request before it’s sent to the server. I hope you enjoyed this burp suite tutorial.
Now, this was just an example of intercepting and forwarding the request. We’ve not hacked anything. Check out Hacking for Beginners: File upload vulnerability post, if you really want to see burp in action.

If you like this post, then follow Techsphinx on Facebook and Twitter for more reviews, tricks, tips and tutorials.
This article needs update or correction? Report the issue here so I can update it.