This post may contain affiliate links/ads and I may earn a small commission when you click on the links/ads at no additional cost to you. As an Amazon Affiliate, I earn from qualifying purchases. Techsphinx also participates in the StationX Affiliate program. You can read my full disclaimer here.

In this tutorial, I will show you how to install Atom Text editor on Ubuntu.
Atom is a cross-platform and open-source text editor from the makers of GitHub. It has a sleek design and has a long list of features which makes it one of the best text editor for programming.
Where editors like Sublime offer convenience but with limited extensibility and command Line Text editors like Vim and Emacs offer extreme flexibility but are not so convenient to use, Atom sits in between providing a zero-compromise combination of hackability and usability.
Here’s a list of some features that Atom provides out-of-the-box.
Features of Atom Text Editor
- It is open-source.
- Cross-platform (Works with Windows, Linux and OS X)
- Built-in package manager.
- Smart auto-completion.
- Multiple panes.
- File system browser.
- Find and replace.
- UI Theming and Customizations.
- Add / Build new features yourself.
- And many more.
Apart from all these features, thousands of open-source packages available which can be used to add new functionality to Atom editor.
Pre-requisites to Install Atom
- Ubuntu Installed and Running.
- Internet connection to download Atom package.
- Sudo / Root privileges.
- 64bit System
(If you want to install Atom on a 32bit system, then you have to build it from the source.)
How to Install Atom on Ubuntu?
There are multiple ways in which you can install Atom Text Editor on Ubuntu.
1. Downloading and Installing Atom (.deb) package.
2. Using Apt to install Atom.
3. Using Snap to install Atom.
I will show you these 3 methods in this post. You can install Atom using any method you prefer.
Let’s start with installing using the “deb” package.
Install Atom on Ubuntu using DEB package
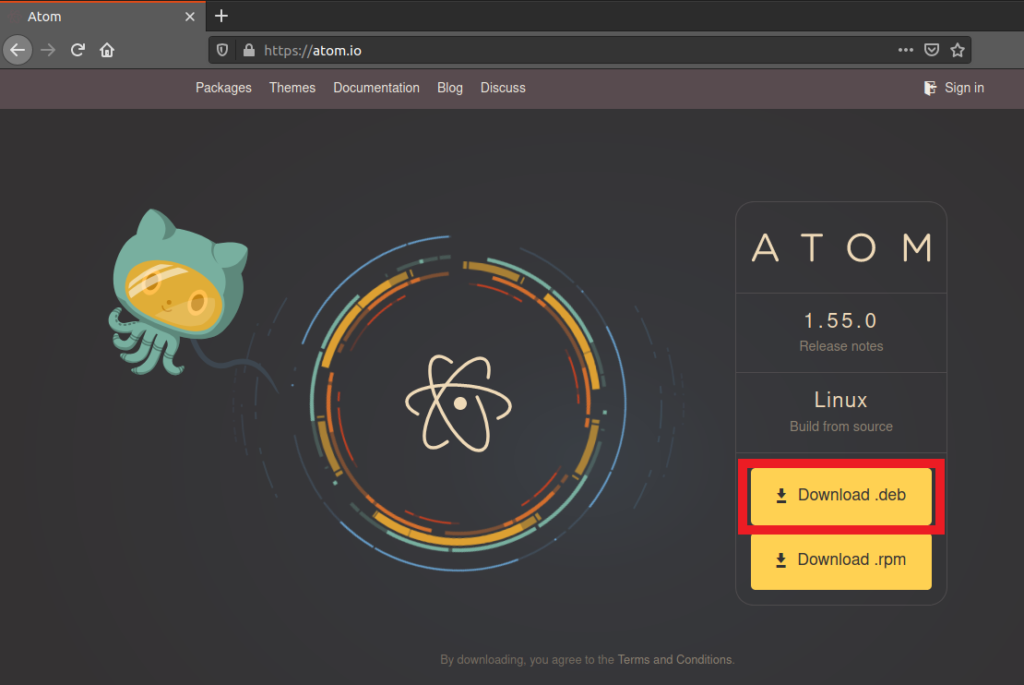
Downloading and installing Atom using the deb package from the official website ensures you’ll have the latest package.
1. Go to the Atom download page for Linux and download the deb file.
You can use any web browser to download the deb package from the Atom website.
2. After download, go to the downloaded location and double click the file to install it.

3. Click on Install and provide the password for authentication.
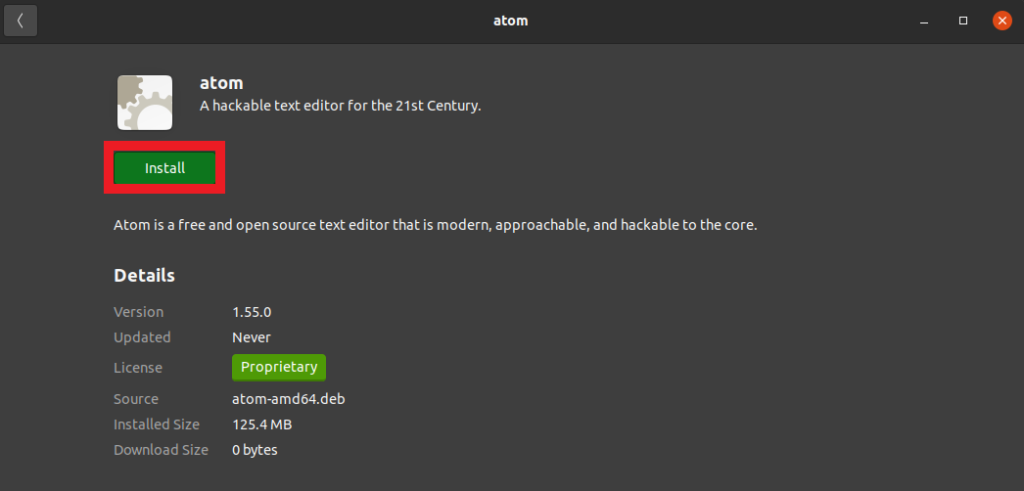
This will install the Atom text editor on your Ubuntu system.
Alternatively, you can also perform the above steps using the terminal.
1. Download the Atom deb installer using a browser (Just like before).
2. Now, go to the downloaded location and open the terminal.
3. Install it using the “dpkg” command.
sudo dpkg -i atom-amd64.deb
The above command may output an error.
Errors were encountered while processing:
atom
Don’t worry, just run:
sudo apt install -f
This will fix the broken packages and you are good to go.
Install Atom on Ubuntu using APT
Before proceeding with installation, it’s recommended to update the software repositories:
sudo apt update
1. Install the necessary packages that will be required to add the atom repositories:
sudo apt install wget software-properties-common apt-transport-https
2. Use wget to download and import the gpgkey.
wget -q https://packagecloud.io/AtomEditor/atom/gpgkey -O- | sudo apt-key add -
3. Add 64bit repository of Atom text editor on Ubuntu:
sudo add-apt-repository "deb [arch=amd64] https://packagecloud.io/AtomEditor/atom/any/ any main"
4. Update Repositories and Install Atom using Apt.
sudo apt update
sudo apt install atom
Install Atom on Ubuntu using Snap
1. Install Snap using the command:

sudo apt install snapd
2. Install Atom using Snap:
sudo snap install atom --classic
You can also install Atom graphically. A snap version of Atom is also available in Ubuntu Software Center.
1. Open “Ubuntu Software Center” and search for Atom text editor.
2. Click on the appropriate result and click on Install.
3. Once installed, you will see the option to remove.
Starting Atom and Additional Tips
I have mentioned multiple ways to install Atom text editor on Ubuntu.
After installing Atom, you can start it either graphically via the applications menu or through the terminal using the command:
atom
Here are some additional tips, that will help you to tailor the Atom editor according to your needs.
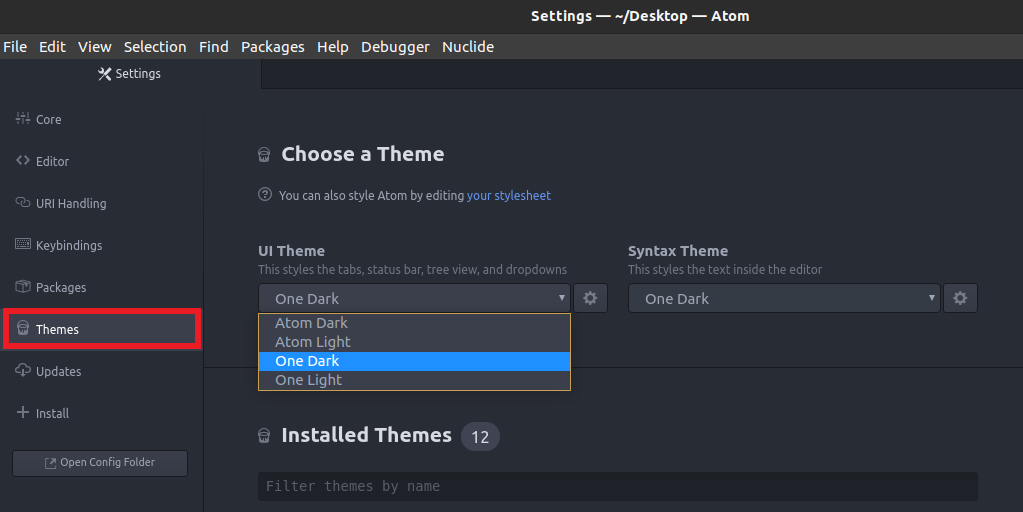
1. Activate Dark Mode
If you code at night or are susceptible to light, then changing the default light theme to dark will help you a lot.
You can change the theme of Atom editor by going to Edit > Preferences > Themes and change UI and syntax theme to “One Dark”.
You can also install any other theme of your choice.
2. Turn Atom Text Editor into an IDE
One of the best things about the Atom editor is the flexibility it provides to its users.
Atom is a text editor but you can also turn this text editor into a full-fledged IDE (Integrated Development Environment) like PyCharm, Eclipse, or IntelliJ IDEA.
To turn it into IDE all you need is to install the atom-ide-ui package.
1. Go to Edit > Preferences > Install.

2. Search for the atom-ide-ui package.
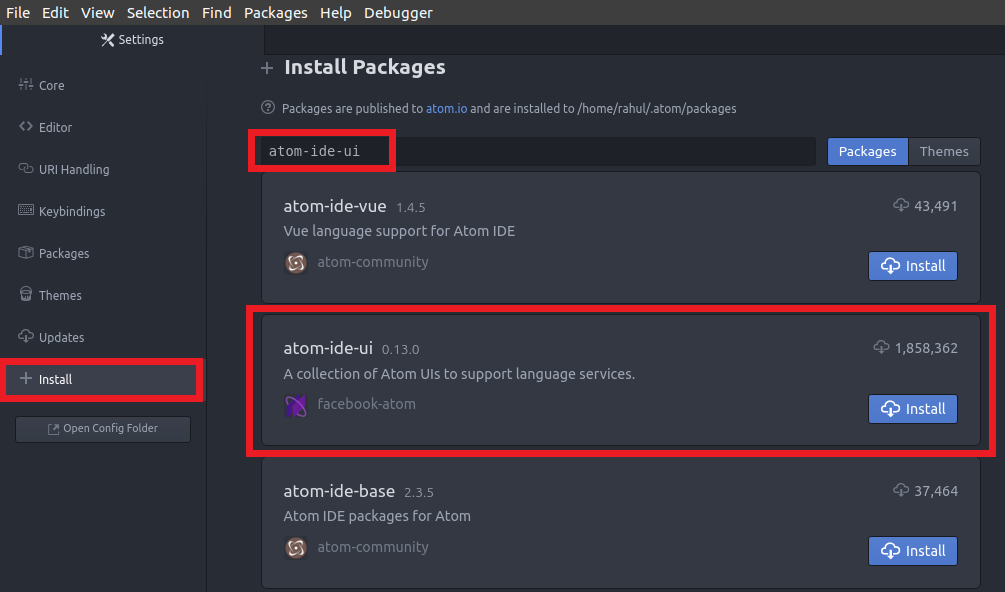
3. Install the appropriate package from the search output.
All you have to do now is to install a language package like PHP, Java, JavaScript, Csharp etc.
With this package installed you get the IDE features like auto tab completion, references, mouse hover, diagnostics etc.
Here’s the official documentation of the atom-ide-ui package, this will help you to get started.
3. Work with Git and GitHub from Atom
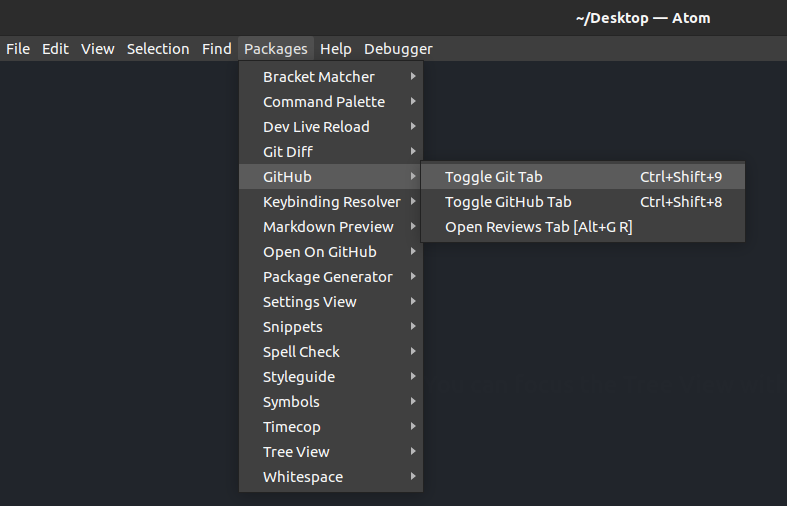
Atom has a Git and GitHub package that will help you to create new branches, stage and commit, push and pull, resolve merge conflicts, view pull requests and more, all from within your editor.
The best thing is that the GitHub package is already bundled with Atom, so you’re ready to go!
Just go to the “Packages” tab on the top and select GitHub from the dropdown. From there you can toggle Git and Github Tab. It will appear as the right sidebar of the Atom editor.
Uninstall Atom from Ubuntu
To uninstall Atom from Ubuntu using Apt run:
sudo apt remove atom
Also, remove the repository that we added for Atom:
sudo add-apt-repository --remove "deb [arch=amd64] https://packagecloud.io/AtomEditor/atom/any/ any main"
Use “autoremove” to remove unused dependencies.
sudo apt autoremove
To uninstall Atom using Snap run the following command:
sudo snap remove atom
Conclusion
I have shown you multiple ways to install Atom text editor on Ubuntu and also gave you some additional tips on customizing Atom so you can fully utilize its awesome features.
There are so many packages available for Atom that will make your editor even more awesome.
Do share your experience of Atom Text editor and tell me which text editor you prefer for your day to day work?

If you like this post, then follow Techsphinx on Facebook and Twitter for more reviews, tricks, tips and tutorials.
This article needs update or correction? Report the issue here so I can update it.