This post may contain affiliate links/ads and I may earn a small commission when you click on the links/ads at no additional cost to you. As an Amazon Affiliate, I earn from qualifying purchases. Techsphinx also participates in the StationX Affiliate program. You can read my full disclaimer here.

In this beginner’s guide, I will show you how to install Ubuntu 20.04 LTS on your system.
Ubuntu 20.04 (codename – Focal Fossa) was released in April 2020. It’s an LTS (Long-Term Support) release, meaning that it will receive support and updates for 5 years (until April 2025).
You can install Ubuntu on a physical machine or as a virtual machine (using VirtualBox or VMware). The installation steps are same; the only difference will be the disk partitioning step.
Pre-Requisites to Install Ubuntu
- Minimum 2 GB RAM
- 2 GHz dual-core processor or better
- Minimum 25 GB free hard disk space
- Active Internet Connection to download Ubuntu 20.04 ISO Image
- 4GB USB drive to create a bootable medium (Only if you want to install Ubuntu 20.04 on Main hardware)
- Virtualization software like VirtualBox or VMware (Only if you plan on installing Ubuntu as a virtual machine)
Steps to Install Ubuntu 20.04
If you are a beginner or don’t have enough experience with dual booting Linux, then I recommend installing Ubuntu on VirtualBox or VMware. This way you don’t mess up your main system.
Important: If you follow these steps on the main machine it will erase everything on your hard drive and install Ubuntu Linux.
I am installing Ubuntu 20.04 on VirtualBox in this post.
Step 1: Download the Ubuntu 20.04 ISO file
To install Ubuntu, you’ll need to download Ubuntu 20.04 ISO file. You can head over to the Ubuntu Download page to download the latest stable version of Ubuntu.
The time it takes to download will depend on your internet speed. Once finished, proceed to the next step.
Step 2: Prepare for Installation
You can install Ubuntu OS on the Main machine or virtual machine. The installation procedure will be almost same for both methods; the only difference will be the partitioning step.
If you want to install Ubuntu 20.04 as your main system, then you’ll need to create a bootable medium. I have written a step-by-step guide on creating a bootable USB for Linux, in case you need any help.
Once you’ve created bootable medium, restart your system and boot Ubuntu, then jump to the installation steps (Step 4 of this post).
If you plan to install on VirtualBox, then first create a VirtualBox container for Ubuntu 20.04 OS.
1. Start VirtualBox and click on new.
2. Fill in all the necessary details to create a new virtual machine.
Name: Ubuntu 20.04
Machine Folder: (You can change location, if you don’t have enough space on the current drive, I am leaving it as default.)
Type: Linux
Version: Ubuntu (64bit)
Memory Size: 2 GB (I am giving it 2 GB, you can select according to your system)

Hard Disk: Select the “Create a Virtual Hard disk now” option.
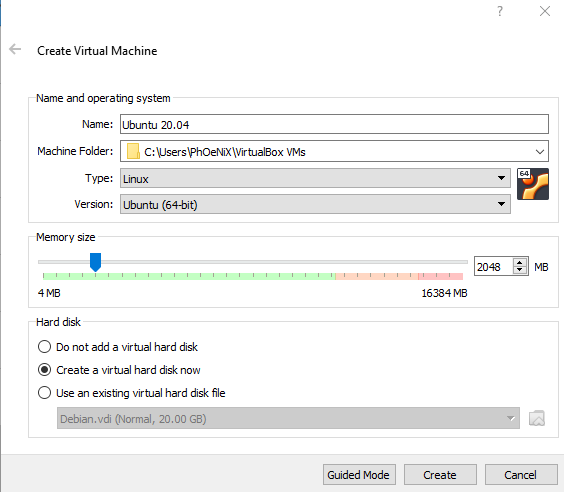
Then click on create.
3. Now, provide details to create a Virtual Hard disk.
File Location: Location of the virtual hard disk file.
File Size: 25 GB (I am giving it 25 GB; you can adjust according to the space available on your hard disk.)
Hard Disk File Type: VDI (VirtualBox Disk Image)
Storage on physical hard disk: Dynamically Allocated
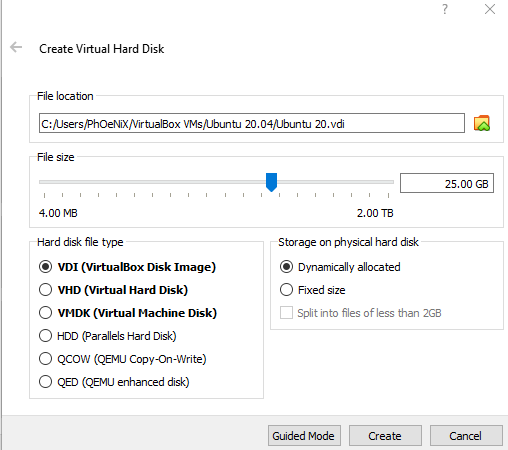
Click on create.
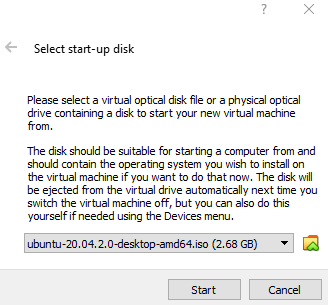
Step 3: Boot the Ubuntu 20.04 OS
Now, start the newly created virtual machine. When it asks to select a start-up disk, click on the yellow icon and browse for the Ubuntu 20.04 ISO file you downloaded earlier and click on start.
If you are installing Ubuntu 20.04 on the main machine, you may have to change the boot order in BIOS to boot from the bootable medium.
Step 4: Start Ubuntu Installation
Once, Ubuntu is booted, you will be presented with the option to “Try Ubuntu” or “Install Ubuntu”. You can choose to try Ubuntu before installing. However, note that no data will be saved while you are trying Ubuntu.
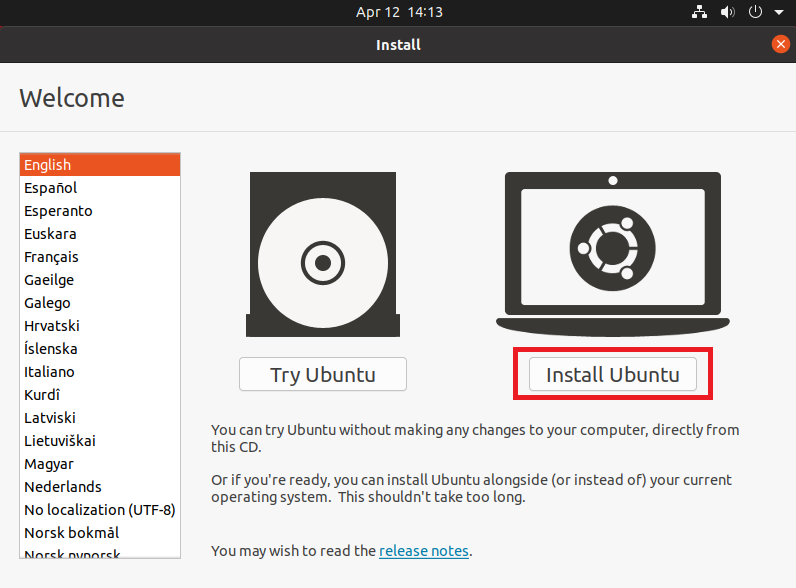
Once, you are ready you can start Ubuntu installation by clicking on “Install Ubuntu”.
Step 5: Select Keyboard Layout
Select your preferred keyboard layout from the list. You can also type something to detect the keyboard layout.
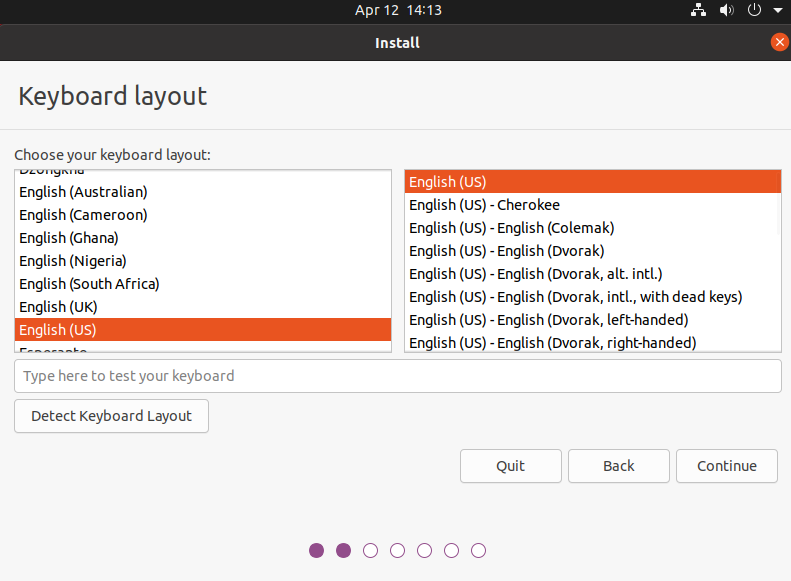
After that click on “continue”.
Step 6: Updates and Other Software
Next, you can choose between normal installation or minimal installation.
Normal Installation: It comes with most of the Ubuntu and multimedia apps for a full desktop experience.
Minimal Installation: It only has the basic utilities along with a web browser.
After choosing the installation type, you can configure the other options.

If you wish you can download updates while installing the Ubuntu 20.04 OS. Also, you can install third-party software for graphics, multimedia and Wi-Fi.
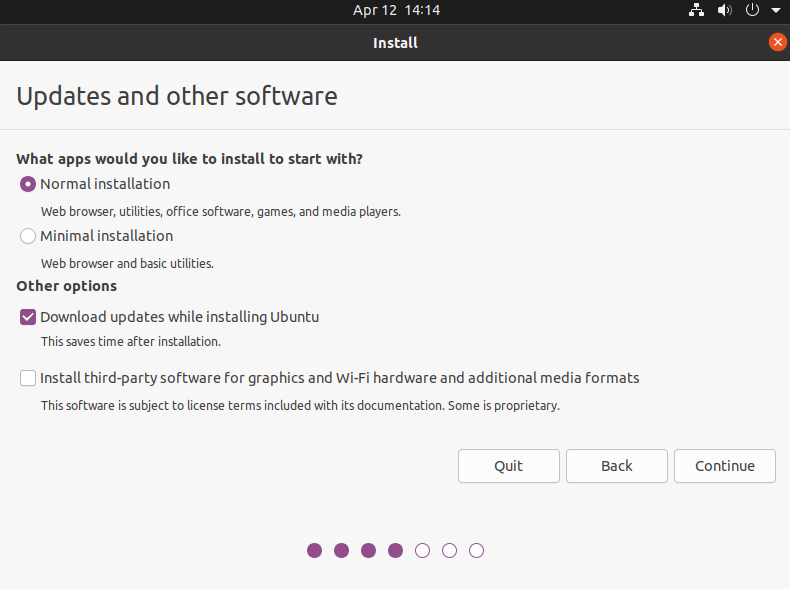
Once you have configured everything on this screen, click on “continue”.
Step 7: Partitioning Disks to install Ubuntu
If you are installing Ubuntu 20.04 as a virtual machine, then you can choose to “Erase disk and install Ubuntu” as it will not affect your main machine.
However, if you are installing it on your main machine, then you may need to select the “Something else” option and create partitions manually, else you may lose data or the currently installed operating system.
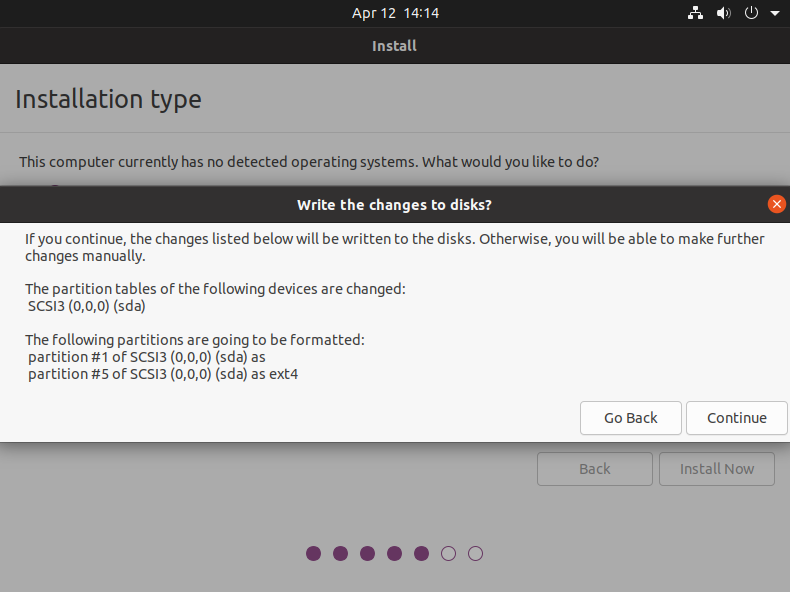
I am installing it on a virtual machine, so I am choosing the “Erase disk and install Ubuntu” option.
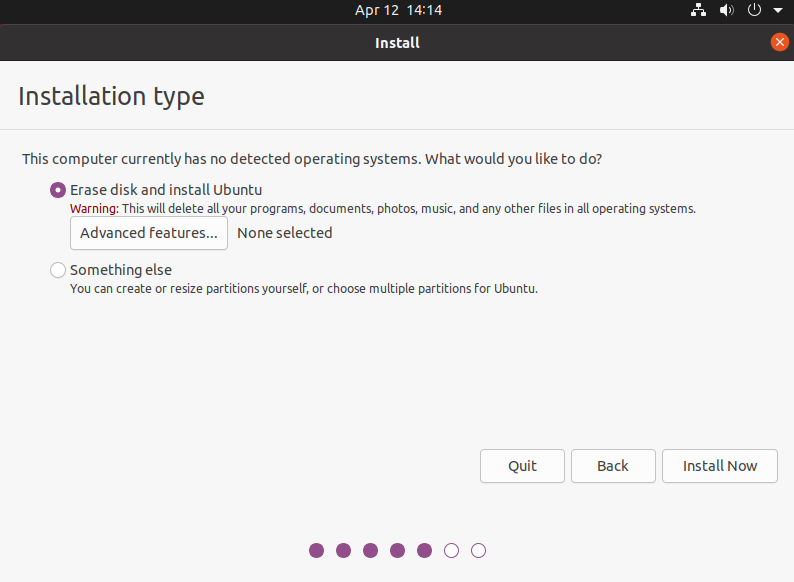
After clicking continue, check if everything is ok, then click continue again to “write changes to disk”.
Step 8: Select Location
On this screen, select your location. You can use the mouse to click on your county or type in the box.
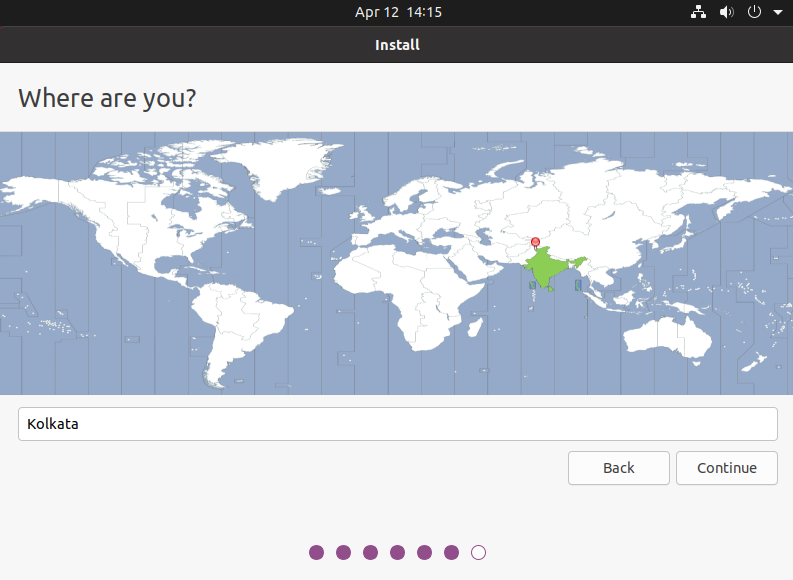
Based on your location, Ubuntu will set the time zone for your system.
After selecting the location click on “continue”.
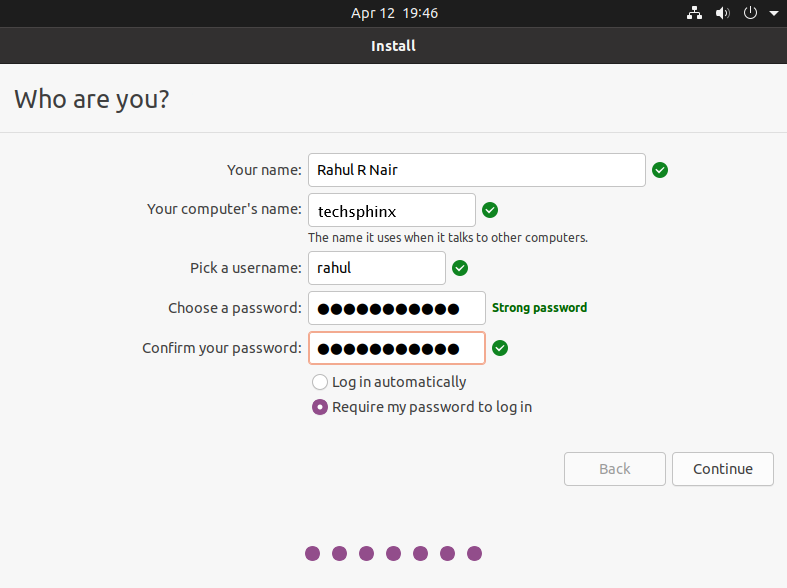
Step 9: Set up User and Password
Create a User and set up the password by filling in the following information:
Your Name: Enter Your Full Name here.
Your Computer’s Name: This is the hostname of your system. This name is used when other system wants to communicate to this system on the network or vice versa.
Username: Pick a username for your system.
Choose a Password: Choose a strong password for your user. A strong password consists of letters, numbers and special characters.
Confirm Password: Confirm your password.
If nobody else uses this system, you can choose to log in automatically. However, for security reasons, it is recommended to always use a password to log in to your system.
Check that you have set up everything correctly, after that click on “continue”.
After that, Ubuntu will start copying system files. Wait patiently for the process to finish.
Step 10: Finish Installation and Start Ubuntu
Once the installation is finished, you will be prompted to restart the computer to finish the Ubuntu installation.

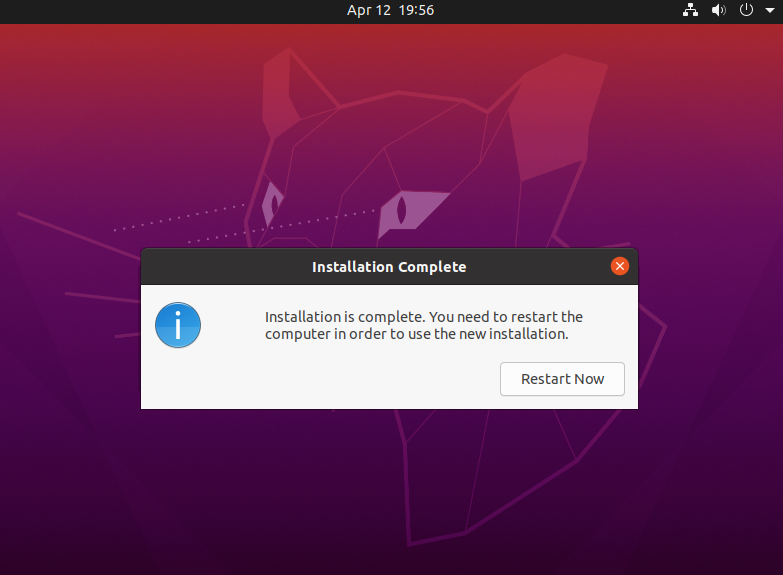
Remove any installation media and press “enter”.
If you have dual booted Ubuntu 20.04 on your main system, then you may have to go through the system bios settings to start GRUB and boot into Ubuntu.
After successful booting, you will see Ubuntu’s login screen. Login to your system using the password and you’ll be greeted with the Ubuntu Desktop.
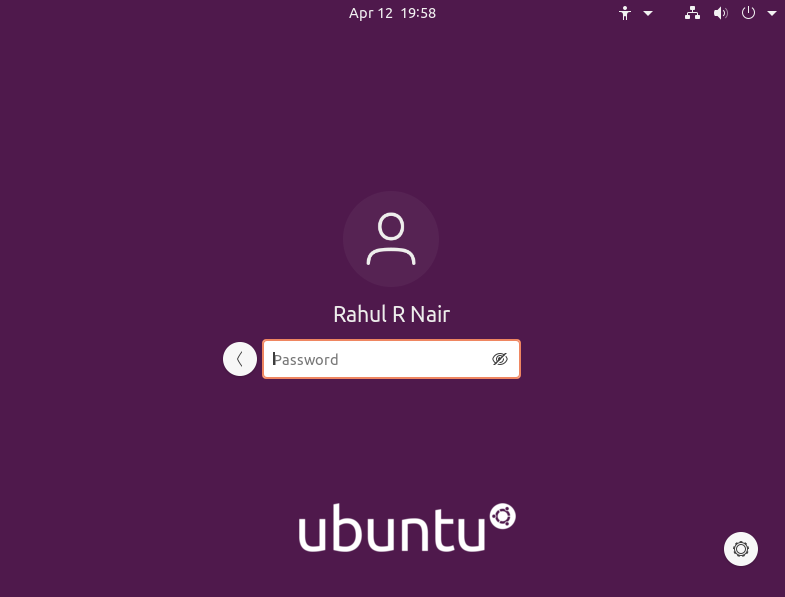
This indicates that Ubuntu 20.04 is installed on your system.
Additional Tips
Here are some additional tips for you after installing Ubuntu 20.04.
Connect Your Online Accounts
When you log in to your newly installed Ubuntu System, a new window will pop up telling you to connect your online accounts.
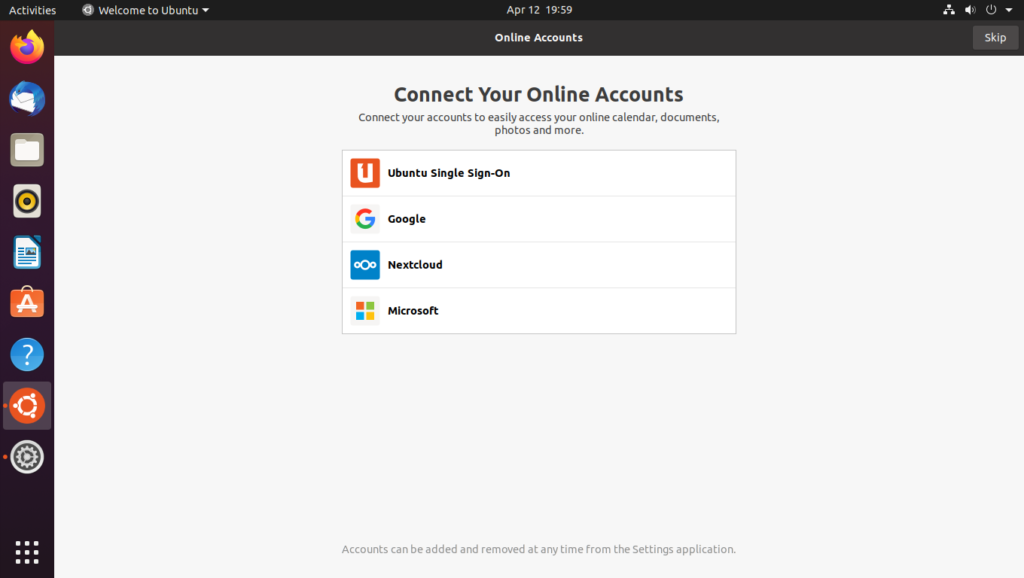
You can connect your accounts and easily access your online calendar, photos, documents etc.
Update System Repositories and Upgrade Packages
After installation, it is recommended to update software repositories and installed packages.
To do that, open a terminal and run the following command:
sudo apt update && sudo apt upgrade
Enter your account password when asked.
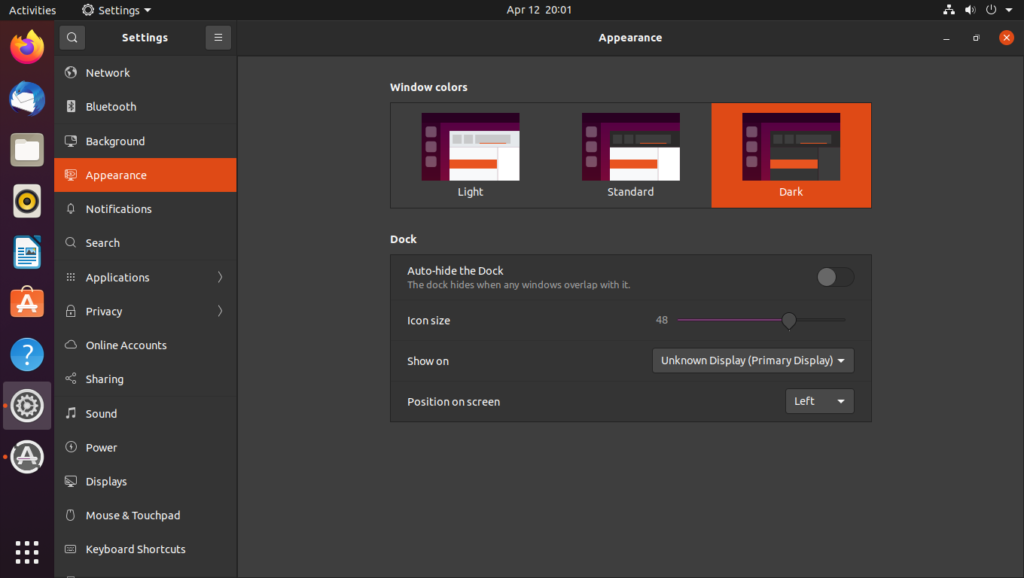
Switch to Dark Mode
If you are susceptible to light or you work at night, then you can toggle the system-wide dark mode on Ubuntu 20.04.
Go to Settings > Appearance, then select “Dark’’ under windows color.
Conclusion
As you’ve seen installing Ubuntu is very intuitive. Even if you are a beginner, the graphical installer of Ubuntu makes everything very easy.
I hope this tutorial helped you to install Ubuntu 20.04 without any problems.
If you have any questions or feedback, then feel free to leave a comment.

If you like this post, then follow Techsphinx on Facebook and Twitter for more reviews, tricks, tips and tutorials.
This article needs update or correction? Report the issue here so I can update it.