
This post may contain affiliate links/ads and I may earn a small commission when you click on the links/ads at no additional cost to you. As an Amazon Affiliate, I earn from qualifying purchases. Techsphinx also participates in the StationX Affiliate program. You can read my full disclaimer here.

This step-by-step tutorial demonstrates how to install Debian 10 Buster on your system.
Debian 10 was initially released in 2019, the latest stable version is 10.9 as of writing this post. In this guide, I am installing Debian 10.9 on VirtualBox.
Even if you are installing Debian on the main hardware, the steps are same except for the partitioning part.
Pre-Requisites to install Debian
- Minimum 2 GB RAM
- Minimum 20 GB free hard disk space
- Active Internet Connection to download Debian ISO Image
- 4GB USB drive to create a bootable medium (Only if you want to install OS on Main hardware)
- Virtualization software like VirtualBox or VMware (Only if you plan on installing Debian as a virtual machine)
Steps to Install Debian
If you are a beginner or don’t have enough experience with dual booting Linux, then I recommend installing Debian on VirtualBox or VMware. This way you don’t mess up your main system.
Important: If you follow these steps on the main machine it will erase everything on your hard drive and install Debian OS.
Step 1: Download the Debian ISO file
You can install Debian through the netinst (network install) ISO file or through the DVD ISO file.
If you downloaded the netinst ISO, then you’ll need a constant internet connection to install Debian.
I am downloading the DVD ISO image of Debian, which is larger than netinst ISO, but I don’t need a constant internet connection to install it.
To download the Debian 10 ISO file, go to the official Debian releases page.
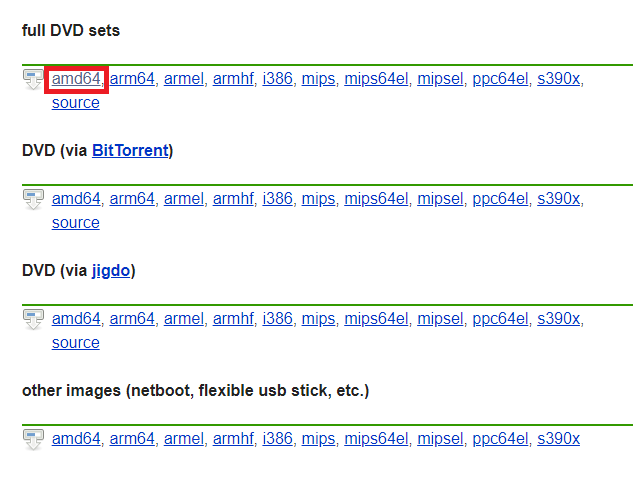
Under the “Full DVD Sets” section, you’ll find the download option for both 64-bit (amd64) and 32-bit (i386) DVD images.
I am clicking on the “amd64” option to download 64-bit Debian 10 ISO file. You can select other options according to your system architecture.
On the next page, you see the DVD ISO files. Just download the first DVD, the other ones contain extra packages for Debian.
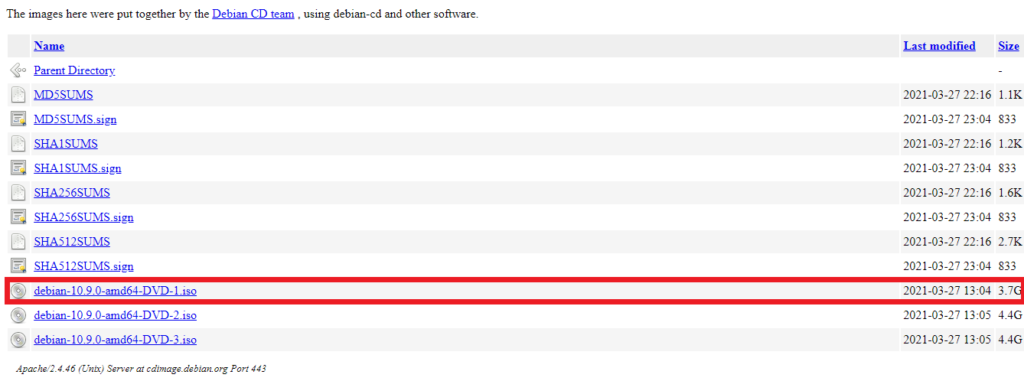
Once downloaded, proceed to the next step.
Step 2: Prepare for Installation
You can install Debian 10 Buster on the main machine or virtual machine. The installation procedure will be almost same for both methods; the only difference will be the partitioning step.
If you want to install Debian as your main system, then you’ll need to create a bootable medium. I have written a step-by-step guide on creating a bootable USB for Linux, in case you need any help.
Once you’ve created bootable medium, restart your system and boot the Debian OS, then select the “graphical install” option and jump to step 4 of this post.
If you plan to install on VirtualBox, then first create a VirtualBox container for Debian 10.
1. Start VirtualBox and click on new.
2. Fill in all the necessary details to create a new virtual machine.
Name: Debian
Machine Folder: (You can change location, if you don’t have enough space on the current drive, I am leaving it as default.)

Type: Linux
Version: Debian (64bit)
Memory Size: 2 GB (I am giving it 2 GB, you can select according to your system)
Hard Disk: Select the “Create a Virtual Hard disk now” option.
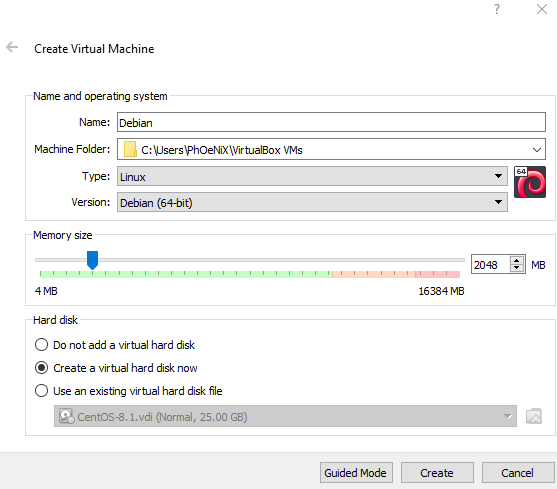
Then click on create.
3. Now, provide details to create a Virtual Hard disk.
File Location: Location of the virtual hard disk file.
File Size: 20 GB (I am giving it 20 GB; you can adjust according to the space available on your hard disk.)
Hard Disk File Type: VDI (VirtualBox Disk Image)
Storage on physical hard disk: Dynamically Allocated

Click on create.
Step 3: Boot the Debian OS to install Debian
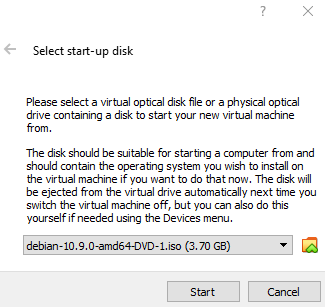
Start the newly created virtual machine. When it asks to select a start-up disk, click on the yellow icon and browse for the Debian OS ISO file you downloaded earlier and click on start.
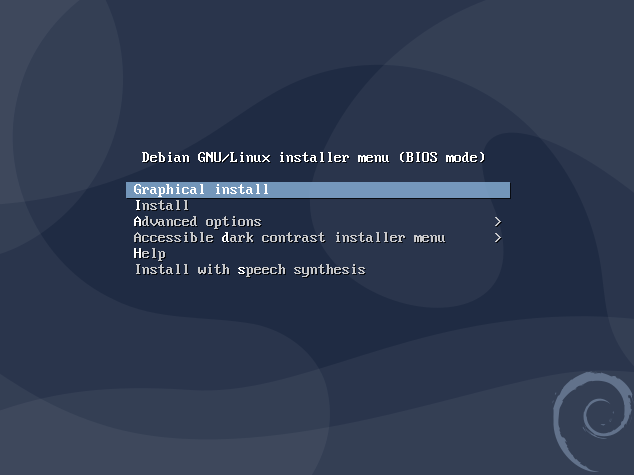
Once Debian 10 is booted, you will see the installation options. Choose the “Graphical install” option.
Step 4: Set Up Language, Location, and Keyboard
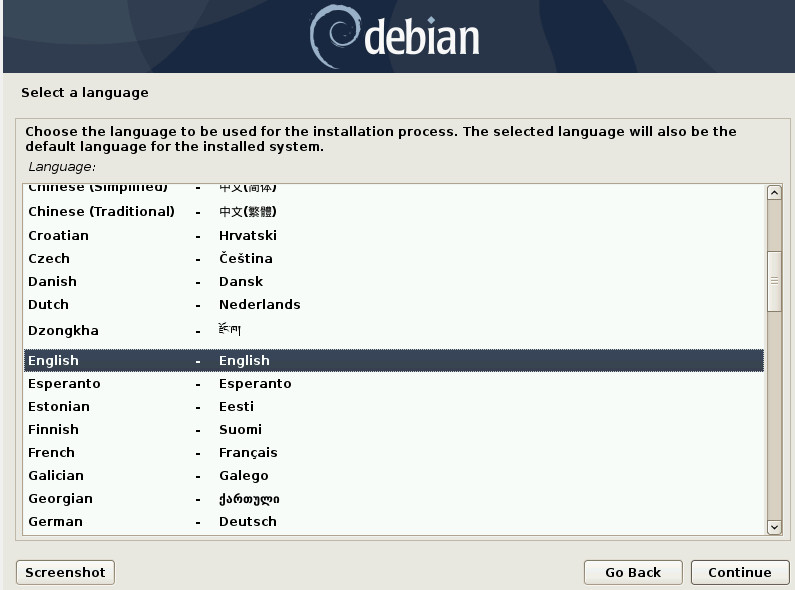
1. After choosing graphical install, you will be prompted to select a language. Choose your preferred language and click “Continue”.
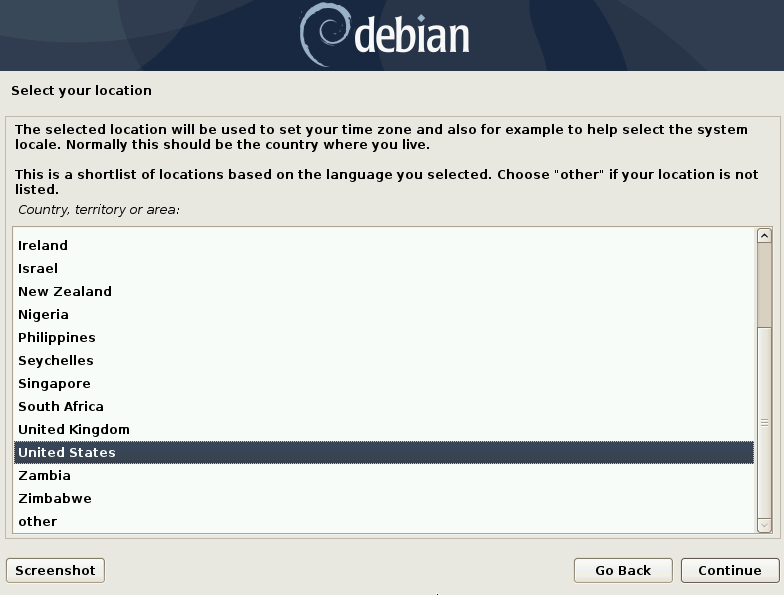
2. Next, select your location and click on “continue”. Based on this location, Debian will set up your timezone.
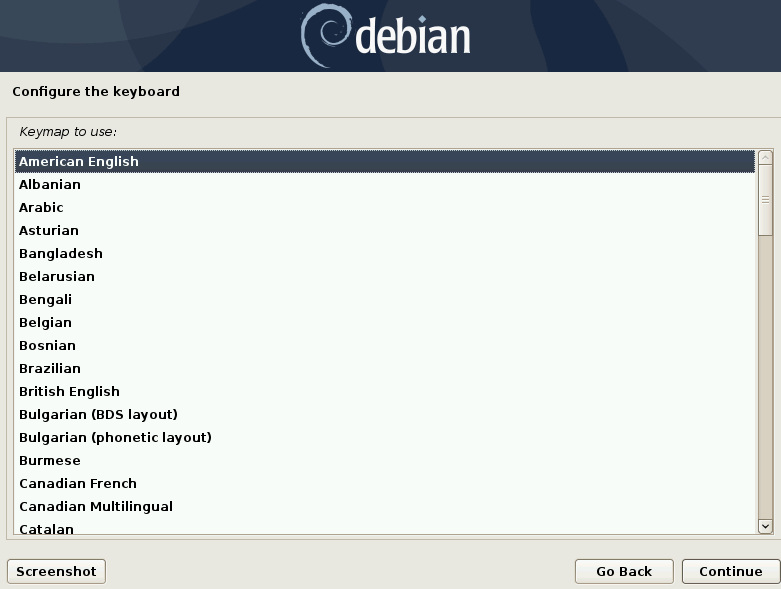
3. Now, select your preferred keyboard layout and click on “continue”.
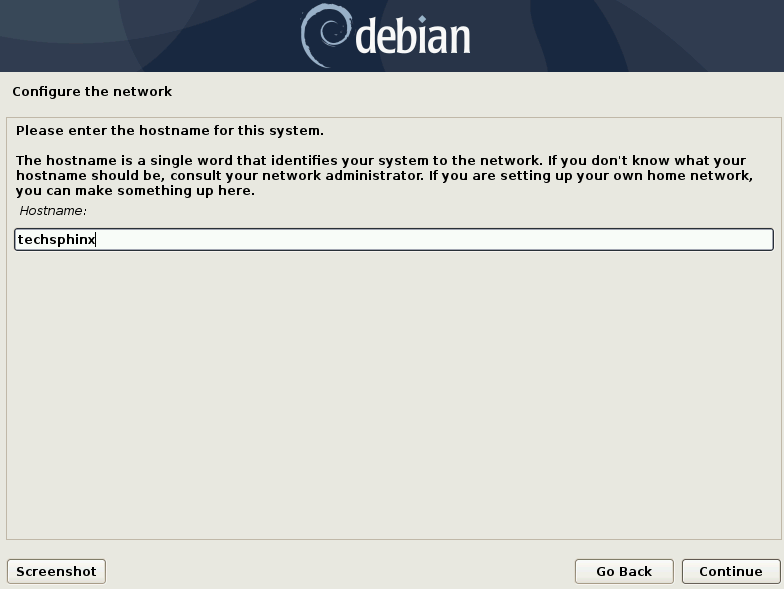
Step 5: Configure Network
1. Provide a hostname for your Debian system. Using this hostname, other systems can identify it on the network. Enter the hostname and click on “continue”.
(I am using “techsphinx” as hostname)
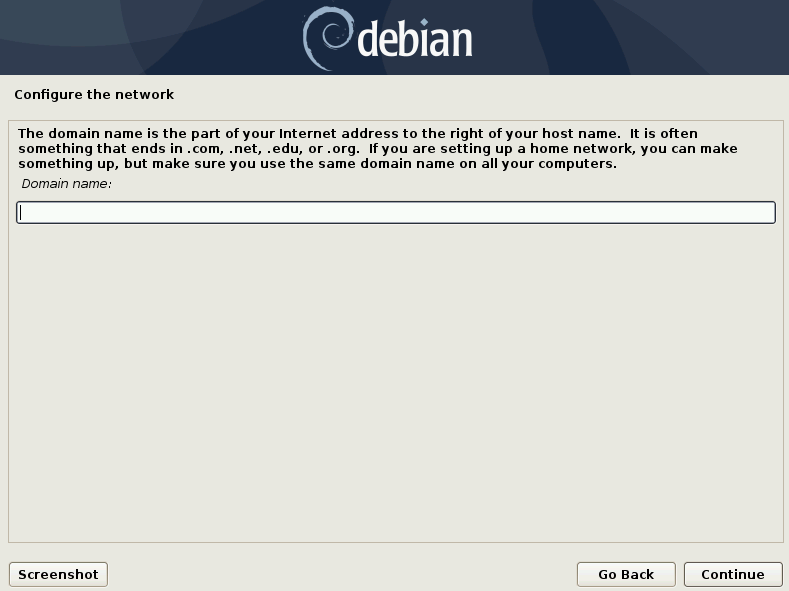
2. After hostname, it’s time to set up a domain name. The domain is a phrase followed by .com, .org, .net etc. If you don’t have one, you can leave this option empty.
Step 6: Set Up Users and Passwords
1. Start by setting up a strong root password. You don’t want the root access of your Debian system to fall into wrong hands.

Therefore, choose a strong password that contains a mixture of letters, numbers and special characters.
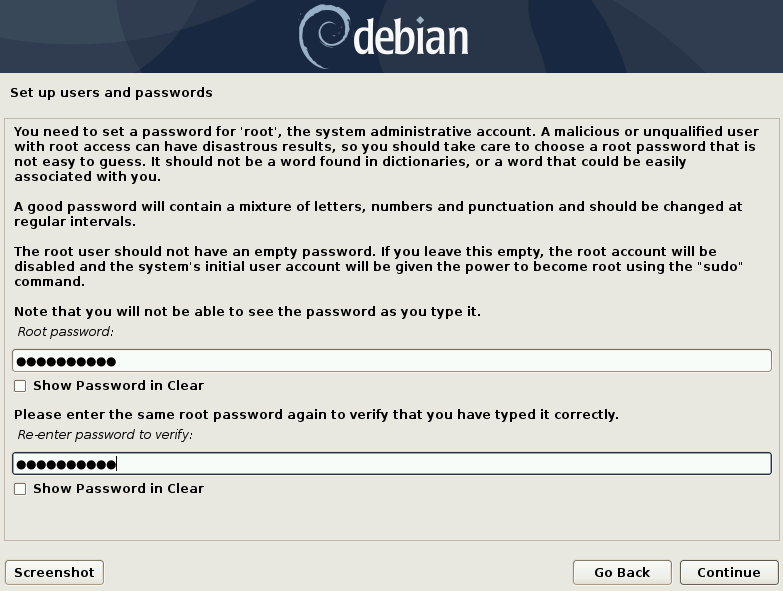
After typing the root password click on “continue”.
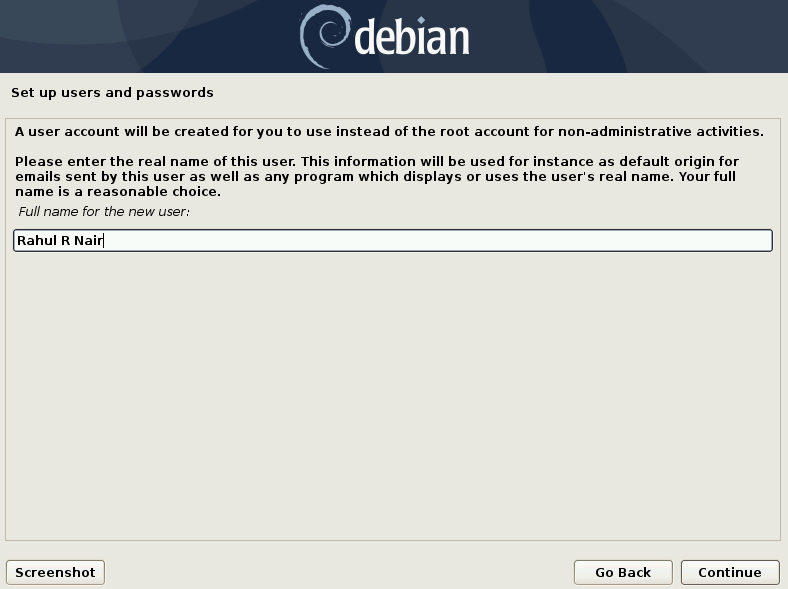
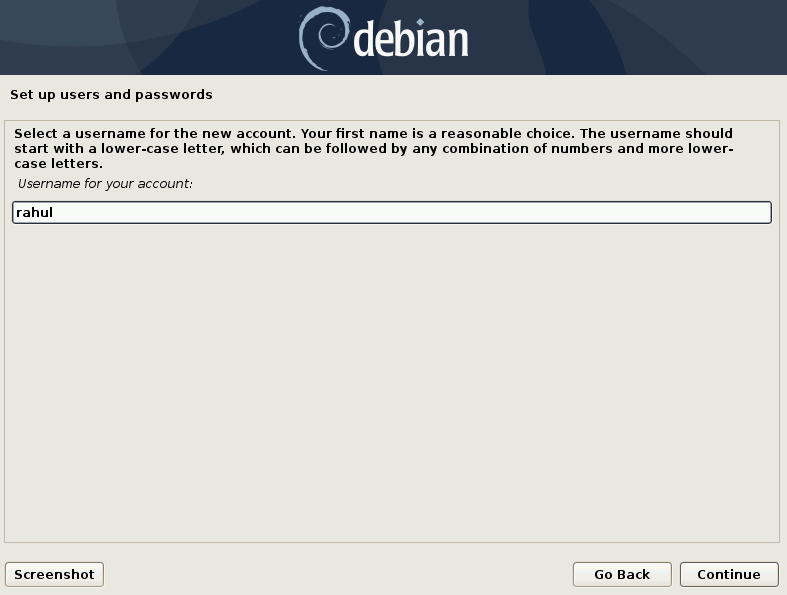
2. Now, create a non-administrative user for your Debian system. Type your full name and click on “continue”.
3. Choose a username and click on “continue”.
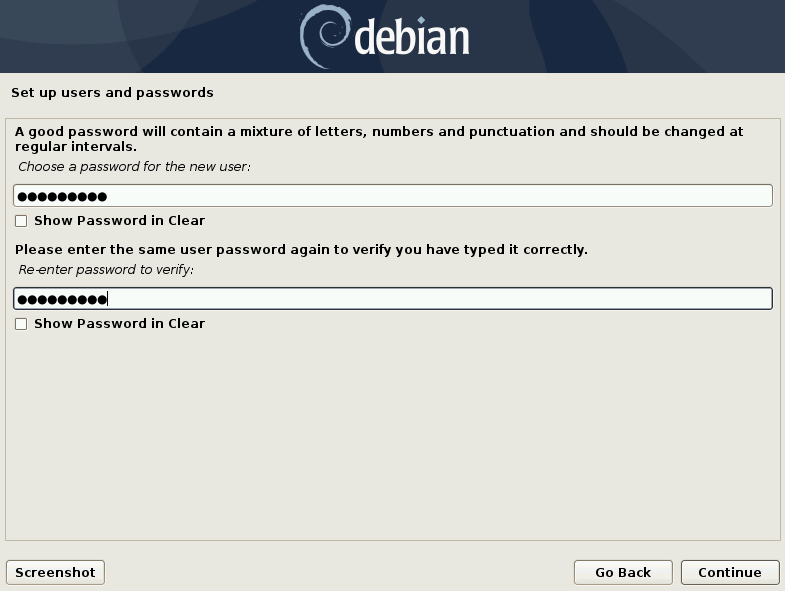
4. Next, choose a strong password for your user and click on “continue”.
Step 7: Configure the Clock
To configure the clock, you can select your desired time zone from the list.
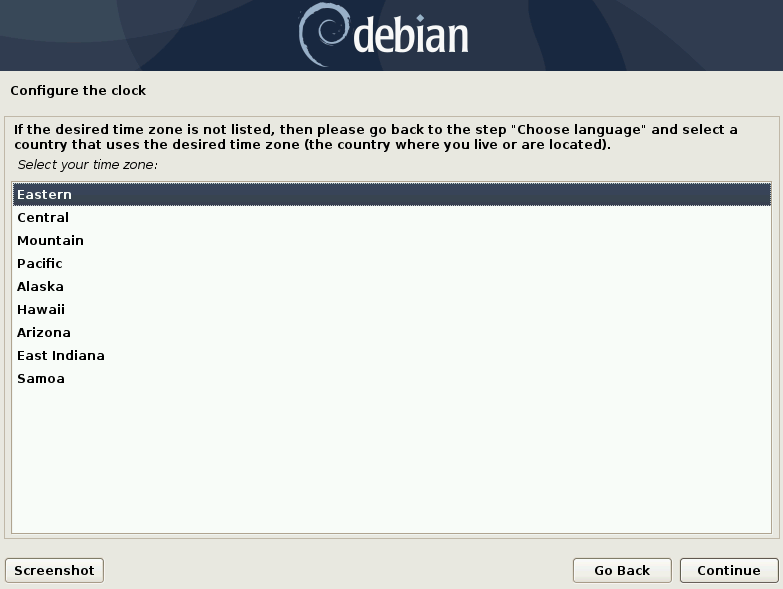
If your desired time zone is not on the list, then you have to go back to “Step 4” of this post and choose a country that has your desired time zone.
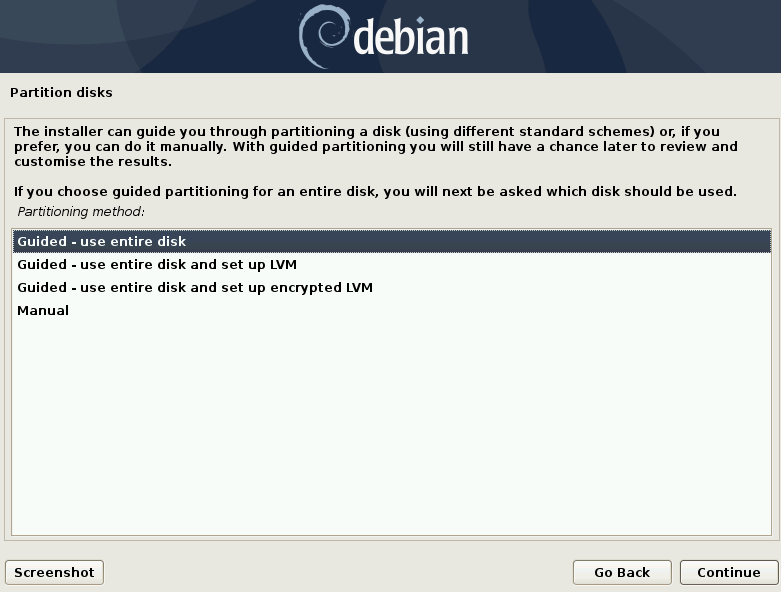
Step 8: Partition Disk for installing Debian
If you are installing Debian 10 as a virtual machine, then you can choose to erase everything (selecting Guided – Use Entire Disk Option) as it will not affect your main machine.
However, if you are installing it on your main machine, then you may need to select the “manual” option and create partitions manually, else you may lose data or the currently installed operating system.
I am installing it on a virtual machine, so I am choosing the “Guided – Use Entire Disk” option.
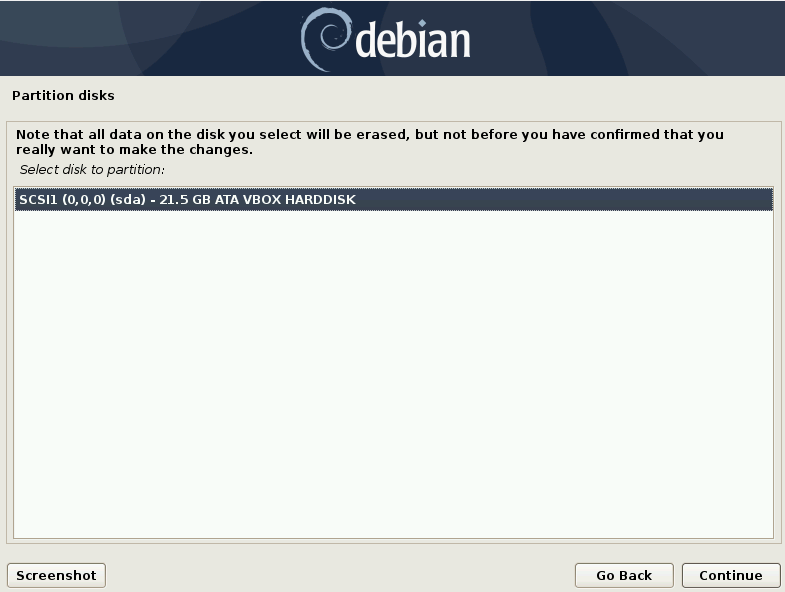
On the next screen, choose the hard disk you want to install Debian on and click on “continue”.
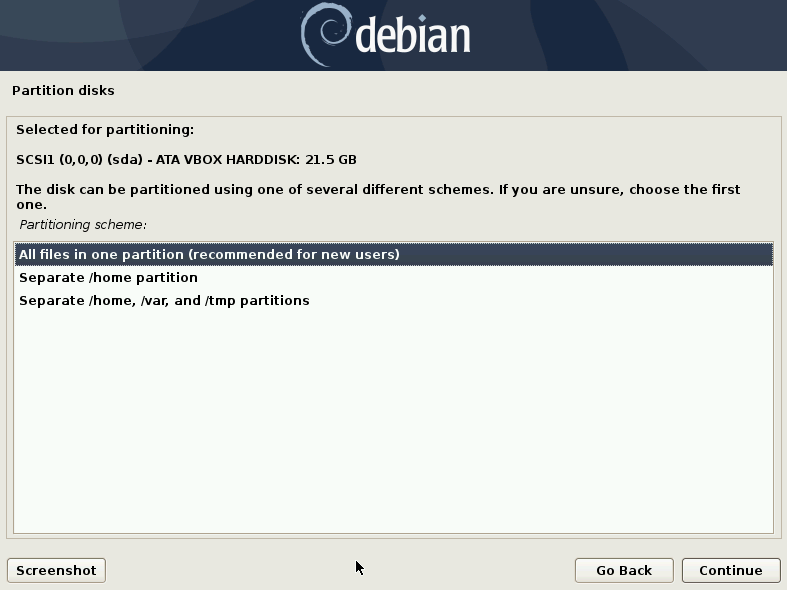
If you are a beginner, then select the first option “all files in one partition” and click on “continue”.
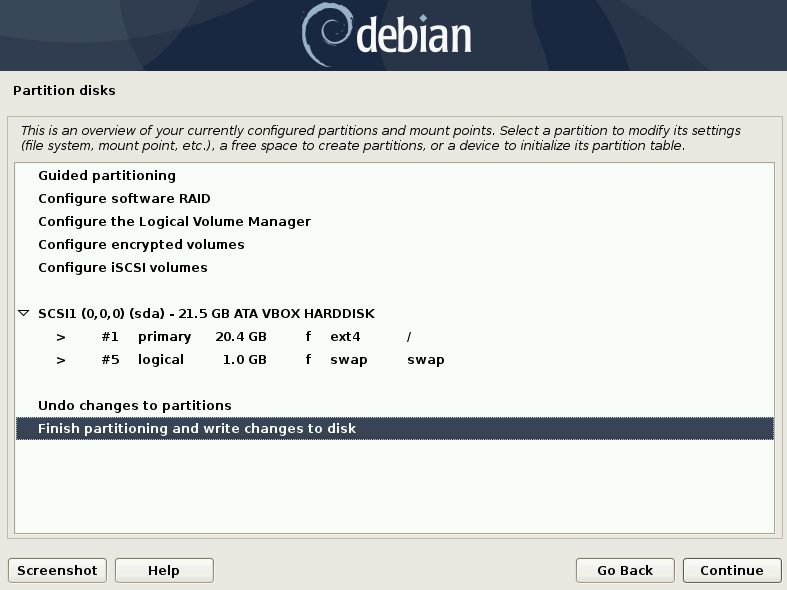
Check if everything is OK, then select “Finish partitioning and write changes to disk” and click on “continue”.
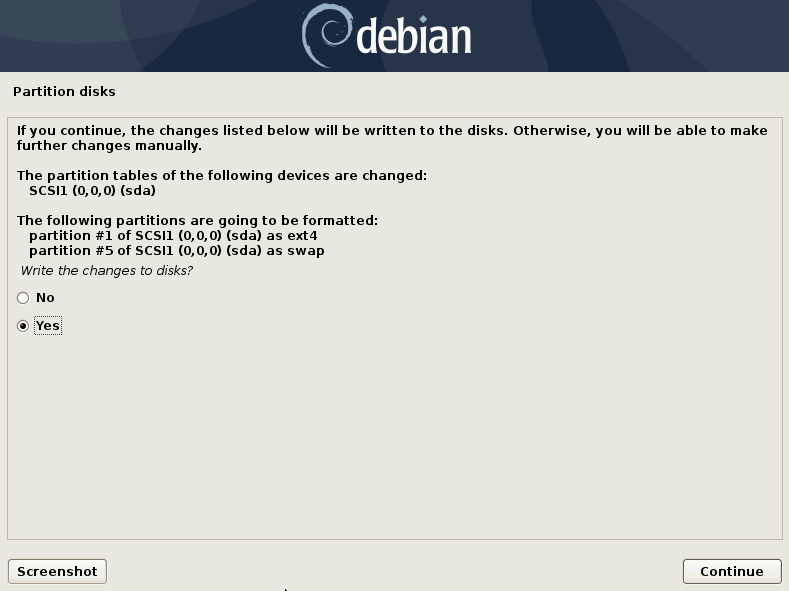
Choose “Yes” to write changes to disk and click on “continue”.
Step 9: Additional Configuration
Before wrapping up the Debian installation, let’s have a look at few additional configurations.
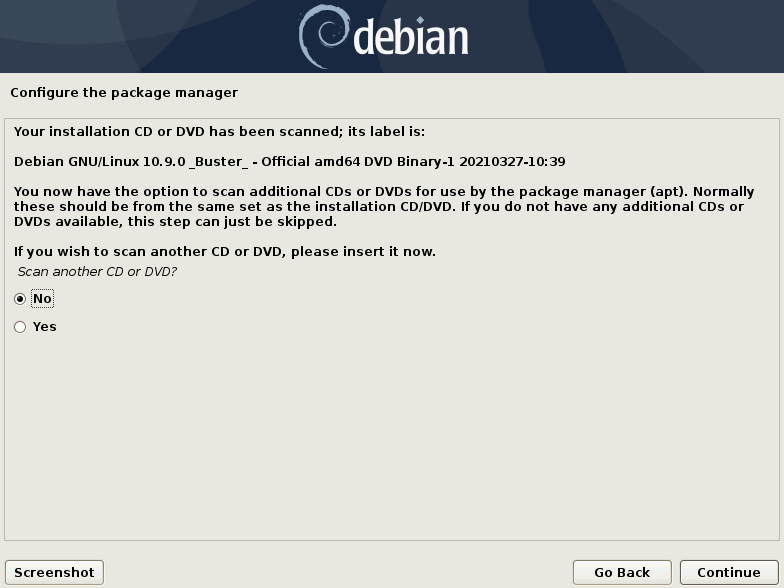
Configure the Package manager
1. If you have downloaded the other DVDs or CDs that contain extra packages, then this is a good time to scan them.
If you don’t have any extra DVDs or CDs then click “NO” and click on “continue”.
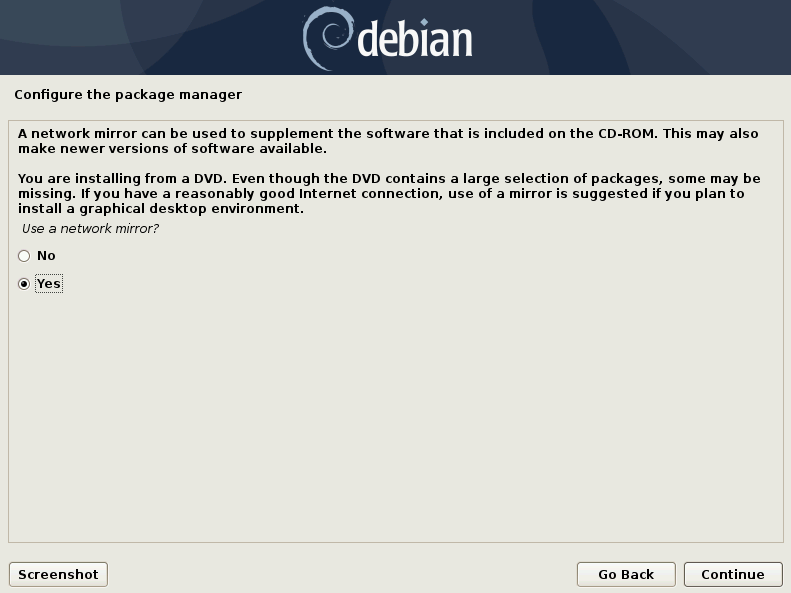
2. Next, you will be prompted to configure a network mirror. Configuring a network mirror will help you to download extra and updated packages from the Debian archive.
If you want to use a network mirror, then choose “yes” and click on “continue”.
3. Select a Debian archive mirror country. This will help you to download the packages at a good speed.

Note: The nearby countries or even your own may not be the best choice.
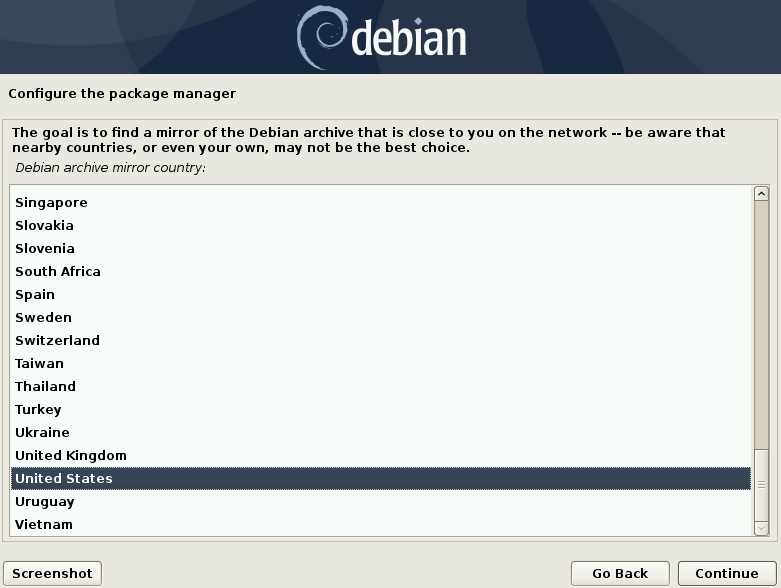
Click on “Continue”.
4. Next, choose a Debian archive mirror that you think will provide the best connection. If you are unsure then choose:
deb.debian.org
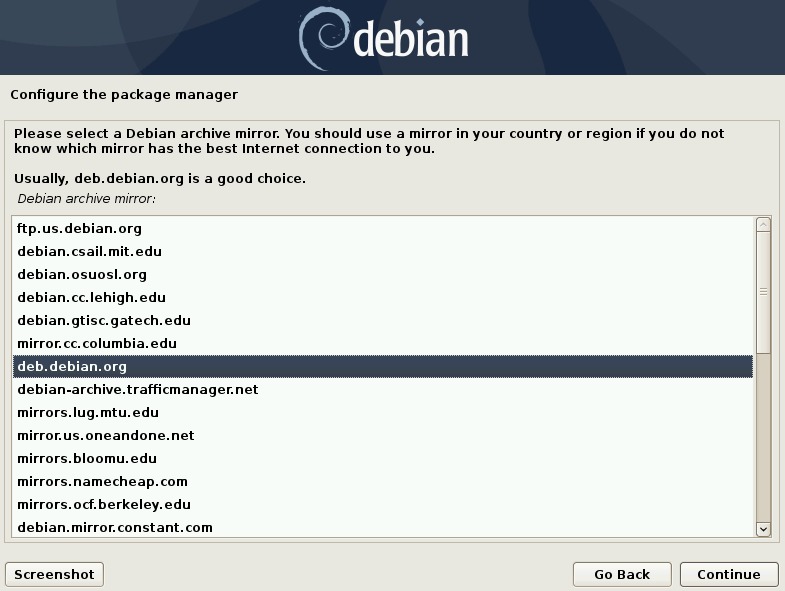
After that click on “Continue”.
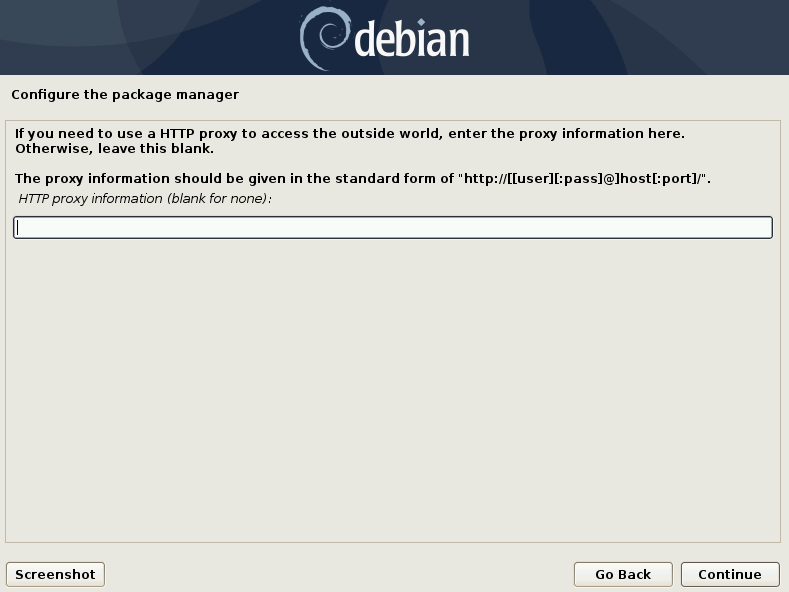
5. You can provide HTTP proxy information; in case you need to use HTTP proxy info to connect to the outside world. Otherwise, you can leave it blank and click on “continue”.
Configure Popularity Contest
You can participate in the package usage survey. This will help the developers to know which are the most used packages on the system which in turn influences the decision on what to put in the first distribution CD of Debian OS.
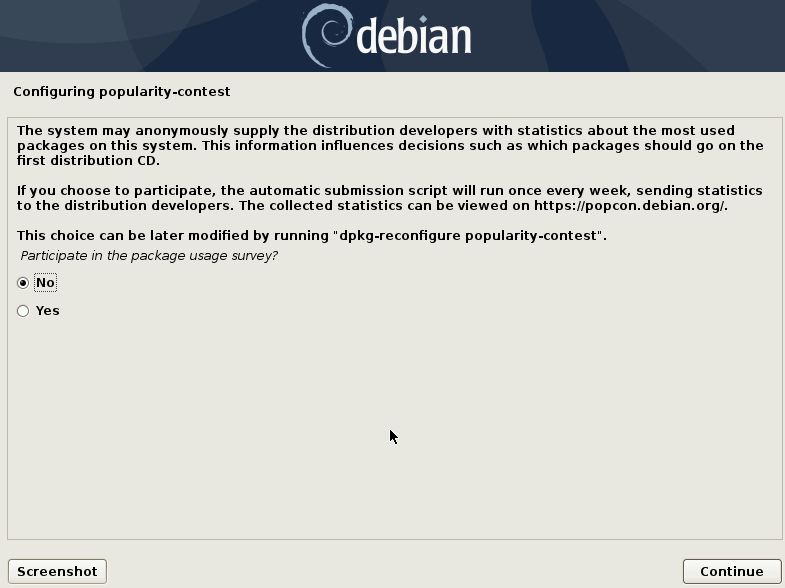
After choosing an option, you can click on continue.
Software Selection
Right now only the core system is installed. If you want to tune the system to your needs, you can select to install a desktop environment of your choice and other utilities.
I am picking GNOME Desktop and a couple of other options from the list.
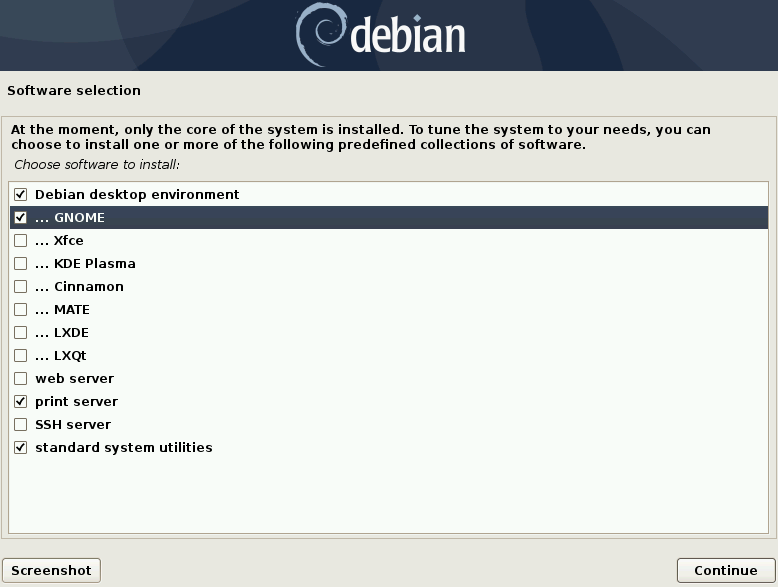
Click on “Continue” to proceed to the next screen.
Install GRUB Bootloader
1. Select “Yes” to install the GRUB Bootloader on your hard drive and click on “continue”.
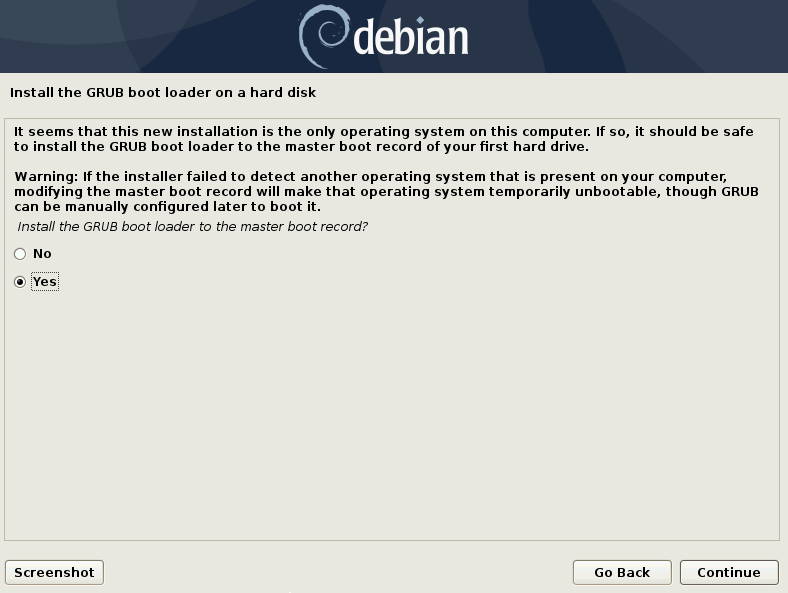
2. Next, select the hard disk you want to install GRUB on. The usual way to do this is to install GRUB on the Master Boot Record (MBR) of the first hard drive.
I am installing on the first hard drive, that is, “/dev/sda”.
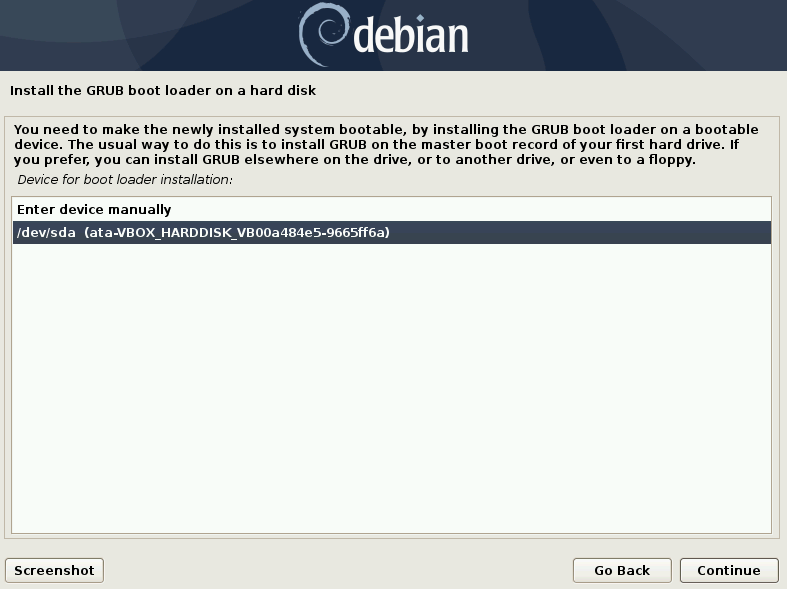
If you prefer somewhere else, then choose the appropriate option and click on continue.
Step 10: Finish installation and Start Debian OS
Lastly, finish the installation of Debian by clicking on “continue”.
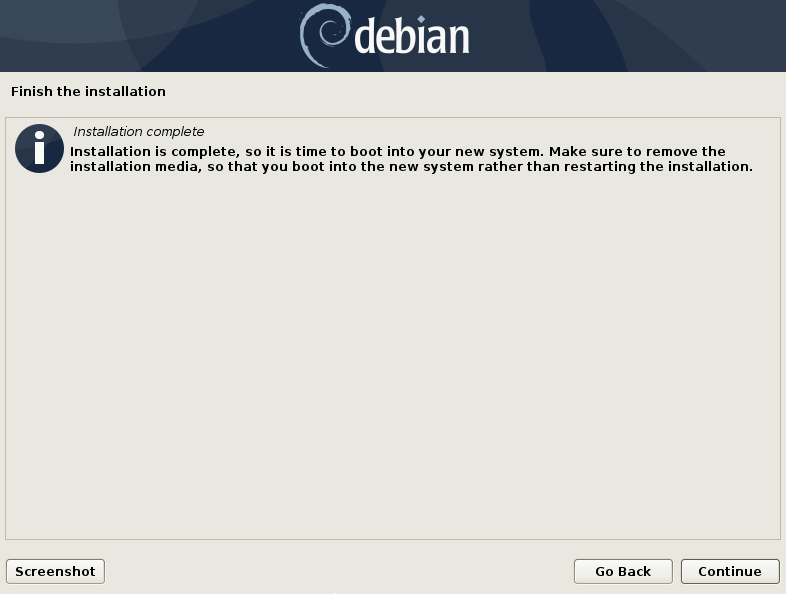
After that, your Debian system will reboot into the newly installed OS.
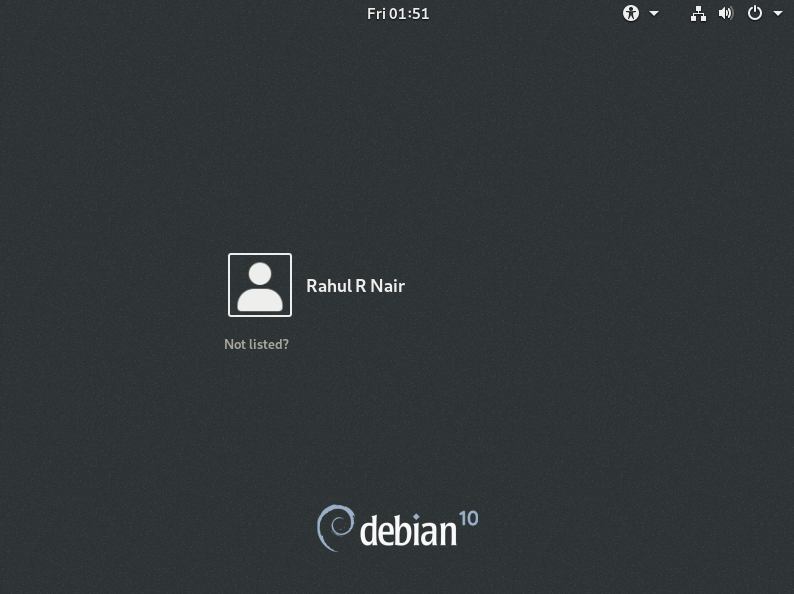
Once booted, you will be greeted with the login screen. Enter your password to log into your system and you’ll see the Debian Desktop.
If you have dual booted Debian on your main system, then you may have to go through the system bios settings to start GRUB and boot into Debian.
Conclusion
Installing Debian OS was pretty easy, isn’t it?
I hope this step-by-step guide helped you to install Debian 10 Buster on your system without any hassle. If you have any suggestions or feedback, then feel free to leave a comment.

If you like this post, then follow Techsphinx on Facebook and Twitter for more reviews, tricks, tips and tutorials.
This article needs update or correction? Report the issue here so I can update it.