This post may contain affiliate links/ads and I may earn a small commission when you click on the links/ads at no additional cost to you. As an Amazon Affiliate, I earn from qualifying purchases. Techsphinx also participates in the StationX Affiliate program. You can read my full disclaimer here.

In this tutorial, I will show you how to install Ubuntu on a USB drive. Unlike the live USB, this will be a fully updatable, portable and persistent Ubuntu system.
Running Ubuntu from a USB flash drive will not be similar to running it from an internal HDD. It will be much slower and is not a good long term solution as it would degrade the life of the USB drive.
So, if you want to have a portable Ubuntu system, I recommend you install it on an external SSD. The steps are identical to installing Ubuntu on a USB drive.
Pre-Requisites for Installing Ubuntu to USB
- USB drive (recommended capacity – 8 GB) to prepare a bootable Ubuntu medium.
- Another USB drive (recommended capacity 32 GB) to install Ubuntu on.
- Internet connection to download Ubuntu ISO image.
Note: Make sure the USB drives you’re using have USB version 3.0 or above for a faster Ubuntu experience.
Steps to install Ubuntu to USB
1. Download Ubuntu ISO
The first step is to download the latest version of Ubuntu from its official website.
The downloading time will depend on your internet speed. Once, downloaded proceed to the next step.
2. Prepare a Bootable USB drive of Ubuntu
Now, prepare one of the USB drive (with the smaller storage capacity) as a bootable medium.
If you don’t know how to create one, then check out my complete guide on making a bootable Linux USB drive.
3. Plug both USB drives and Boot Ubuntu
Plug both USB drives and restart the system. Enter the Boot menu of your system.

The key to enter the boot menu varies from system to system. Check on your manufacturer website or Google for your particular system.
Once, you enter the boot menu, select the bootable USB drive you created in step 2 to boot Ubuntu from it.
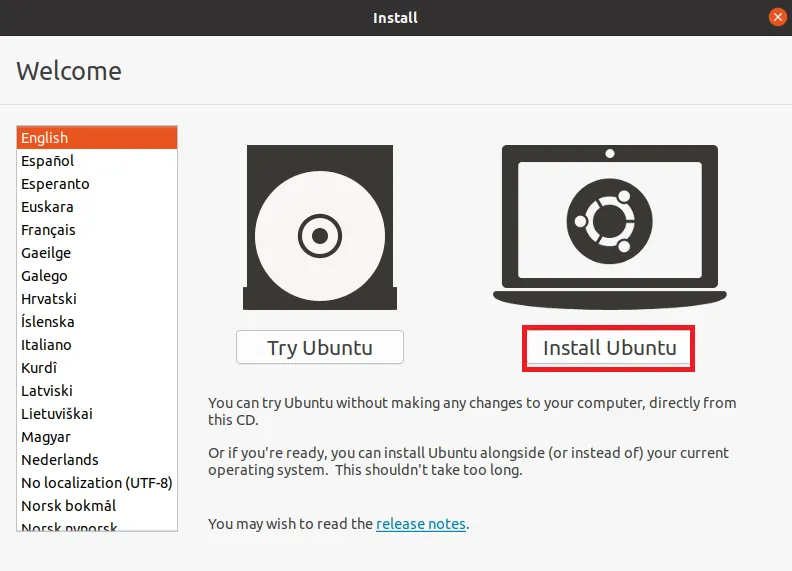
4. Start the Installer
If your USB booted successfully, you’ll see the Ubuntu welcome screen. Select the “Install Ubuntu” option.
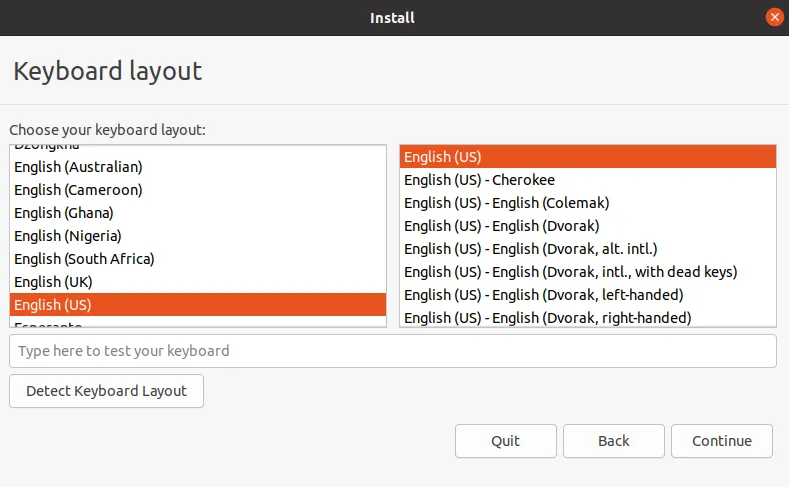
5. Select Keyboard Layout
Choose your preferred keyboard layout and click on continue.
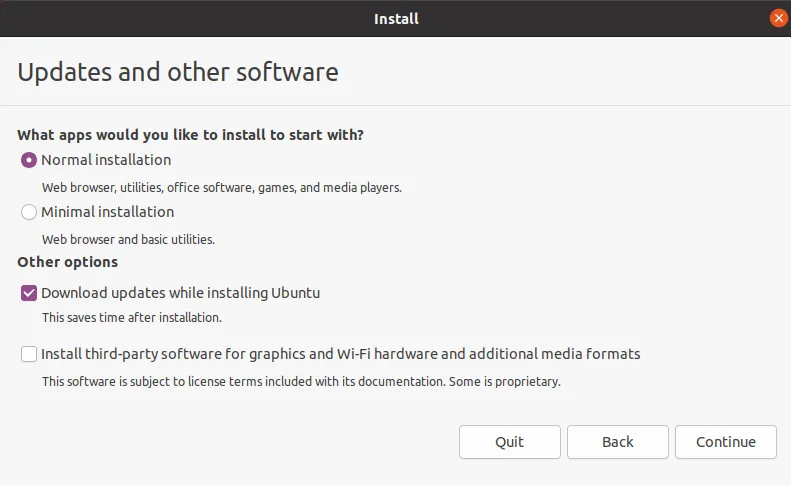
6. Select Installation type
On this screen, select the installation type. If you don’t want the normal installation or you don’t have a larger capacity USB drive, then you can go with the minimal installation option.
You can also check the other options such as downloading updates and installing third-party drivers. After that, click on continue.
7. Select the USB drive and create partitions
On this screen, click on “something else” to do the partitioning manually.

This is the most important step. Here, you have to choose the USB drive on which you want to install Ubuntu and create partitions on it.
In my case, the USB drive is “sdb” and there is one partition on it “sdb1”. I am going to delete the “sdb1” by right-clicking on it and select the “delete” option.

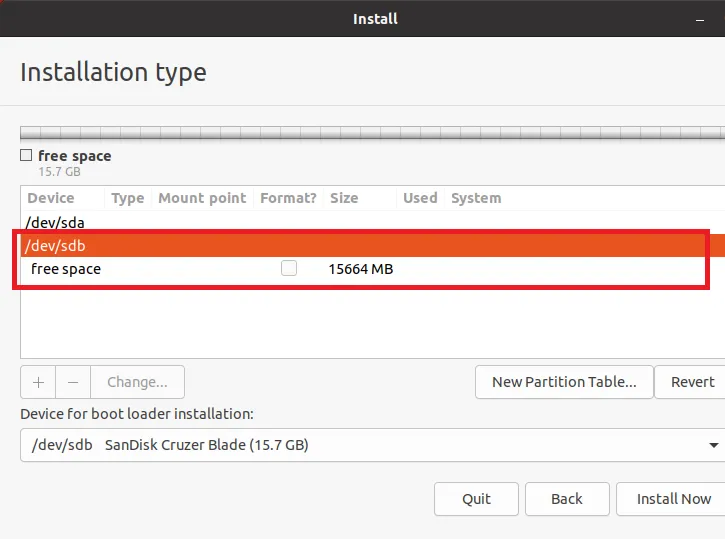
Once, deleted you’ll see “free space”. Now, right-click on it again and select the “add” option to add a new partition.
Create a boot partition of 500 MB.
Size: 500 MB
Type for new partition: Primary
Location of new partition: Beginning of this space
Use as: Ext4 journaling file system
Mount point: /boot
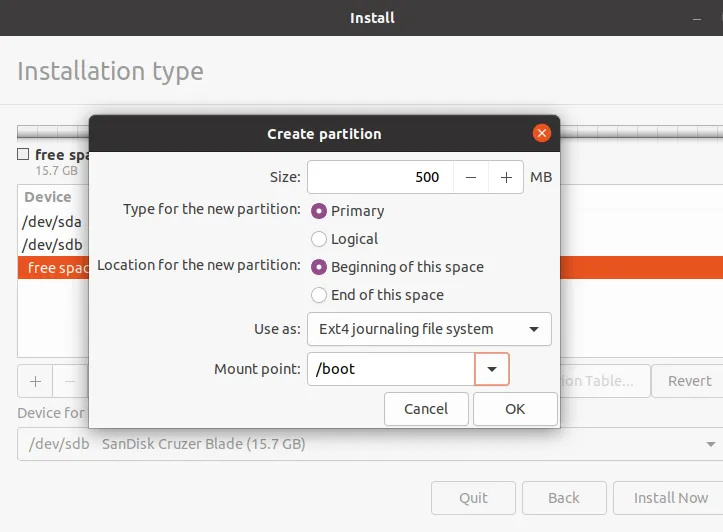
Click Ok, and you’ll see 500 MB for boot partition has been allocated.
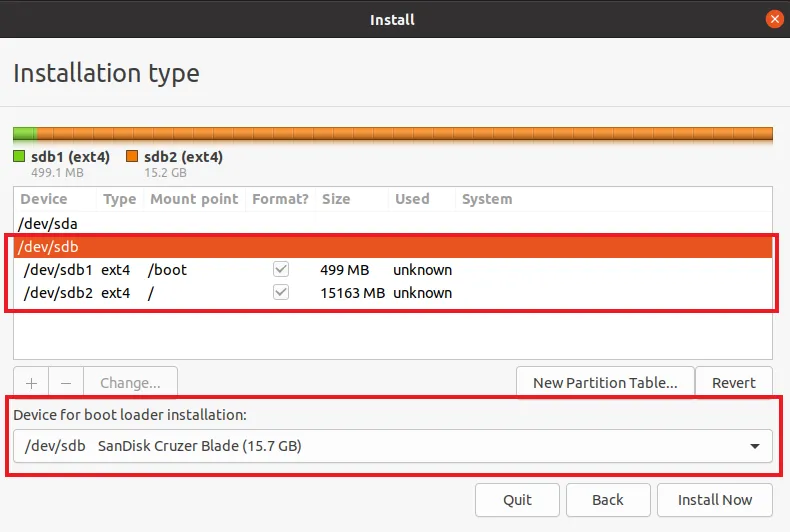
Now, right-click on the free space again and add the root partition.
Size: allocate all the remaining space on the USB drive.
Type for new partition: Primary
Location of new partition: Beginning of this space
Use as: Ext4 journaling file system
Mount point: /
Click ok, and you’ll see the / partition is created.
Also, select the USB drive in the “Device for bootloader installation” dropdown.
Once, you have configured the partitions, click on the “install now” button. After that, you’ll be prompted with the “Write changes to disks?” dialog.

Check everything and click on continue to proceed.
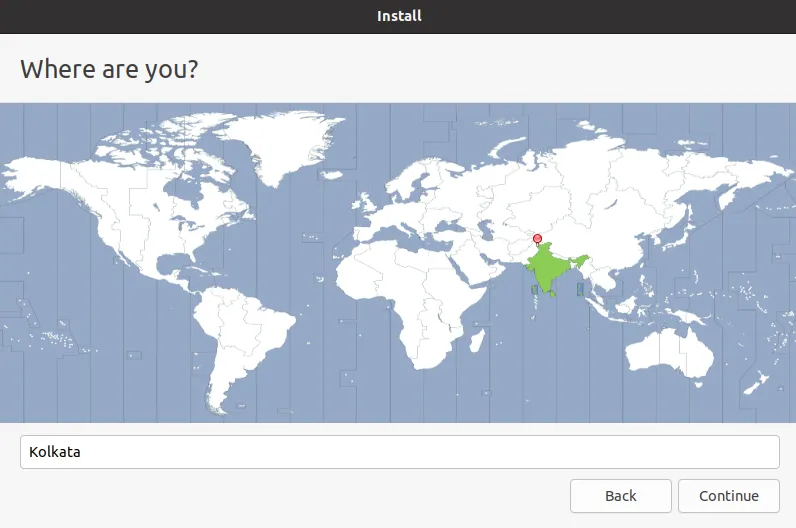
8. Select your preferred time zone
After partitioning, the next step is to set a time zone. So, select your preferred time zone and click on continue.

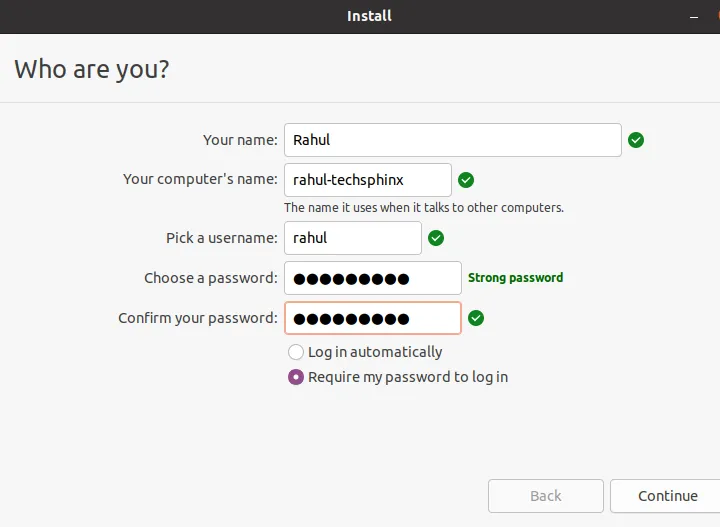
9. Setup user credentials
On this screen, fill in all the details such as name, password, computer name and username. If you want a password-less login, you can choose the “Log in automatically” option.
When you click on continue, the installation process will begin. Wait patiently for the installation to complete. As I mentioned previously, you’re not installing Ubuntu on an external SSD, so it will take longer than your usual Ubuntu installation.
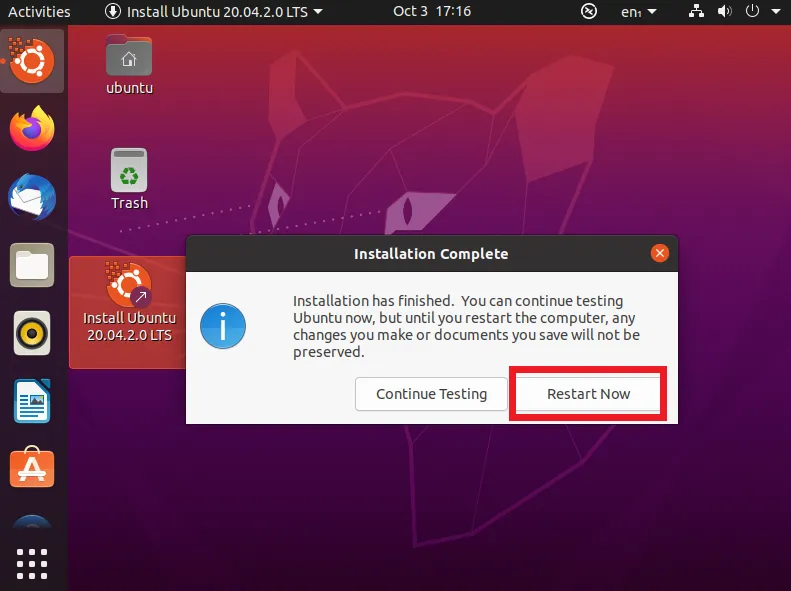
10. Finish installation of Ubuntu on the USB drive
Once, the installation is finished, you’ll be prompted with an option to restart the system. Click on restart.
You can now unplug both USB drives.
Boot the newly created USB drive of Ubuntu
To boot Ubuntu from USB, you can simply plug the USB drive (on which you installed Ubuntu) into any system and boot from it.
Conclusion
Congrats, you have successfully installed Ubuntu to a USB drive. If you faced any problems during the process, you can ask in the comments.
If you have done experimenting and want to use the USB drive for something else, use the Gparted tool (in Linux) or disk management (in Windows) to delete the partitions and format it with the NTFS file system.
That’s it, have fun with your portable Linux system. 🙂

If you like this post, then follow Techsphinx on Facebook and Twitter for more reviews, tricks, tips and tutorials.
This article needs update or correction? Report the issue here so I can update it.