This post may contain affiliate links/ads and I may earn a small commission when you click on the links/ads at no additional cost to you. As an Amazon Affiliate, I earn from qualifying purchases. Techsphinx also participates in the StationX Affiliate program. You can read my full disclaimer here.

This quick tutorial will show you how to install PyCharm python IDE on Ubuntu.
JetBrains has developed many great IDE’s for development work. The most popular are IntelliJ IDEA (JVM IDE), WebStorm (JavaScript IDE), PhpStorm (PHP IDE) and PyCharm (Python IDE).
PyCharm is also considered as one of the best IDE’s for python development.
There are two editions of PyCharm available for download:
- PyCharm Community Edition
- PyCharm Professional
Read the comparison between Community and Professional edition to find out which one is suitable for you.
Note: You’ll need a paid licence to use PyCharm Pro. Jetbrains offer special offers of PyCharm Pro editions for Students, teachers, open-source projects, non-profit organisations etc.
Check if you qualify for any special offers of PyCharm on the Jetbrains site.
The installation steps for both editions are almost similar.
Features of PyCharm
Here’s a small list of features PyCharm IDE provides out-of-the-box.
- Smart code completion
- Code inspections
- Automated code refactoring
- On-the-fly error highlighting
- Rich navigation capabilities
- Code snippets
- Code folding
- Syntax highlighting
- Auto-Indentation
- Built-in Developer Tools
- Support for Python Web frameworks
- Customizable and Cross-platform IDE
The above mentioned are some of the features of PyCharm. For a full list visit Jetbrains official website.
Pre-Requisites to Install PyCharm on Ubuntu
- Ubuntu Installed and Running (I am using Ubuntu 20.04 in this post)
- Active Internet connection to download PyCharm.
- Sudo privileges
How to Install PyCharm on Ubuntu?
There are multiple ways you can install PyCharm on Ubuntu. I am going to show you the following three methods:
- Graphical method
- Using Terminal
- Official PyCharm Packages from JetBrains
You can use any of the above methods to install PyCharm on Ubuntu.
Install PyCharm Graphically
PyCharm is available in the snap repository. So, you can easily install PyCharm using the software center in Ubuntu.
1. Open the Ubuntu Software Center.
2. Search for PyCharm.

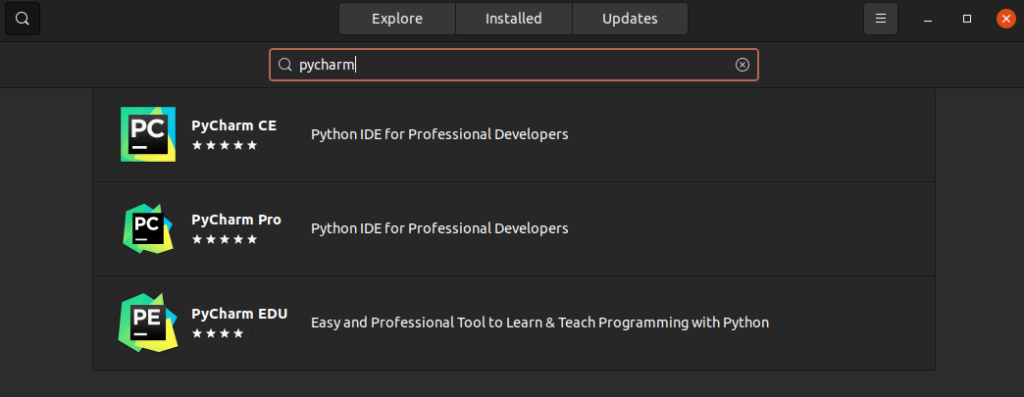
3. From the search results, choose PyCharm CE (Community Edition) or PyCharm Pro (Professional).
4. Click on the “Install” button.
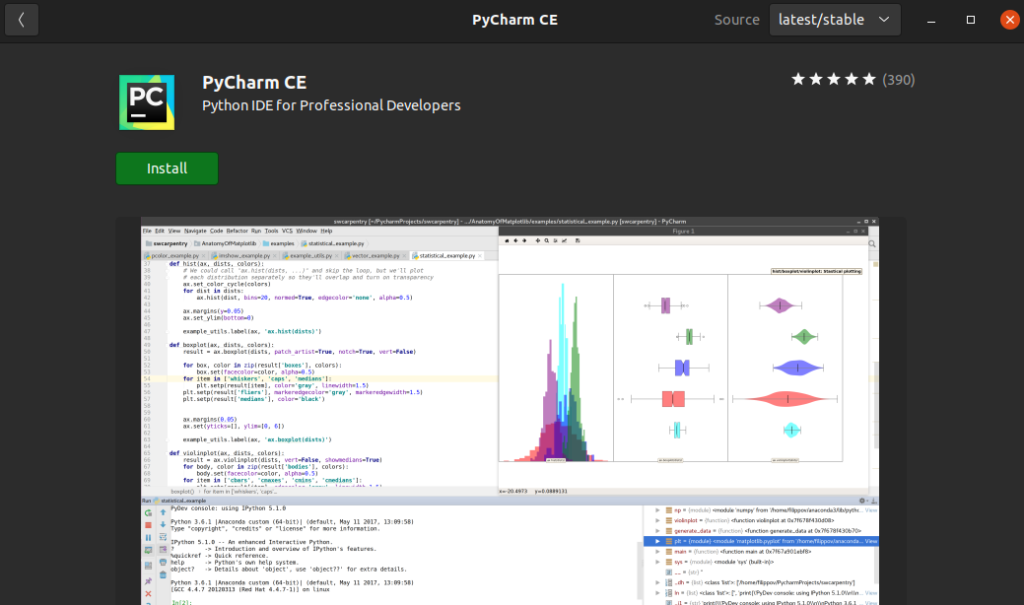
5. Once installed, you can start PyCharm from the Applications menu in Ubuntu.
Install PyCharm using Terminal
You can also install PyCharm via snap using the terminal.
To install PyCharm Community Edition run the following command:
sudo snap install pycharm-community --classic
To install PyCharm Professional run the following command:
sudo snap install pycharm-professional --classic
Now, you can start PyCharm graphically via the Applications menu or run the command:
pycharm-community
or
pycharm-professional
Install PyCharm using Official Installer from JetBrains
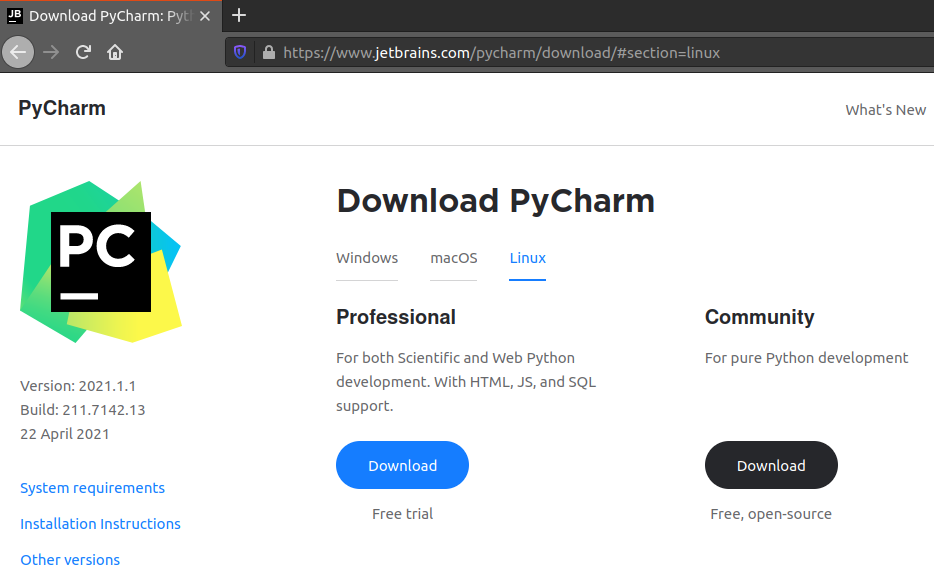
The above two methods I mentioned, rely on snap package manager. If you don’t want to use snap, then you can download PyCharm from the JetBrains official website.
1. Download PyCharm from the Jetbrains download page.
2. Navigate to the downloaded directory.
cd ~/Downloads/
3. Extract the downloaded “.tar” file.
tar -xvf pycharm-community-2021.1.1.tar.gz
Replace “pycharm-community-2021.1.1.tar.gz” with your downloaded filename.
4. Once extracted, go to “bin” directory in the extracted PyCharm directory.

cd pycharm-community-2021.1.1/bin/
Replace “pycharm-community-2021.1.1” with your extracted directory name.
5. Make the “pycharm.sh” file executable using the “chmod” command.
chmod u+x pycharm.sh
6. Run the “pycharm.sh” file.
sh pycharm.sh
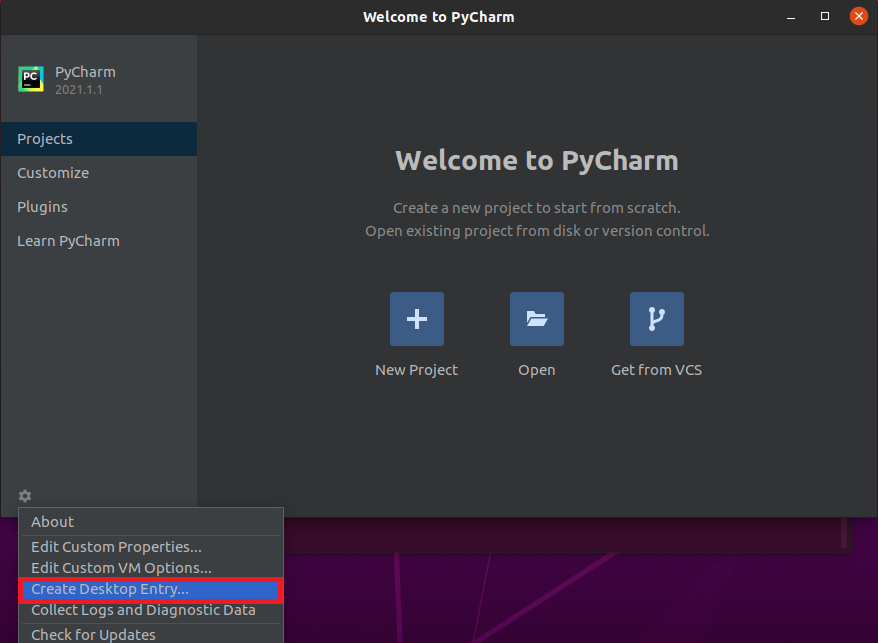
7. Click on the settings icon on the lower-left of the PyCharm window and click on the “Create Desktop Entry” option.
Now, you can easily start PyCharm via the Applications menu.
Additional Tips on using PyCharm
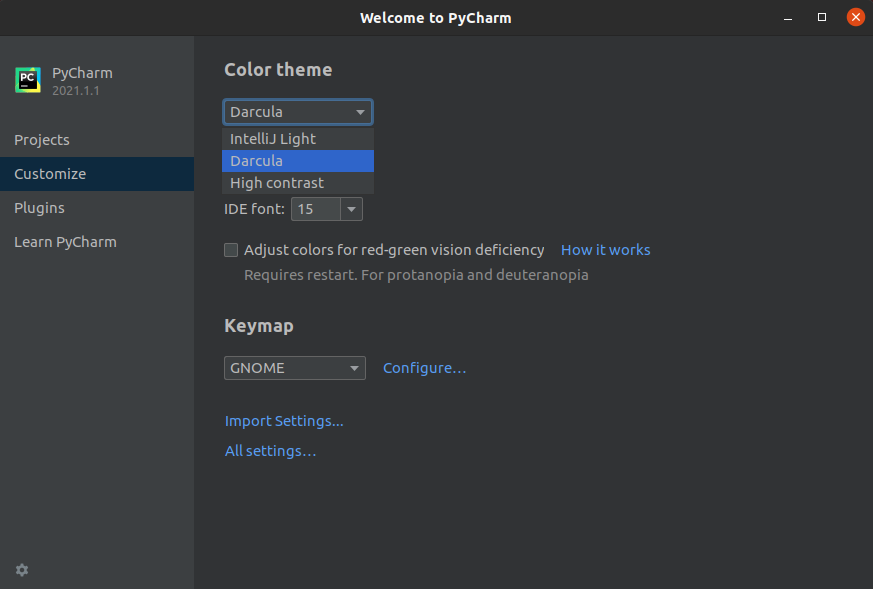
Change Theme
If you are susceptible to light or prefer to work during night time, then you can change the PyCharm IDE theme to Dark or should I say “Darcula”.
Click on the Customize option in the PyCharm window and you can change the color theme from there.
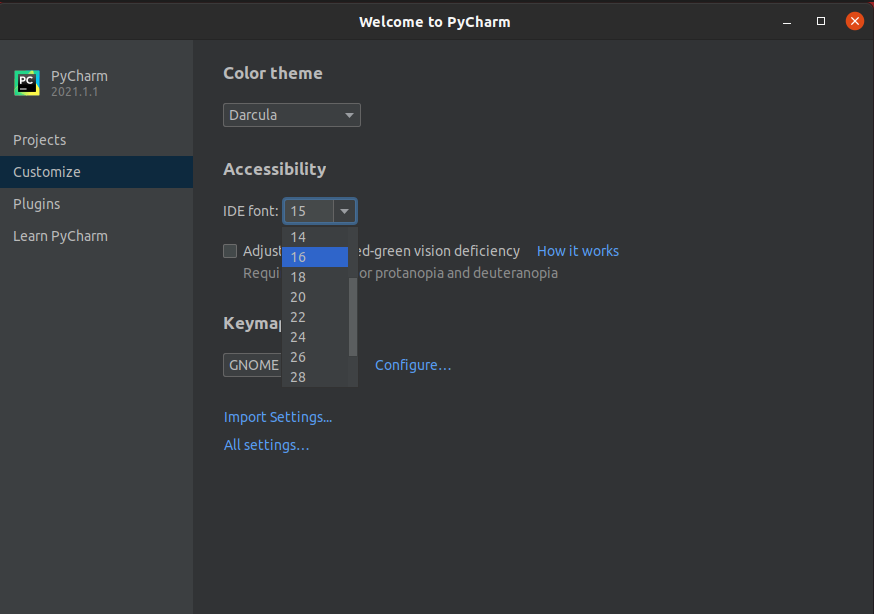
Change Font Size
In the same customize tab, you can also change the IDE font size. This option is present under the “Accessibility” section.
Pick any font size from the dropdown or type the font size manually.
Install Plugins
One of the most fascinating features of the PyCharm IDE is that you can install other plugins to increase the functionality of the IDE.
Click on the “Plugins” tab and you’ll see all the available and installed plugins there. You can also use the search feature to search for your desired plugins.
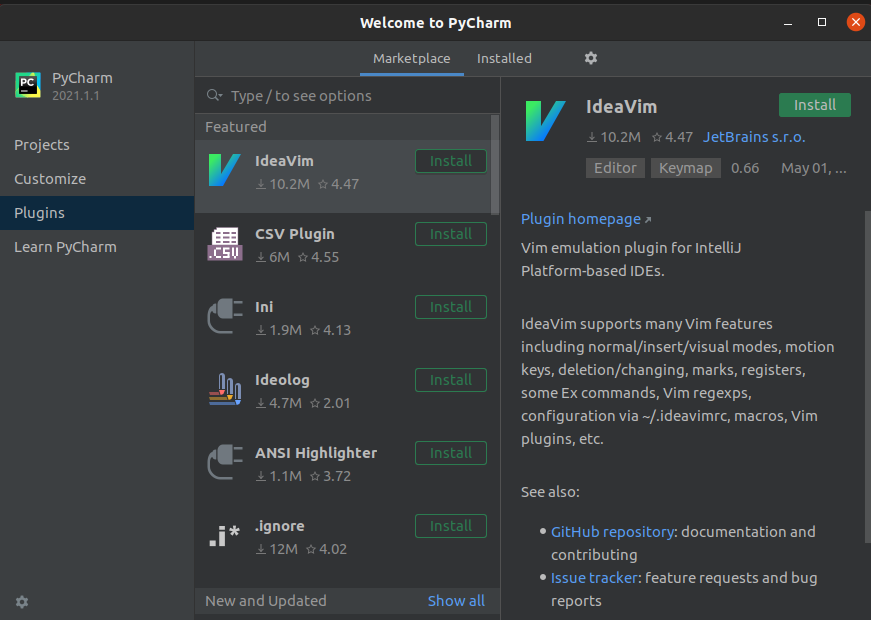
Just select the plugin you wish to install then click on “Install” and that’s it.

Learn PyCharm
If you are new to PyCharm, then the “Learn PyCharm” tab will prove very useful.
Here, you can learn all the basic and essential IDE features interactively.
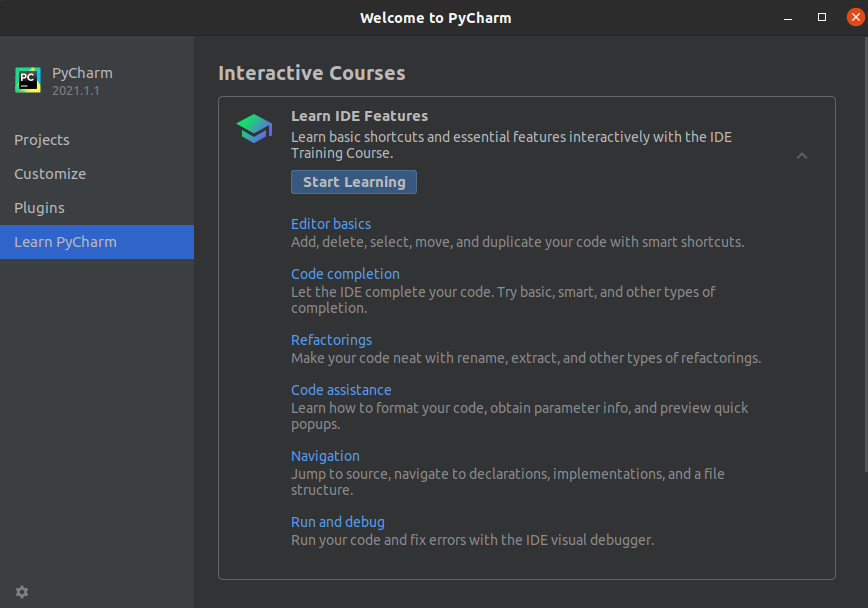
If you are just starting your journey with PyCharm, then I recommend spending some time learning the basics. This will improve your workflow in all your future projects.
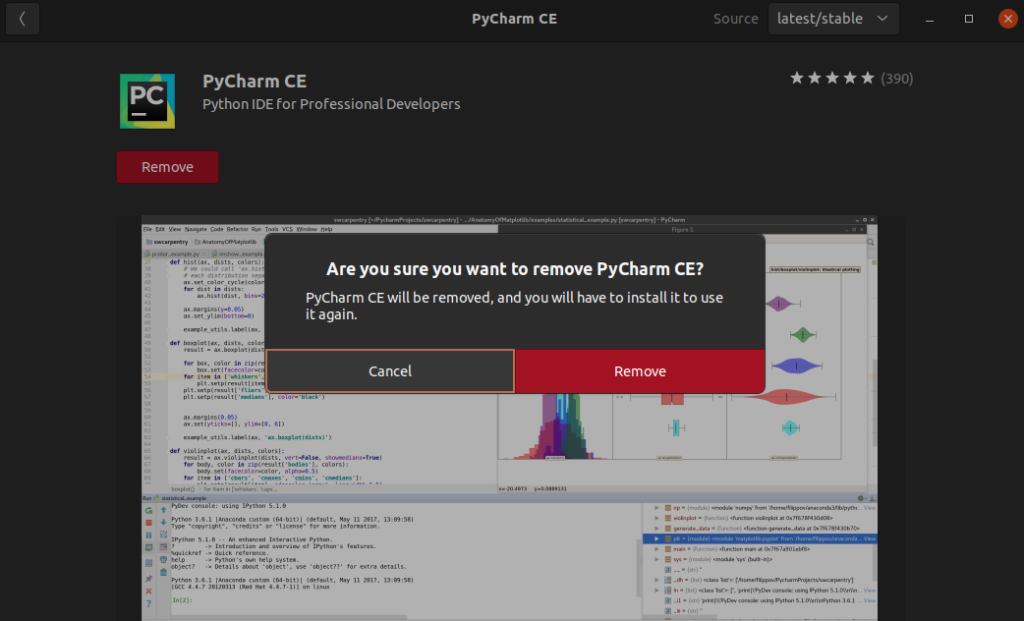
Uninstall PyCharm from Ubuntu
You can uninstall PyCharm from Ubuntu using the Ubuntu Software Center (Graphically).
You can also remove PyCharm using the following commands:
sudo snap remove pycharm-community
or
sudo snap remove pycharm-professional
If you have downloaded PyCharm from the Jetbrains website, then remove the extracted PyCharm directory.
rm -rv pycharm-community-2021.1.1
Replace “pycharm-community-2021.1.1” with your extracted PyCharm directory name.
Also, remove the desktop entry using the command:
rm /home/username/.local/share/applications/jetbrains-pycharm-ce.desktop
Replace “username” with your username and “jetbrains-pycharm-ce.desktop” with “jetbrains-pycharm-pro.desktop” if you have created a desktop entry for the pro version.
Conclusion
I hope this guide helped you to install PyCharm on your Ubuntu system without any problems.
PyCharm has a little bit of a learning curve if you want to use its full potential. Jetbrains have provided easy to follow documentation for the same.
If you have any suggestions or feedback, feel free to leave a comment.

If you like this post, then follow Techsphinx on Facebook and Twitter for more reviews, tricks, tips and tutorials.
This article needs update or correction? Report the issue here so I can update it.