This post may contain affiliate links/ads and I may earn a small commission when you click on the links/ads at no additional cost to you. As an Amazon Affiliate, I earn from qualifying purchases. Techsphinx also participates in the StationX Affiliate program. You can read my full disclaimer here.

In this tutorial, I will show you how to create, restore and delete VirtualBox snapshot.
Snapshot is a very powerful feature in the world of virtualization.
So, let’s first understand what is a snapshot and why do we need it?
Basic Terminologies in Virtualization
First, let’s get some basic terminologies sorted out.
Virtualization: In simple words, it is a process to create a virtual instance of a computer system from physical hardware. It enables you to install multiple OS on one system.
The operating systems running inside a virtual environment will feel like its running on its own dedicated system.
The utility which enables us to achieve that is called a hypervisor. In our case, the hypervisor is VirtualBox.
I don’t want to go deep into virtualization and hypervisors in this post. That’ll be unnecessary.
Virtual Machine (VM) or Guest OS: An operating system installed in the hypervisor (like VirtualBox, VMware, KVM etc.).
You can install any OS in VirtualBox, if you haven’t used VirtualBox before, then check out the below links, where I have installed various OS on Virtualbox.
How to Install Kali Linux on Virtualbox?
How to Install Linux Mint 20 – Ulyana? (Beginners Guide)
What is a Snapshot? And Why do you need it?
To explain snapshot, let me ask you this – Have you ever looked at your old photo from your childhood and remembered how good life was? Have you ever wished to go back and live the good-old-days once again?
But, you know going back in time is not possible, right? (at least not when I am writing this post)
Well, I say virtual machines are luckier than humans. They can go back in time because of the snapshot.

Snapshot is a feature to save the current state of a virtual machine so that you can revert back to it if something goes wrong in future.
For example, you have done some important work on your OS and you created a snapshot of it, then after a few days something went wrong and your OS crashed. You can’t even boot into your OS to retrieve your important work.
Since you have created a snapshot before, you can just roll back to the state when your system was working properly. This way, you don’t have to panic or start your work from scratch.
Now, you know what snapshot is and why you need it? Let’s understand the process of creating, restore and deleting it.
In this post, I am creating a snapshot of Manjaro Linux operating system, which is installed and running on VirtualBox.
Note: Snapshot is the feature of hypervisor (VirtualBox in this case) and not of the OS you have installed as a VM. Creating, restoring, deleting and managing snapshots will be same, regardless of the OS you are taking the snapshot of.
Creating a snapshot in Virtualbox
There are multiple ways and shortcuts to create a snapshot of a VM in VirtualBox. Let’s take a look at them one by one.
Creating Snapshot from VM window when it is running:
1. Make sure the VM is in running state or start the VM if it is not running.
2. Go to Machine in the menu bar of the VM window and click on Take Snapshot option.
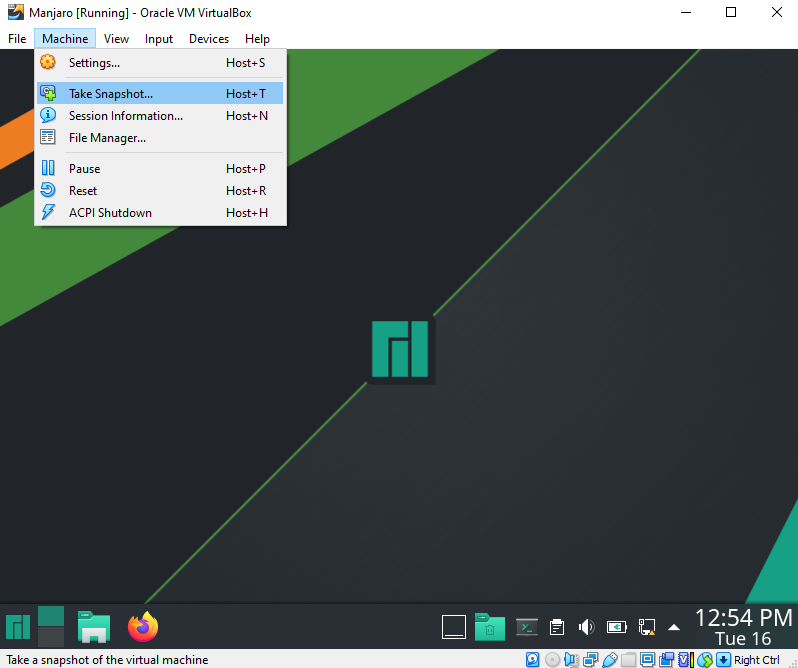
Alternatively, you can also use the keyboard shortcut “Host + T”, where host key is the key provided by the VirtualBox to access its various functions. By default, the host key is “Right Control” or “Right command”.
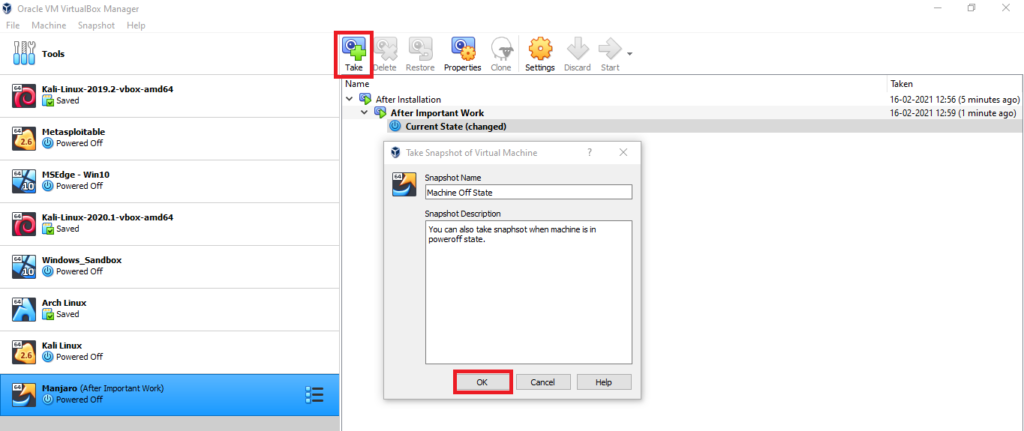
3. Name and describe your snapshot. This is an important step, don’t leave it as default “snapshot 1” or you’ll not be able to tell what changes this snapshot contains, especially when you’ll have multiple snapshots of the same OS. Be kind to your future self.
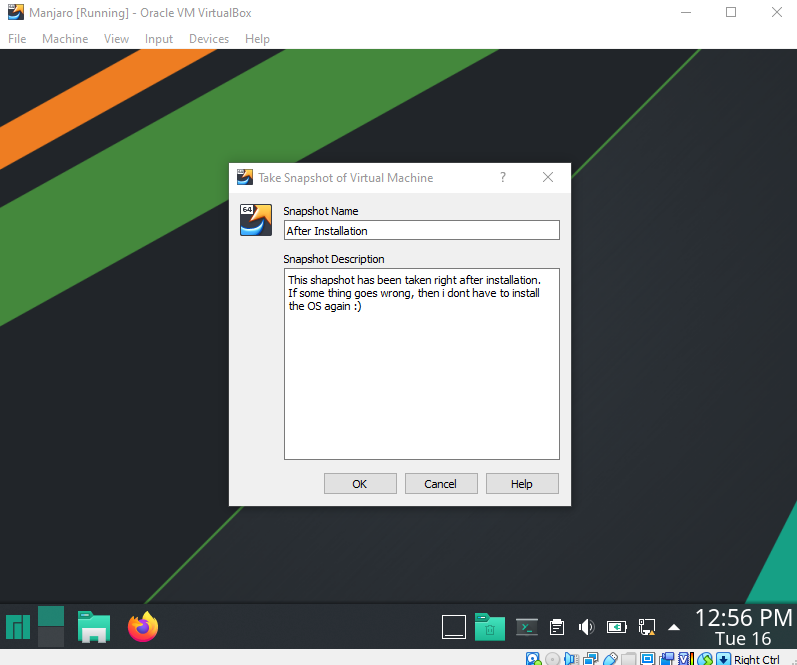
4. After clicking Ok, the snapshot creating process will begin. Wait for it to finish.
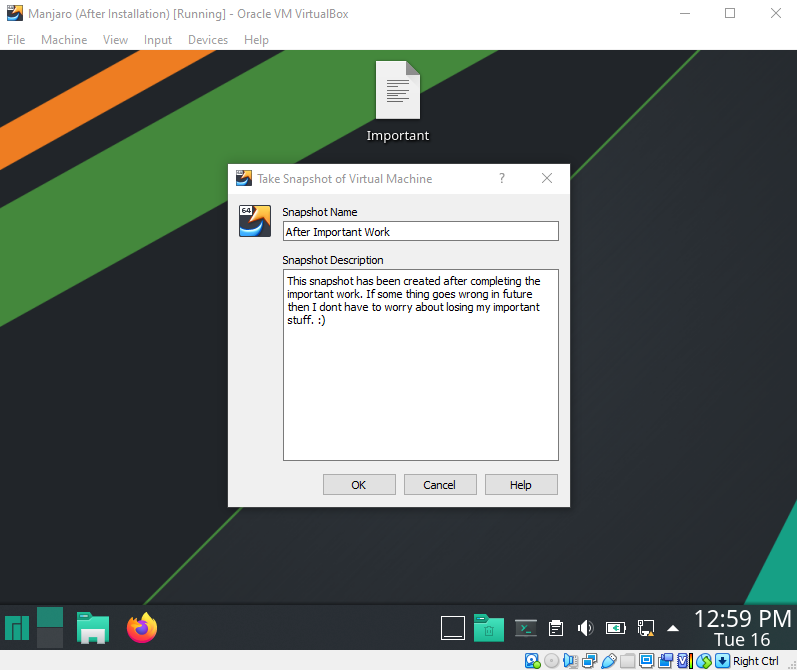
Once the process completes, you can see the name of your snapshot on top of the window of your VM (next to your VM name).
You can take multiple snapshots of your VM. For example, I am taking another snapshot after creating an “Important” file on the desktop.
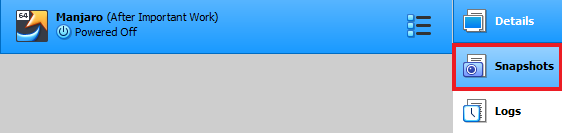
Creating a Snapshot when VM is not running:
1. Click on the icon (the one with 3 black lines with blue squares) next to the VM name in VirtualBox and click on Snapshots.

2. Click on Take snapshot button.
3. Fill in the snapshot name and description and click Ok.
3. Wait for the process to complete.
This way you can create snapshot of VM when it is in the power off state.
Restoring a Snapshot in VirtualBox
Just like creating snapshots, you can restore snapshots using different ways and keyboard shortcuts.
Restoring Snapshot when powering off a running VM.
Note: Following these steps will only restore the current snapshot, if you want to restore other snapshots, then follow the second method.
1. Click on the Close button on VM window.
2. You’ll be prompted with Save, shutdown and power off option, select the power off option and check the restore current snapshot option.
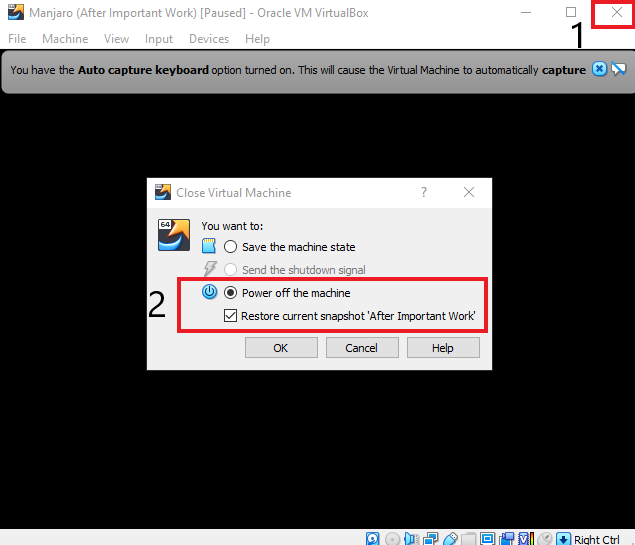
3. Click on Ok and it will start restoring the current snapshot.
Once the process is complete, you’ll notice your system is back to the state as it was while creating the snapshot. Any changes you made after creating the snapshot are lost now.
Restoring Snapshot when the VM is in shutdown state.
The above method was simple but only effective if you want to restore the current snapshot. If you want to restore any snapshot you have created for the VM, then follow these steps.
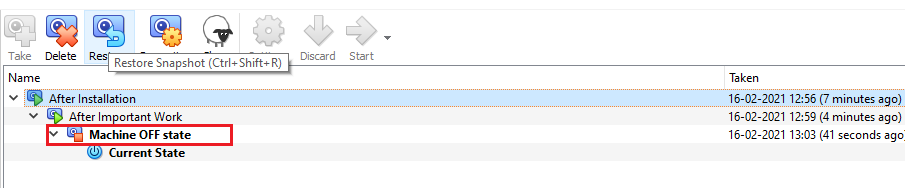
1. Click on the icon next to the VM name and click on snapshots.
2. From here, select the snapshot you want to restore and click on the restore button or use “Ctrl + Shift + R” keyboard shortcut (on PC).
3. You’ll be prompted to create a snapshot of the current working state. You can do this if you have unsaved work and planning to return to it in future or just uncheck the box and click on restore.
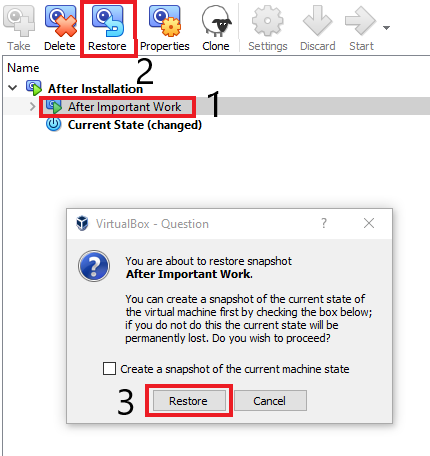
4. Restore process will begin.

This way you can jump between different snapshots of the same VM. For example, there is a snapshot where you have installed OS and created and “Important” file and another snapshot where you have installed OS and has done some other work.
You can restore any snapshot whenever you want, it’s just like having an alternate timeline of the same VM, isn’t it?
Deleting a snapshot in VirtualBox
As you get a habit of creating snapshots, it will get confusing, to an extent that you may not even know what changes of OS do each snapshot contain.
Naming and describing a snapshot will help you to avoid that to an extent but it’s also necessary to delete useless snapshots to keep things simple and tidy.
To delete a virtualbox snapshot:
1. Click on icon next to VM name and click on Snapshots.
2. Select the snapshot you want to delete and click on delete button.
3. Read the warning and click delete again to confirm.
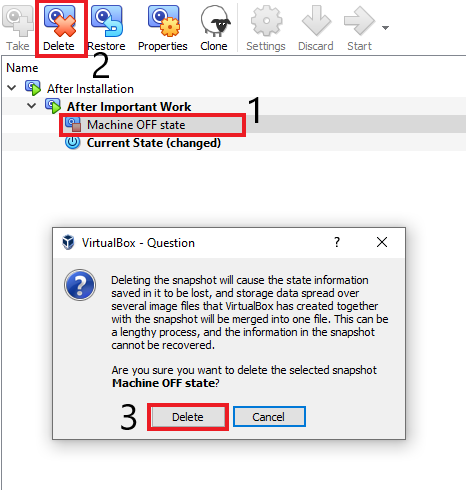
The selected virtualbox snapshot will be deleted.
Conclusion
Using the snapshot feature can save you from tight spots if something goes down.
Also, it is recommended to create a snapshot right after installing the OS, so you don’t have to go with the hassle and time-consuming process of reinstalling the operating system.
This feature is like a blessing to me as I have to do many experiments while creating how-to posts and tutorials.
How snapshot feature helped you to ease your life?
Tell me in the comments.

If you like this post, then follow Techsphinx on Facebook and Twitter for more reviews, tricks, tips and tutorials.
This article needs update or correction? Report the issue here so I can update it.